Craft Easy Christmas Wreaths with Just 4 Materials. Enhance the holiday spirit in and around your home by creating charming miniature wreaths. These simple yet elegant evergreen hoops adorned with bright red ribbon add a touch of festive warmth. Follow this step-by-step guide to Craft Your Own delightful mini wreaths using cut sprigs of seasonal greenery. Display them creatively in a front-facing window to share the joy with your neighbors.
Creating a Simple and Elegant Wreath: Materials Needed

Prepare to craft a simple and elegant wreath that will add a touch of charm to your space.
Gather the following materials before you begin:.
Greenery: Select an assortment of greenery that suits your desired aesthetic.
This could include faux or real greenery such as pine branches, eucalyptus, or any other foliage of your choice.
hot glue gun: A hot glue gun will be your trusty companion for securing the greenery onto the wreath base.
Ensure you have enough glue sticks to complete the project.
Ribbon or Seam Binding: Choose a ribbon or seam binding that complements your decor.
This will be used for hanging the wreath and adding a finishing touch.
Embroidery Hoop: The embroidery hoop serves as the base for your wreath.
Select a size that suits the scale you envision for your finished wreath.
With these materials in hand, you’re ready to embark on the creative process of assembling a beautiful wreath that will infuse your space with festive elegance.
Whether you’re crafting for the holidays or simply enhancing your home decor, this project allows you to personalize your space with a touch of handmade charm.
Step 1: Cut and Glue Greenery to the Embroidery Hoop

To begin creating your elegant wreath, follow these step-by-step instructions:.
Cut Sprigs of Greenery: Select sprigs of greenery, such as spruce, cedar, and juniper, to form the base of your wreath.
Cut the sprigs into manageable lengths, ensuring they fit the overall size and shape you desire for your wreath.
Prepare the Embroidery Hoop: Take the embroidery hoop, which serves as the foundation for your wreath.
Choose a hoop size that aligns with your vision for the finished product.
Hot Glue Application: Heat up your hot glue gun.
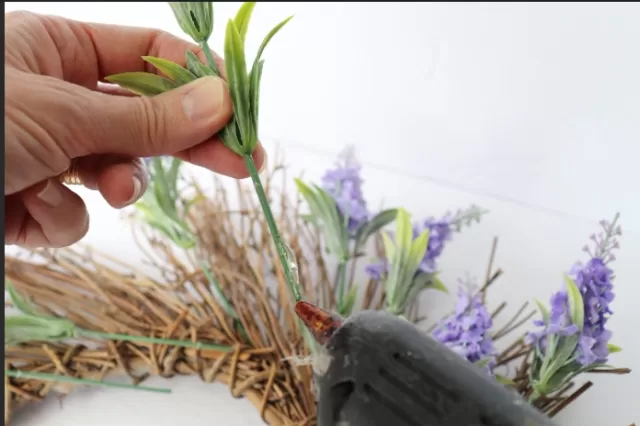
Apply a generous amount of hot glue to one end of a greenery sprig and attach it to the embroidery hoop. Continue this process, working your way around the hoop, layering the sprigs to create a lush and full wreath.
Overlap and Vary: Overlap the greenery sprigs as you go to achieve a cohesive and textured look.
Vary the types of greenery to add depth and visual interest to your wreath.
Continue this process until you’ve covered the entire embroidery hoop with greenery, creating a beautifully crafted base for your wreath.
This initial step lays the foundation for your elegant wreath, setting the stage for further embellishments and finishing touches.
The combination of spruce, cedar, and juniper will infuse your wreath with a delightful aroma, making it not only visually appealing but also a sensory delight in your home.
Step 2: Repeat and Adorn the Inner Hoops
Continuing with the creation of your elegant wreath, proceed to Step 2 for a fuller and more detailed appearance:.
Repeat the Process: Following the same technique as in Step 1, cut additional sprigs of greenery and use your hot glue gun to attach them to both the front and back of the embroidery hoop.
This repetition ensures that your wreath is lush and well-covered from all angles.
Adhere Smaller Pieces: As you work, consider adhering smaller pieces of greenery to the inside of the hoops.
This attention to detail adds dimension to your wreath, making it visually appealing from every perspective.
By repeating the process and covering both the front and back of the rings, you’re ensuring a well-balanced and full-bodied wreath.
Adhering smaller pieces to the inside of the hoops adds intricacy and depth, transforming your creation into an elegant and visually captivating decor piece.
Take your time with this step, adjusting the placement of greenery as needed to achieve the desired look.
The combination of spruce, cedar, and juniper will create a harmonious blend of textures, colors, and scents, making your wreath a standout addition to your home decor.
Step 3: Adding the Finishing Touch

Now, bring your elegant wreath to completion with the final step:.
Loop a Length of Ribbon or Seam Binding: Select a ribbon or seam binding of your choice, ensuring it complements the overall aesthetic of your wreath.
Cut a length of the ribbon and loop it around the top of the wreath, creating a hanger. The choice of ribbon allows you to personalize the wreath further and coordinate it with your decor.
Hang Your Elegant Wreath: Once the ribbon is securely looped and tied, your elegant wreath is ready to be hung.
Choose a prominent spot in your home—whether on a door, wall, or mantel—to showcase your beautifully crafted creation.
This final step not only adds a practical element by facilitating the hanging of your wreath but also serves as a decorative flourish.
The ribbon becomes a visual extension of your personal style, enhancing the overall elegance of the wreath.
With the ribbon in place, your elegant wreath is now ready to grace your home with its festive charm.
Whether it’s adorning your space During the Holidays or serving as a year-round decor piece, this handmade creation reflects your creativity and adds a touch of warmth to your surroundings.
*The information is for reference only.