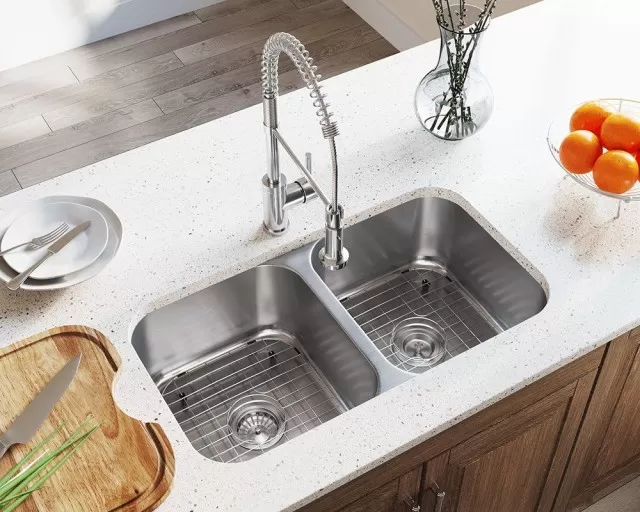
Easy Kitchen Sink Installation: 5 Simple Steps to Follow. Installing a kitchen sink without damaging your countertop is indeed possible, and with average DIY skills, you can successfully complete the replacement in approximately four hours. Proper preparation and following a step-by-step process are key to a successful installation.
Start by turning off the water supply and disconnecting the plumbing connections. Carefully remove the existing sink, taking care not to damage the surrounding countertop. Measure and mark the dimensions for the new sink, ensuring a proper fit. Apply a sealant or adhesive to secure the sink in place, and reconnect the plumbing. Finally, test for any leaks and make adjustments if necessary. By approaching the installation methodically and attentively, you can replace your kitchen sink while preserving the integrity of your countertop.
Easy 10-Step Guide to Installing a Kitchen Sink

Installing a new kitchen sink can be a daunting task, especially when it comes to connecting the drain pipe and Sink Drain.
However, with careful planning and the right tools, you can successfully complete the installation in 10 simple steps. Here’s a comprehensive guide to help you get started:.
Step 1: Choose a sink that fits your existing countertop opening.
It’s best to avoid enlarging the hole unless necessary. Prepare all the necessary supplies in advance.
Step 2: Clear out the sink cabinet and inspect the sink clips that secure it to the countertop.
Disconnect the supply and drain plumbing.
Step 3: With the help of a flashlight, remove the sink clips and have a helper support the sink from above.
Remove the old sink, ensuring you loosen the caulk seal with a putty knife if needed. Test-fit the new sink.
Step 4: Install the faucet on the new sink according to the manufacturer’s instructions.
Remember to thoroughly clean the sink and install all accessories, such as sprayer and detergent dispenser mounts, at this stage.
Step 5: Apply a ribbon of plumber’s putty to the bases of the faucet and sprayer before installing them.
Warm up the putty with your hands for easier application.
Step 6: Apply caulk around the sink hole, leaving a 1/2-inch gap from the opening.
Use a caulk that inhibits mold and bacteria growth. Seat the sink in the opening and run a bead of caulk around the edge between the sink and countertop.
Attach any clips to secure the sink.
Step 7: Install the drain by running a bead of caulk around the rim of the basket strainer and placing it in the sink’s drain hole.
Attach the gasket and nut underneath the sink, ensuring a tight connection. Clean off any excess caulk.
Step 8: Insert the tailpiece into the sink drain, positioning the gasket correctly.
Secure the tailpiece nut onto the threaded end of the sink drain pipe. Cut a piece of schedule 40 PVC pipe to connect the tailpiece to the drain pipe.
Attach the P trap to complete the connections and tighten all the nuts.
Step 9: Reattach the supply hoses from the faucet to the valves under the sink using a crescent wrench.
If using flexible supply hoses, avoid reusing old gaskets to ensure a proper seal.
Step 10: Turn on the water and let it run for a few minutes.
Inspect all connections for any leaks, paying close attention to the tubing, drain, and trap areas.
By following these 10 steps, you can successfully install a new kitchen sink and ensure its proper functionality.
Enjoy your newly installed sink and a leak-free kitchen!.
Please note that this guide may not cover every specific detail of your installation, so it’s important to refer to the manufacturer’s instructions and seek professional assistance if needed.
Pro Tips for a Smooth Kitchen Sink Installation

When it comes to installing a new kitchen sink, following these pro tips will help ensure a hassle-free process and prevent future issues:.
Install the faucet before placing the sink: Save yourself time and effort by installing the faucet while the sink is still out, as it allows easier access to the mounting nuts.
Clean off old caulk: Before installing the new sink, thoroughly remove any remnants of old caulk from the countertop.
Lingering caulk can create gaps that allow water to seep through.
Opt for caulk instead of plumber’s putty: While plumber’s putty is commonly used for sealing drain connections, it tends to dry out over time, leading to potential leaks.
Use caulk instead, as it remains pliable and provides a reliable seal.
Flush the supply lines: To prevent sediment from clogging your new faucet, flush the supply lines into a bucket before connecting them.
This step helps clear any debris and ensures smooth water flow.
Check for leaks with a paper towel: After the sink is installed, place a paper towel under the drain pipe and leave it for a few days.
Monitor it daily to detect any signs of moisture, which could indicate leaks in the newly installed drain.
By implementing these pro tips, you’ll enhance the overall installation process and minimize the chances of encountering issues down the line.
Enjoy your new kitchen sink without any leaks or complications!.
Expected Costs for Installing a New Kitchen Sink

When budgeting for a new kitchen sink installation, it’s important to consider not only the cost of the sink and faucet but also the necessary supplies.
Here’s an estimate of the expected costs involved:.
Sink and faucet: The price of sinks and faucets can vary depending on the material and brand.
Prepackaged sink and faucet combinations often offer cost savings of around $100 compared to purchasing them separately. Prices for sinks and faucets can range from budget-friendly options starting at $100 to high-end choices exceeding $1,000.
P-trap and PVC pipe: You’ll need a new 1 1/2-inch PVC P-trap, which typically costs around $8 to $12.
Additionally, a section of schedule 40 PVC pipe, priced at approximately $4, will be required to make the necessary connections.
Supply lines: While it’s possible to reuse existing supply lines, it’s recommended to replace them for better water flow and leak prevention.
A set of new supply lines can be purchased for around $15.
Caulk: Caulk is essential for attaching and sealing the sink to the countertop, as well as installing the drain basket.
Expect to spend approximately $7 for a tube of caulk.
Taking all these factors into account, the estimated total cost for supplies in a new kitchen sink installation would be around $30.
Keep in mind that these are approximate costs and can vary depending on your location and specific product choices.
It’s also important to consider any additional costs that may arise, such as hiring a professional plumber for installation if you’re not confident in your own skills.
Final Thoughts
In conclusion, while hiring a professional plumber is a common choice for sink installation, it is possible to undertake the project yourself with basic tools and supplies.
By following a detailed guide and taking your time, you can successfully install a new kitchen sink and save a significant amount of money. With the right preparation and careful execution, you can confidently tackle this DIY project and enjoy the satisfaction of completing it on your own.
*The information is for reference only.