To achieve a clean kitchen with spotless appliances. With the right approach and some guidance, you’ll be able to make your appliances shine.

It’s great that you’re looking to achieve a clean kitchen with spotless appliances.
With the right approach and some guidance, you’ll be able to make your appliances shine.
Let’s go through the step-by-step instructions to help you achieve your goal:
Start with a Plan:
Before diving into the cleaning process, make a plan to tackle each kitchen appliance one by one.
This will help you stay organized and ensure that no kitchen appliance is overlooked.
Gather Supplies:
Gather all the necessary cleaning supplies such as microfiber cloths, Cleaning Solutions (specific to each appliance), vinegar, baking soda, and a scrub brush.
Having everything prepared in advance will save you time.
Oven Cleaning:
For your oven, remove the racks and soak them in warm soapy water.
Follow the instructions for your oven cleaner, apply it, and allow it to sit for the recommended time. Then, wipe away the cleaner and grime using a cloth or sponge.
Stovetop Cleaning:
Remove the burners and grates from your stovetop.
Soak them in warm soapy water and scrub away any stubborn stains or grease. Clean the stovetop surface using an appropriate cleaner and wipe it down thoroughly.
Refrigerator Cleaning:
Empty the contents of your refrigerator and discard any expired or spoiled items.
Remove shelves, drawers, and bins, and wash them with warm soapy water. Wipe down the interior using a mixture of water and mild detergent, paying attention to any spills or stains.
Dishwasher Cleaning:
Check the dishwasher filter and remove any debris.
Run a cycle with a dishwasher cleaner or a mixture of vinegar and baking soda to remove any buildup and odors. Wipe down the exterior with a damp cloth.
Microwave Cleaning:
Place a microwave-safe bowl filled with water and a few tablespoons of vinegar inside the microwave.
Heat it for a few minutes until the steam helps loosen any food debris. Then, wipe down the interior with a cloth.
Small Appliances:
Clean smaller appliances like coffee makers, toasters, and blenders according to their specific instructions.
Use appropriate cleaning solutions and wipe down the exterior surfaces.
Finishing Touches:
Once all the appliances are clean, wipe down the countertops, cabinet exteriors, and other kitchen surfaces to complete the clean kitchen look.
Remember to follow the manufacturer’s instructions and safety precautions for each appliance during the cleaning process.
By following these step-by-step instructions, you’ll be able to achieve spotless appliances and create the clean kitchen of your dreams.
Good luck with your cleaning endeavors!
Refrigerator

Cleaning a refrigerator is an important task to maintain cleanliness, eliminate odors, and get rid of expired foods.
Here’s a step-by-step guide on how to clean a refrigerator easily:
What You Need:
Vinegar
Spray bottle
Cloth
Step 1: Prep and Apply Cleaning Solution.
Mix equal parts water and vinegar in a spray bottle to create a food-safe cleaning solution.
Label the spray bottle and keep it in the refrigerator for easy access. Whenever spills or messes occur, spray the cleaning solution onto the area and wipe it clean with a cloth.
Step 2: Deep Clean.
Periodically, perform a deep cleaning of the refrigerator to thoroughly clean all surfaces and eliminate hidden dirt and bacteria.
Start by removing all the drawers and shelves from the refrigerator. Clean the drawers and shelves with the vinegar solution and warm soapy water.
Rinse them well and let them dry completely before placing them back in the refrigerator. Next, clean the interior surfaces of the refrigerator, including walls, door shelves, and the ceiling.
Use the vinegar solution and a cloth to wipe down all surfaces, paying special attention to any spills or stains. Don’t forget to clean the door gasket (rubber seal) thoroughly to remove any dirt or debris.
As you clean, check for any expired or spoiled foods and discard them. Consider reorganizing the refrigerator to improve its organization and eliminate clutter.
Use storage containers or bins to group similar items together and create a more organized space.
By following these steps, you can easily clean your refrigerator, maintain its freshness, and keep your kitchen clean and organized.
Regular cleaning and routine maintenance will ensure a pleasant and hygienic environment for your food storage.
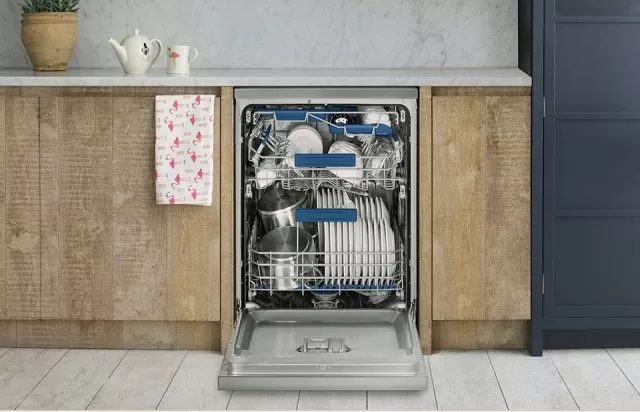
Dishwasher

Cleaning a dishwasher is essential to prevent odors and grime buildup.
Follow these easy steps to clean your dishwasher effectively:
What You Need:
Vinegar
Dishwasher-safe cup
Toothbrush
Lemon juice
Step 1: Prepare the Dishwasher.
Fill a dishwasher-safe cup with vinegar.
Place the cup on the top rack of the empty dishwasher. Vinegar helps break down grease and removes odors.
Step 2: Run the Dishwasher.
Run the dishwasher on the hottest and longest cycle available.
This will help sanitize the dishwasher and loosen any food particles or soap scum.
Step 3: Deep Clean.
For more thorough cleaning, focus on the tops and sides of the dishwasher door and the removable parts.
Remove all accessories and removable parts, such as racks, silverware holders, and filters. Scrub these parts with warm soapy water to remove any grime or residue.
Use a soft toothbrush to clean the spray arm and remove any debris or clogs from the sprayers. Check for any hard water deposits or mineral buildup.
For this, you can use lemon juice as a natural alternative to vinegar. Fill the dishwasher-safe cup with lemon juice and place it on the top rack.
Run a cycle to help remove the deposits. By following these steps, you can keep your dishwasher clean and odor-free.
Regular cleaning helps maintain its performance and ensures that your dishes come out sparkling clean. Remember to check the manufacturer’s instructions for any specific cleaning recommendations or guidelines for your dishwasher model.
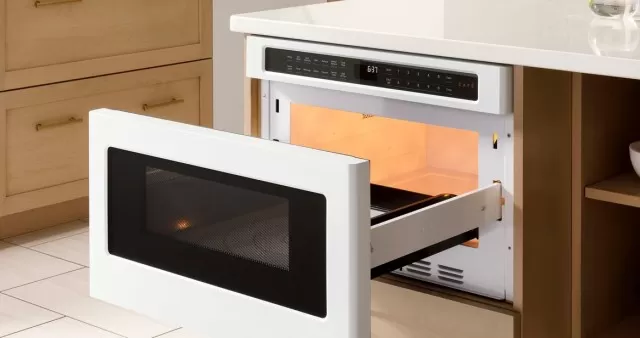
Microwave

Cleaning a microwave is a simple task that can remove splatters and buildup.
Here’s how to clean a microwave.
What You Need:
Microwave-safe bowl
Cloth or sponge
Step 1: Fill the Bowl and Heat.
Fill a microwave-safe bowl with water.
You can add a squeeze of lemon juice or a few tablespoons of vinegar for a fresh scent. Place the bowl in the microwave and heat it uncovered until the water starts to boil.
The steam generated will help loosen the caked-on food and stains.
Step 2: Wipe Clean.
Carefully remove the bowl from the microwave, as it will be hot.
Use a cloth or sponge to wipe down the interior surfaces of the microwave. The steam from the heated water will have loosened the grime, making it easier to clean.
Pay extra attention to any stubborn spots or spills, gently scrubbing as needed. For hardened food particles, you can dampen the cloth or sponge with a mild detergent or Dish Soap to help remove them.
Make sure to wipe down the turntable, the walls, the ceiling, and the door of the microwave.
By following these steps, you can quickly and easily clean your microwave in the kitchen, removing any food splatters and leaving it fresh and ready for use.
Regular cleaning after spills or weekly maintenance can help prevent stubborn stains and keep your microwave looking and smelling clean.
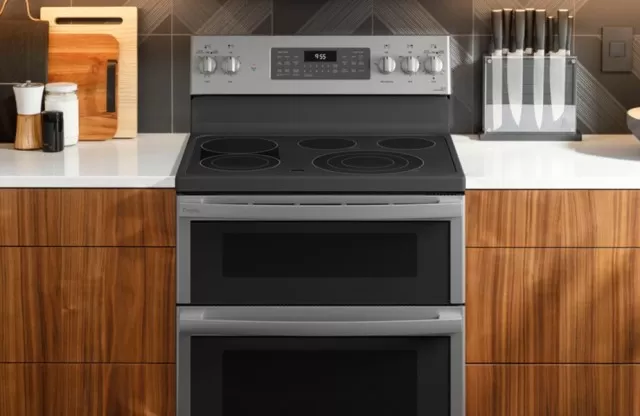
Kitchen Stove

Cleaning a kitchen stove, especially a glass cooktop, can help maintain its appearance and keep it in good condition.
Here’s how to clean a kitchen stove top effectively.
What You Need:
All-purpose cleaner
Single-edged scraper
Damp cloth
Step 1: Clean as You Go.
It’s best to clean your stovetop as soon as possible after cooking to prevent food bits from hardening or sticking.
After the stove top has cooled down, use an all-purpose cleaner sprayed onto a damp cloth to wipe away any spills or splatters. This will help prevent them from becoming stubborn stains.
Step 2: Soak Stains and Let Sit.
For any stubborn stains or hardened spills on your stovetop, consult the manufacturer’s instructions to determine the appropriate cleaning solution or cleaner that is safe for your specific cooktop surface.
Apply the recommended cleaner to the stains, allowing it to soak according to the instructions. This will help loosen the stains and make them easier to remove.
Step 3: Scrape Debris and Wipe Clean.
Use a single-edged scraper, held at a 30- to 40-degree angle, to carefully scrape away any debris or hardened food particles from the cooktop surface.
Be cautious not to scratch or damage the surface while scraping. Always follow the manufacturer’s guidelines.
After scraping, wipe the cooktop clean with a damp cloth to remove any remaining residue or cleaner.
By following these steps, you can effectively clean your stovetop and restore its sparkling appearance.
Remember to consult the manufacturer’s instructions for specific cleaning recommendations and precautions for your particular stove model. Regular maintenance and prompt cleaning will help keep your stovetop looking its best.
*The information is for reference only.