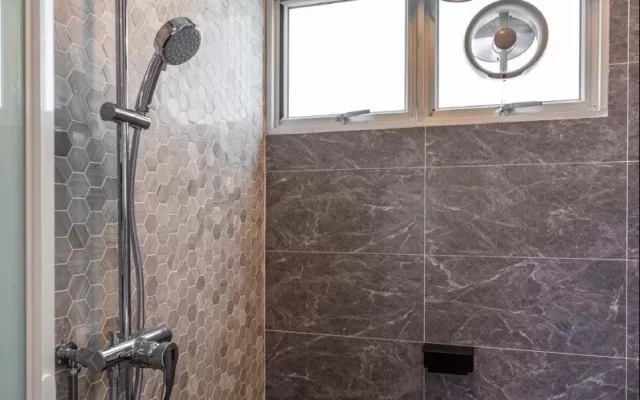
Follow the instructions below to learn how to effectively clean your bathroom exhaust fan and keep it operating at its best.
Amidst all the cleaning tasks you have on your list, it’s common to overlook the unassuming yet vital bathroom exhaust fan.
Despite its simplicity, this hardworking device plays a crucial role in removing excess moisture and preventing mold and mildew growth, making it essential to keep it clean. To ensure proper functioning and to avoid dust buildup on the exhaust fan cover and motor, it’s recommended to clean it at least once or twice a year.
The good news is that this bathroom cleaning chore is relatively straightforward and can be completed in just about 20 minutes. With only a few tools required, you can easily tackle this task and maintain a clean and healthy bathroom environment.
Before Getting Started

Before you begin the cleaning process for your bathroom exhaust fan, it’s crucial to take some Safety Precautions.
Always start by turning off the breaker to the bathroom to ensure no electricity is running through the fan while you clean it. If your bathroom lacks natural light, have a flashlight handy to help you see better during the process.
As an additional safety measure, turn on the fan switch to confirm that the power is indeed off.
To access the fan properly, make sure you have a stepladder that allows you to comfortably reach the ceiling where the fan is installed.
Gently remove the cover of the bathroom exhaust fan, which can vary in how it’s attached. Some models have pins on the sides that need to be pressed to release the cover, while others may be secured with screws.
Keep a screwdriver nearby in case you encounter screws holding the cover in place.
If your exhaust fan is plugged into an outlet, unplug it before proceeding with the cleaning process.
Additionally, check for any brackets securing the fan in place. These brackets may need to be unscrewed to allow you to access the fan blades and motor correctly.
Now that you’ve taken the necessary safety measures and removed the fan cover, you’re ready to move on to the next steps of the cleaning process.
Cleaning your bathroom exhaust fan not only helps maintain a fresh and healthy bathroom environment but also ensures the fan operates efficiently, reducing the risk of Mold and Mildew growth. By following the proper cleaning steps, you can keep your exhaust fan in excellent working condition, providing better air circulation and a more pleasant bathroom experience.
Regular maintenance and cleaning will not only enhance the longevity of your bathroom exhaust fan but also contribute to the overall cleanliness and comfort of your bathroom space.
How to Properly Clean Your Bathroom Exhaust Fan

A bathroom exhaust fan is a crucial component in maintaining a clean and healthy bathroom environment.
However, over time, dust, grime, and debris can accumulate on its various parts, affecting its efficiency and potentially leading to mold and mildew growth. To ensure your bathroom fan works optimally, it’s essential to clean all three major parts: the vent cover, fan blades and motor, and the housing.
Here’s a step-by-step guide on how to clean your bathroom exhaust fan thoroughly:
Clean the Exhaust Fan Vent Cover: Start by removing the vent cover from the fan.
You can do this easily by twisting and releasing it from its position. Place the vent cover in a tub of hot Soapy Water to soak while you clean the other parts.
Using a damp microfiber cloth, carefully scrub away the accumulated dust and grime from the vent cover.
Make sure to reach all the crevices to ensure a thorough clean. Once you’ve finished cleaning, let the vent cover air-dry completely before reassembling it.
Clean the Exhaust Fan Blades and Motor: Detach the fan and motor assembly from the exhaust vent.
If you can remove it entirely, use a damp cloth to clean the fan blades and motor. For hard-to-reach areas, you can use a vacuum attachment to eliminate stubborn dust and debris.

If removing the fan from the ceiling isn’t possible, use the vacuum to suction away as much dirt as you can from the blades.
This will help improve the fan’s overall efficiency.
Clean the Exhaust Fan Housing: With a crevice attachment on your vacuum cleaner, thoroughly clean the inside of the exhaust vent.
Pay special attention to the brackets that hold the exhaust fan in place. If you don’t have a crevice attachment, a brush attachment can also be used to clean these areas effectively.
Dry and Reassemble the Fan: Once you’ve finished cleaning all the parts, it’s time to reassemble the fan.
Place the fan and motor assembly back into the housing area and secure it with the provided brackets or screws. Move the fan back and forth gently with your fingers to ensure it isn’t hitting anything that might hinder its operation.
Next, return the dry vent cover to the bathroom exhaust fan.
Press the cover firmly until the clips click closed, or secure it with screws if necessary.
Turn the Power Back On: Before using the bathroom exhaust fan again, return to your breaker and flip the power switch back on.
This will restore electricity to the fan. To ensure everything is working correctly, give the newly cleaned bathroom exhaust fan a test run.
By keeping your bathroom exhaust fan clean, you’ll promote better air circulation, reduce the risk of mold and mildew, and maintain a fresh and healthy bathroom environment.
Regularly cleaning your exhaust fan will not only enhance its efficiency but also extend its lifespan, saving you from potential repair costs down the road.
*The information is for reference only.