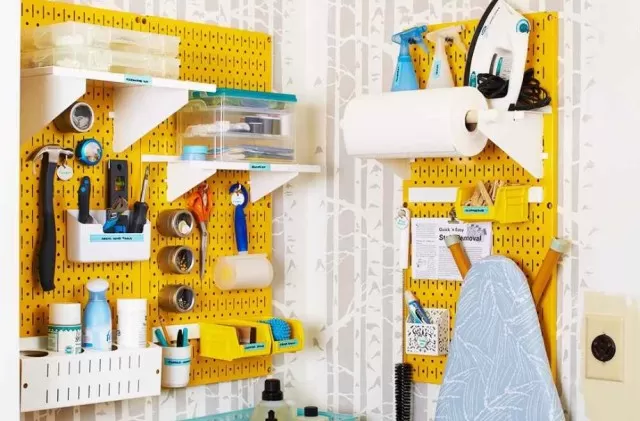
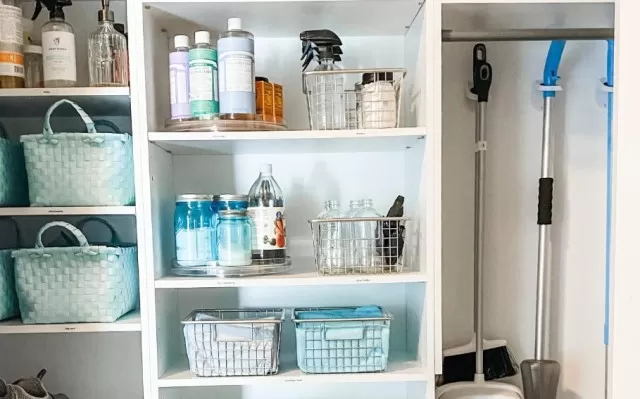
These clever ideas will help you set up an efficient cleaning storage system in the cleaning closet, making your tidying routine much more streamlined.
Cleaning tasks become much more manageable when all the necessary tools and supplies are stored in a well-organized and easily accessible location.
Choose a suitable space, such as a closet, cabinet, or another storage area, where cleaners, sponges, brushes, brooms, and other cleaning items can be conveniently kept. The ideal location for organizing cleaning supplies might be in the laundry room, bathroom, or kitchen, depending on where you primarily perform your cleaning tasks.
Once you’ve selected a storage spot, utilize various organizers such as bins, hooks, drawer dividers, and other storage solutions to effectively sort and store your cleaning essentials. You can even think outside the box by repurposing office supplies like pencil cups, magazine holders, and binder clips to keep specific items in order.
Cleaning Closet Storage Tips

Efficient Cleaning Closet Organization.
Optimize your cleaning closet by utilizing space-saving techniques.
Items that can be collapsed flat for storage, such as a collapsible bucket, folding stool, and floor sweeper, can be neatly arranged on the inside of the cabinet door. Install low-profile hooks to securely hold each item.
Additionally, ensure easy access to supplies like mop pads and Cleaning Solutions by storing them on nearby shelves.
Organized Cleaning Supply Bins.
Simplify the process of finding cleaning supplies with the help of clear stacking storage bins.
These transparent bins are perfect for storing messy items like assorted lightbulbs and miscellaneous cleaning supplies. For added convenience, use shelf labels to easily identify and maintain a neat storage system.
Strategic Placement of Cleaning Closet.
Streamline your cleaning routine by keeping all your cleaning essentials in one centralized location.
Consider situating your cleaning closet near a sink to minimize the number of steps required to gather supplies. This proximity to a water source makes it convenient for tasks that involve water or require quick access to cleaning tools.
Practical cleaning schedule.
Stay on top of home maintenance by creating a customized cleaning schedule and placing it inside the cabinet door of your cleaning closet.
Include a comprehensive list of weekly, monthly, quarterly, and yearly chores. To make ADDITIONAL NOTES about special seasonal tasks, required supplies, or homemade cleaning solution recipes, mount large dry-erase sheets next to the schedule.

Divided Storage for Cleaning Closet.
Maximize the efficiency of your cleaning closet by installing dividers inside the drawers of a small cabinet.
This organizational strategy frees up valuable space in your junk drawer and allows you to sort frequently needed items, such as office supplies, batteries, and postage stamps, into designated compartments. Maintain order by adding labels and updating them as the contents change.
Utilize Top Shelves for Cleaning Supplies.
Make use of high shelves in your cleaning closet to store large, lightweight objects like empty buckets and extra paper towels.
By placing these items on higher shelves, you can clear up floor space and keep regularly used items within easy reach. If necessary, use a step stool to access the top shelves comfortably.
Convenient Paper Towel Holder.
For quick and easy access, mount a paper towel holder towards the top of the inside of your cleaning closet door.
This placement allows you to grab your preferred cleaner and tear off a paper towel without any hassle. Keep a stock of extra paper towels nearby to ensure easy replacement.
Portable Cleaning Kit.
Create a cleaning kit that contains frequently used supplies, allowing you to carry them around the house as you clean.
Customize the contents of the cleaning caddy or bin based on specific tasks, such as including microfiber dusting cloths and furniture polish for dusting purposes. With all your supplies in one portable kit, you can save time by avoiding multiple trips back to the cleaning closet.

Utilize Back-of-Door Storage Space.
Don’t overlook the vertical storage potential of the back of your cleaning closet door.
Take advantage of this space by hanging a clamp-style rack designed for brooms and mops. Additionally, repurpose wall-mounted pencil holders to store sponges and scrubbers, keeping them easily accessible.
Hooks for Cleaning Closet Organization.
Install small coat hooks on the side of your cleaning closet to hang a duster, broom, and dustpan.
Keep pairs of rubber gloves together by clipping them with a binder clip and hanging them from another wall hook. Maximize the available wall space by arranging multiple rows of hooks.
Organize cleaning products with Wall Bins.
Hang narrow metal wall bins, typically designed for mail and magazines, on the inside of your cleaning closet.
Fill these bins with spray bottles and cleaners, and label each bin according to the type of cleaning product or designate them for specific rooms in the house. This arrangement keeps your cleaning products neatly organized and easily accessible.
Protect and Beautify the Cleaning Closet Floor.
Take care of your cleaning closet by covering the base with a sheet of durable adhesive paper that can be easily wiped clean.
This protective layer will catch any drips or dust from your cleaning equipment, preventing damage to the underlying surface. Additionally, use this opportunity to add a touch of style by choosing adhesive paper with an attractive pattern, giving your storage space a visually pleasing appearance.
*The information is for reference only.