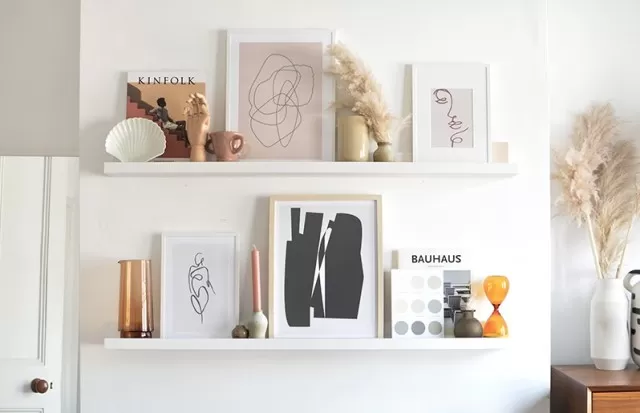
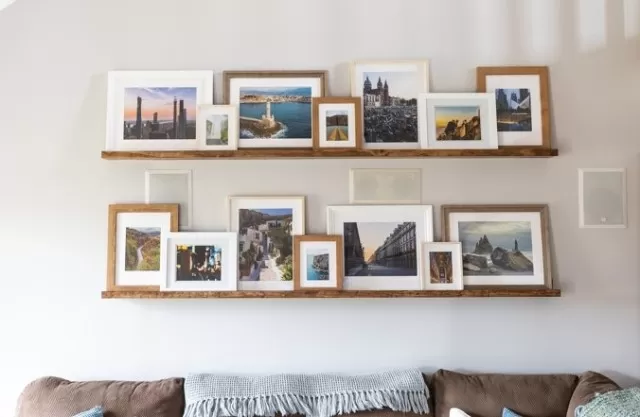
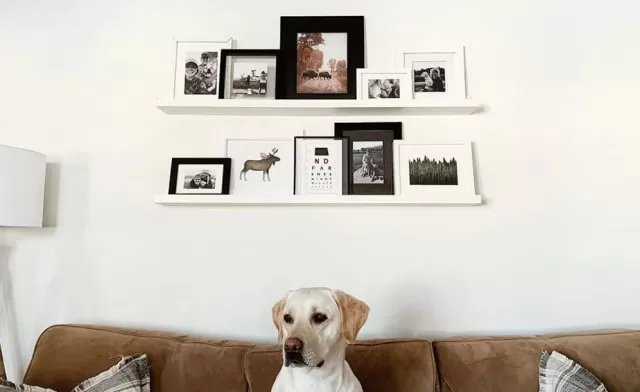
If you’re eager to create a functional and stylish wall display, you can start making your photo ledges This Weekend.
If you’re looking for a quick and effortless hanging solution, consider using a photo ledge.
It offers a convenient way to create an instant gallery wall without the need for extensive planning or hanging each frame individually. By installing several photo ledges, you can easily switch out photos and artwork whenever you like, making it a versatile and budget-friendly project.
Whether you want to update the display with seasonal decor, track your kids’ growth, or showcase various collections, photo ledges are perfect for the task.
Building the shelves is a straightforward process, and you won’t need much time for completion.
The only waiting period might be for painting the ledges if you choose to do so. With photo ledges, you can proudly display children’s books with their covers visible for easy access during reading time.
Additionally, they work wonderfully for showcasing record albums, organizing spice jars in the kitchen, or displaying a collection of small toys or cherished keepsakes.
Photo ledges will not only enhance your home decor but also add a touch of personalization to your living spaces.
What are photo ledges? & The Difference Between Photo Ledges & Floating Wall Shelves

Picture ledges are narrow wall shelves designed primarily for displaying pictures, artwork, and other decorative items.
Unlike traditional floating wall shelves that offer more storage space, picture ledges are thinner in design and are intended to showcase items without taking up much room themselves.
These decorative ledges are commonly used to create stylish and Versatile displays of framed photographs, paintings, prints, and small decor pieces.
They provide a minimalist and modern way to exhibit your favorite memories and artistic creations, adding a touch of sophistication and personality to any room.
Picture ledges are often made of wood or other sturdy materials and come in various lengths to accommodate different wall spaces and display needs.
Their slim profile allows for seamless integration into any interior design, making them suitable for both contemporary and classic decor styles.
Placement Options: Picture ledges can be installed in various locations around your home, adding beauty and charm to any room.
Common placement options include above a sofa or bed, along a hallway, in the dining room to showcase family photos, or even in the bathroom to display small plants and decorative accents.
Organized Displays: One of the key benefits of picture ledges is the ability to create organized and ever-changing displays.
You can easily swap out photos or artwork, updating your decor to match the seasons, special occasions, or your evolving style preferences.
Versatility in Decor: While picture ledges are ideal for displaying framed pictures, they are not limited to just photographs.
You can also showcase decorative plates, small sculptures, memorabilia, or even a curated collection of vintage finds.
Add Visual Interest: By layering the frames or artwork on the ledge, you can add depth and visual interest to your display.
Combine different frame sizes and orientations, and play with colors and textures to create a captivating gallery wall effect.
Practical and Functional: Although picture ledges may not offer extensive storage space, they do serve a practical purpose by keeping your cherished memories and favorite art pieces on display and within easy reach.
Unlike traditional frames hung on the wall, you can switch out the items on the ledge quickly and without the need for hammering nails or creating new holes in the wall.
Use in Home Offices: In home offices, picture ledges can be used to hold inspirational quotes, motivational prints, or even reference materials within reach of your workspace.
This not only adds a personalized touch but also keeps your workspace organized and clutter-free.
Display for Children’s Artwork: In children’s rooms or play areas, picture ledges can be a great way to showcase their artwork or crafts.
You can easily switch out their latest creations, making them feel proud of their achievements while maintaining a neat and stylish display.
Seasonal Decorating: Picture ledges also lend themselves well to seasonal decorating.
You can use them to display holiday-themed artwork, seasonal prints, or festive decor, adding a touch of celebration to your home without overwhelming the space.
Overall, picture ledges offer a simple and elegant solution for displaying your treasured memories and decorative pieces in a way that complements your home’s style and reflects your unique personality.
Whether you choose to showcase family photos, artwork, or other decor items, picture ledges are sure to elevate the aesthetics of your living spaces.
DIY Guide to Building Photo Ledges

Step-by-step Guide: How to Build and Hang Photo Ledges.
Make Cuts: Using a tape measure, mark the dimensions on the wood and then cut the pieces accordingly.
For this project, you’ll need a 1 x 4-inch board cut into two 30-inch long pieces and one of these pieces cut in half to create two smaller 2-inch wide pieces. Sand all three pieces to create a smooth surface.
Build Ledges: Take one of the 2-inch wide pieces and glue it flush with one edge of the wide 1 x 4-inch board.
This creates a “lip” on the end of the picture ledge to prevent frames from sliding off. Clamp the pieces together to hold them in place and wait for the glue to become tacky.
Once ready, secure the pieces by nailing them together with a nail gun. Repeat the same process for the second thin piece, but this time, glue it to the top of the 1 x 4 base to create a taller “back” piece that faces the wall.
Prime and Paint: Apply primer and paint or stain to your photo ledges in your desired color.
If you prefer a natural wood look, you can simply seal the ledges to protect them before hanging them. Ensure to apply two to three coats for the best coverage, allowing sufficient drying time between each coat.
Editor’s Tip: To make painting the edges easier, rest your photo ledge on pieces of scrap wood.
Locate Studs and Hang: Since the picture ledges will support frames and other potentially heavy items, it’s important to hang them on wall studs for extra security.
Use a stud finder to locate the studs on the wall and mark their corresponding locations lightly on the back panel of the ledge. Drill pilot holes at the marked spots before securing the ledge to the wall with screws.
Use a level to ensure the photo ledge is hung evenly.

Another instruction:
Decorate the photo Ledges: After the paint has dried, you can decorate the ledges with your favorite photos, artwork, or decorative items.
Experiment with different arrangements and display styles to find the perfect look for your space.
Add Finishing Touches: Consider adding decorative molding or trim to the front edge of the ledges for an extra touch of elegance.
You can stain or paint the molding to match the rest of the ledge, creating a cohesive and polished appearance.
Customize the Length: If you need longer ledges to fit a specific wall space, adjust the dimensions accordingly when cutting the wood.
However, keep in mind the weight of the items you plan to display on the ledge and ensure it remains sturdy and secure.
Create Multiple Ledges: You can build multiple picture ledges and hang them in a gallery-style arrangement to create a stunning focal point on your wall.
Vary the lengths and heights of the ledges to add visual interest and dimension to your display.
Mix and Match Colors: Experiment with different Paint Colors or stains to create a unique and personalized look for your photo ledges.
Mixing and matching colors can add a playful and eclectic touch to your decor.
Use for Various Purposes: These picture ledges are not limited to displaying photos and artwork.
They can also be used to hold books, small plants, candles, or other decorative items. Get creative and use them in different rooms throughout your home for functional and stylish storage solutions.
By following these instructions and extending the possibilities, you’ll have beautiful and versatile picture ledges that not only showcase your cherished memories but also enhance the overall aesthetics of your home.
*The information is for reference only.