Craft Your Own Christmas Cards for a Homemade Holiday Glow.Crafting handmade holiday cards is a labor of love, whether the sentiment is elegantly embossed, adorned with ribbons, or conveyed through cherished photographs. The effort invested in creating these cards is undoubtedly well worth it. Those tranquil evenings spent meticulously snipping ribbons and adding delicate touches of fine glitter will help you ease into the bustling holiday season, filling your heart with anticipation and joy.
What makes these DIY Christmas cards truly special is that they become cherished gifts in themselves, treasured long after the store-bought cards have been exchanged and forgotten. The art of making your own Christmas cards is a gift to both the creator and the fortunate recipient. This holiday season, why not try your hand at one of our numerous ideas? From endearing button snowmen to accordion-folded photo cards, each card is a unique masterpiece, embellished with personal touches and a sprinkle of glitter, making them truly unforgettable tokens of love and joy.
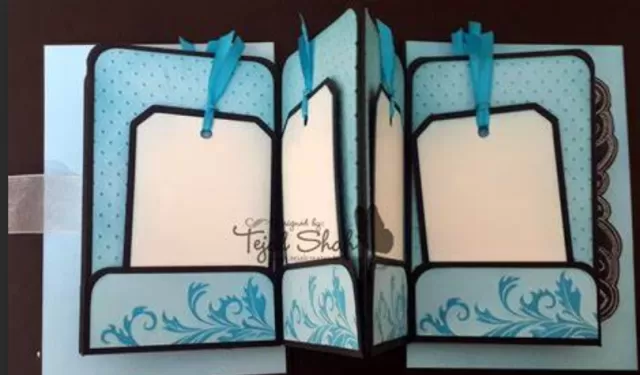
Accordion-Fold Picture Greeting Card

This delightful three-part card combines the joy of sharing two of your cherished photos with a simple, heartfelt greeting.
For optimal results, opt for color photocopies or computer-paper printouts as they create a thinner stack compared to actual photographs.
To create your unique card, start by cutting medium- to heavyweight art paper to your desired size.
Then, fold it accordion-style into three equal sections. Trim your chosen printouts or color photocopies of photographs, leaving a 1/4-inch border of art paper around each.
Use a thin layer of craft glue to affix the photos in the first two sections, and add a printed message in the third. Your personalized accordion-fold photo card is ready to bring smiles and warm sentiments to your loved ones.
Festive Yarn Art Cards
Yarn enthusiasts, rejoice! The winter holidays provide a wealth of delightful symbols to work with, including wreaths, snowmen, fir trees, snowflakes, mittens, candy canes, and more.
Get creative with yarn in varying colors, weights, and textures, even combining them on a single card for a unique touch. Crafting a charming Christmas ornament only requires a few artful curves, and you can create a stunning tree by using several graduated lengths of yarn.
For your custom designs, consider practicing on scrap paper if you wish.
Lightly sketch your design onto a blank card or a piece of cardstock. Then, trace the drawing with craft glue from a bottle with a fine-tip applicator.
Gently place yarn on the glue, allowing it to dry, and snip away any excess yarn. Your yarn art cards are ready to add a warm and cozy touch to the holiday season.
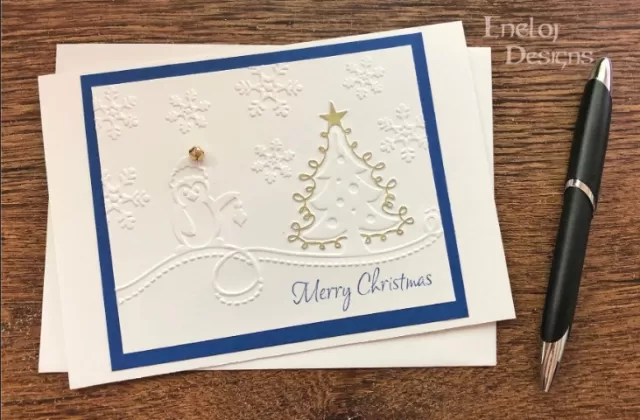
Embossed Holiday Greeting Cards

Add an extra touch of elegance to your holiday card-giving with beautiful embossed designs.
You can transform any striking seasonal line drawing into an embossing stamp, as seen in these examples created by Martha for her own holiday greetings.
Whether you choose store-bought cards or create your own from card stock, the process remains the same.
Begin by pressing a rubber stamp onto an embossing pad. Carefully position the stamp over the card, applying firm and even pressure to transfer the design.
Afterward, clean the stamp by gently wiping it with a paper towel and a stamp-cleaning pad.
Next, place the card on a paper plate and delicately sprinkle embossing powder over the stamped design.
Tap the card to remove any excess powder and reapply as needed to ensure the design is fully coated. If there is stray powder on the card, you can gently clear it by spraying compressed air from a can fitted with an extension wand.
Working in sections, hold a heat gun about 2 inches from the design and move the nozzle in a circular motion.
The powder-covered areas will gradually melt, creating a glossy finish. Continue this process until the entire design has smoothly melted.
Give the card a gentle wave three or four times to set the design. If the paper begins to curl, simply heat the back of the card and fan it again.
To finalize your embossed card, place it under a heavy book for five to ten minutes.
This step won’t smudge the design and will ensure your holiday cards exude a touch of sophistication and charm.
Button Snowman Greeting Cards
Embrace the charm of the holiday season with these delightful button snowman cards, where ordinary buttons take on a cheerful new life.
With tiny knots and stitches of embroidery floss, you can create endearing snowmen right on your cards.
To make your button snowmen, use embroidery floss to sew white shirt buttons of various sizes onto a colored note card.
Use green French knots to form the buttons and eyes, and a single red stitch between two holes to create a smiling mouth. Slide a bit of thin silk ribbon behind the top two buttons and tie it into a snug scarf, then trim the ribbon ends, securing it all with craft glue.
To complete your card, slide a second, slightly larger blank note card inside the first one.
Align them as you like and punch two holes along the folded edge using a micro-hole punch. Thread a ribbon through the holes and tie it securely, creating a beautiful and heartwarming button snowman greeting card to share the holiday spirit.
Creative Rickrack Greeting Cards

Elevate your holiday card-making with the charming and Versatile wavy cotton trim known as rickrack.
This fun and easy craft allows you to transform rickrack into festive seasonal symbols for your greeting cards.
Simply glue rickrack designs onto blank cards and let your creativity shine.
For example, cut and paste strips of green rickrack to craft a delightful christmas tree, or trim segments of white rickrack to form intricate snowflakes. If you’re looking to create striped designs, twist together two strands of rickrack with equal width.
The unique shapes of the strands will keep them from unraveling, allowing you to design a wide variety of imaginative and personalized rickrack greeting cards for the holidays.
*The information is for reference only.