Discover effective methods to clean and maintain your kitchen and laundry room appliances. Learn how to degrease, deodorize, and remove stubborn grime from these essential tools that keep your home running smoothly. Keep your appliances in top shape with our easy-to-follow Cleaning Tips.
Maintain Cleanliness and Performance: Essential Tips for Appliance Care

It may seem ironic that the very appliances designed to clean and sanitize our homes require regular cleaning themselves, but it’s a crucial step in maintaining their performance.
Appliances like washing machines and dishwashers can quickly become breeding grounds for mold, mildew, and bacteria in damp environments. Even gadgets that come into contact with food, such as refrigerators, microwaves, and stovetops, are prone to accumulating grime and developing unpleasant odors if not properly maintained.
With a little effort and the right cleaning supplies, you can improve the performance and longevity of your appliances.
These essential tips and techniques will not only keep your appliances looking great but also ensure that they continue to work efficiently for years to come.
Regular Maintenance
Set aside time for regular appliance maintenance to prevent dirt and debris buildup. Wipe down surfaces, remove food particles, and clean filters or vents as needed.
Appliance-Specific Cleaning
Different appliances require specific cleaning methods. Follow the manufacturer’s instructions to clean the interior and exterior of each appliance effectively.
Deep Cleaning
Schedule periodic deep cleaning sessions for your appliances. This may involve removing and cleaning removable parts, using specialized cleaning products, or performing maintenance tasks like descaling.
Odor Control
Combat unpleasant odors by using odor-absorbing agents like baking soda or placing activated charcoal inside the appliances. Regularly empty and clean drip trays or filters to prevent odor-causing bacteria growth.
Safety First
Always unplug appliances before cleaning to avoid the risk of electric shock. Use non-abrasive cleaning tools and follow safety guidelines provided by the manufacturer.
By implementing these simple yet important steps, you can keep your appliances in optimal condition.
Not only will they look and smell fresh, but they will also continue to perform at their best, enhancing your daily routines and ensuring a clean and healthy living environment.
Remember, a little maintenance goes a long way in preserving the efficiency and longevity of your appliances.
Make appliance care a priority, and enjoy their benefits for years to come.
Energy Efficiency Starts with a Clean Refrigerator
Did you know that maintaining a clean refrigerator not only promotes hygiene but also increases its energy efficiency? It’s true! Take a moment to discard spoiled food and give your refrigerator a thorough cleaning to reap the benefits.
Follow these simple steps to ensure a clean and efficient refrigerator:.
Clear Out and Discard
Start by removing all items from your refrigerator, checking for expired or spoiled food. Dispose of any items past their prime and wipe down containers before placing them back in the fridge.
Clean Shelves and Drawers
Using warm soapy water, scrub the shelves and drawers to remove any spills or stains. Rinse thoroughly and allow them to dry before returning them to the refrigerator.
Remember, when cleaning glass shelves, avoid using hot water as it can cause the glass to shatter.
Wipe Down the Exterior
Using a nonabrasive cloth and a mild cleaning solution, thoroughly wipe down the exterior of the refrigerator. Pay attention to handles, buttons, and any other surfaces that may collect dirt or fingerprints.
Regular cleaning helps maintain the appearance and longevity of the appliance.
Vacuum the Coils
Locate the refrigerator coils, typically found on the lower part or back of the unit. These coils are responsible for dissipating heat and ensuring the refrigerator operates efficiently.
Gently vacuum the coils to remove dust and debris that can hinder performance. Regularly cleaning the coils will help the refrigerator consume less energy.
By incorporating these cleaning practices into your routine, you not only maintain a fresh and hygienic environment but also optimize the energy efficiency of your refrigerator.
A clean refrigerator runs more efficiently, saving you money on energy bills and reducing your environmental impact.
Remember, a little effort in maintaining cleanliness goes a long way in keeping your refrigerator operating at its best.
Take the time to clean and care for this essential kitchen appliance, and enjoy the benefits of a well-maintained and energy-efficient refrigerator.
Effortless Oven Cleaning Tips for a Sparkling Kitchen

Spills and stains in the oven can be stubborn and difficult to remove, especially when they’ve been burnt to a crisp.
However, with a few pantry ingredients and some easy techniques, you can effectively clean your oven and restore its shine. Follow these simple steps for effortless oven cleaning:.
Baking Soda Paste
Create a paste by combining baking soda and water until it forms a thick consistency. Spread this paste over the stubborn stains and spills inside the oven.
The baking soda works as a natural abrasive and helps to break down grime.
Gentle Scrubbing
Use a toothbrush or a plastic scrubbing pad to gently scrub the baking soda paste into the stains. The abrasive texture of the baking soda will help loosen the dirt and make it easier to remove.
For tougher stains, you can add a little vinegar to the baking soda paste for extra cleaning power.
Vinegar for Extra Cleaning
Vinegar is a versatile and natural cleaning agent. If the stains persist, apply a small amount of vinegar directly to the affected areas and let it sit for a few minutes.
The vinegar will react with the baking soda, creating a bubbling effect that helps to break down tough stains.
Commercial Oven Cleaner
In some cases, extremely dirty ovens may require the use of a commercial oven cleaner. If you opt for this method, it’s crucial to follow the manufacturer’s instructions carefully.
Take precautions to protect yourself, use appropriate ventilation, and wear gloves for safety.
Remember, regular oven maintenance and cleaning can help prevent stubborn stains from accumulating.
Wipe up spills as soon as they occur and perform routine cleaning to keep your oven in optimal condition.
Effortlessly clean your oven using these pantry ingredients and gentle scrubbing techniques, or, if necessary, rely on a commercial oven cleaner.
Enjoy a sparkling clean oven that enhances your cooking experience while following proper safety measures.
A clean oven not only ensures optimal performance but also contributes to a fresh and inviting kitchen ambiance.
Take pride in maintaining your oven, and let it shine as a centerpiece of your culinary adventures.
Effortless Iron Cleaning Tips for Fresh and Wrinkle-Free Fabrics
Maintaining a clean iron is essential to prevent residue buildup and avoid the risk of staining your beloved garments.
Don’t wait until it’s too late—take a moment to degunk your iron promptly. Follow these simple steps to effectively clean your iron and ensure it performs flawlessly:
Baking Soda Paste
Begin by creating a paste using baking soda and water. Ensure that the iron is cool, then apply the paste to the soleplate—the bottom surface of the iron where the clothes make contact.
Gently rub the paste onto the soleplate, paying extra attention to any visible stains. The baking soda’s gentle abrasive properties will help remove stubborn residue.
Removing Mineral Deposits
Steam ducts in the iron can accumulate mineral deposits over time. To address this, use pipe cleaners to carefully clean the steam ducts.
Insert a pipe cleaner into the openings and gently move it back and forth to dislodge any mineral buildup. This will help restore the iron’s steaming capabilities.
Vinegar and Water Solution
Fill the iron’s water reservoir with a mixture of equal parts vinegar and water. Turn the iron on to the highest heat setting and let it steam for approximately 15 minutes.
This process helps dissolve mineral deposits and eliminate any lingering odors. Afterward, allow the iron to cool down.
Rinse and Repeat
Empty the vinegar and water solution from the reservoir. Refill the reservoir with plain water and repeat the steaming process to rinse out any remaining vinegar.
This step ensures that no vinegar residue is left behind.
By following these straightforward steps, you can maintain a clean and efficient iron that keeps your clothes looking crisp and wrinkle-free.
Regular cleaning prevents residue from transferring onto fabrics and safeguards your favorite designer garments.
Remember, a well-maintained iron is the key to achieving perfectly pressed clothes.
Take the time to clean your iron promptly and enjoy the confidence of wearing immaculate outfits every day.
Note: Always refer to the manufacturer’s instructions and safety guidelines when cleaning your iron to ensure proper usage and avoid any potential damage.
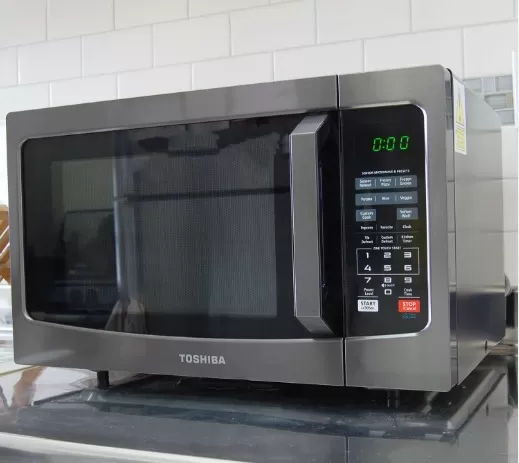
Fresh and Clean: Effortless Microwave Cleaning with Lemon Power

Dealing with stubborn, unpleasant odors and caked-on food splatters in your microwave? Don’t worry, because cleaning your microwave using lemons and water is surprisingly simple.
Follow these easy steps to refresh and sanitize your microwave effortlessly:
Lemon and Water Mixture
Start by cutting a lemon in half and squeezing the juice into a microwave-safe dish. Add one cup of water to the dish, ensuring that the lemon juice is evenly distributed in the mixture.
Microwave on High
Place the dish with the lemon and water mixture into the microwave. Set the microwave to the highest power level and heat the mixture for approximately 10 minutes.
The heat will generate citrusy steam, which helps loosen the caked-on food particles and eliminate unpleasant odors.
Let it Sit
After the microwave finishes heating, leave the door closed and allow the mixture to sit inside for an additional 10 minutes. This resting period allows the steam to penetrate and soften the food splatters and stains, making them easier to wipe away.
Wipe Clean
Carefully remove the dish from the microwave (using oven mitts if necessary, as it may be hot) and open the door. Take a damp cloth or sponge and wipe the microwave’s interior walls, ceiling, and turntable.
The softened food residue should come off easily, leaving your microwave fresh and clean.
By utilizing the natural cleaning power of lemons and steam, you can effectively tackle tough microwave stains and eliminate unpleasant odors without harsh chemicals.
This method is not only effective but also leaves behind a refreshing citrus scent.
Regular maintenance and prompt cleaning of your microwave will keep it in optimal condition, ensuring that your food is heated or cooked evenly without any unwanted flavors or smells.
Remember, safety is crucial when handling hot dishes and using kitchen appliances.
Take necessary precautions, such as using oven mitts and allowing the mixture to cool before cleaning.
Enjoy the convenience of a clean microwave, and savor your meals with confidence, knowing that your microwave is fresh and ready for use.
*The information is for reference only.