Crack Prevention for Concrete: Simple Solutions and Tips. Embarking on your first concrete project can be exciting, and with the right approach, you can achieve a long-lasting, professional finish.
To ensure success, it’s important to steer clear of common pitfalls and be prepared to address any issues that may arise. By following these guidelines, avoiding common pitfalls, and utilizing appropriate repair products when necessary, you can ensure a successful outcome for your first concrete project. With each project, your skills and knowledge will grow, allowing you to achieve increasingly professional results.
Master the Art of Achieving a Polished Finish: Essential Guidelines to Ensure Concrete Perfection

Concrete, renowned for its exceptional strength and longevity, has long been favored by both professionals and do-it-yourself enthusiasts for a wide range of construction projects, including patios, sidewalks, driveways, and more.
With proper installation, concrete can maintain its aesthetic appeal and structural integrity for many years. However, preventing common mistakes during and after the concrete pouring process is crucial in minimizing the likelihood of future cracks.
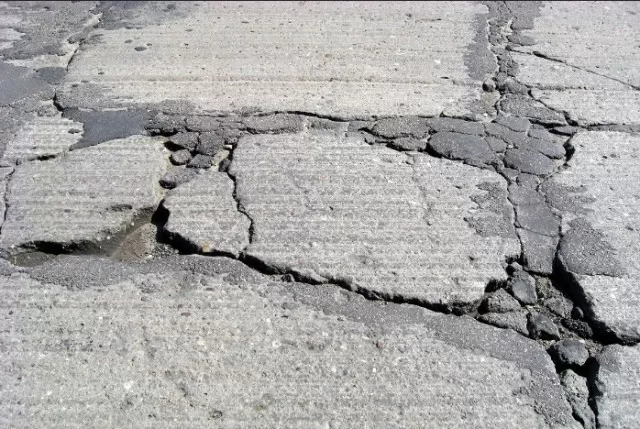
Cracks not only mar the visual appeal but also pose the risk of water seepage, which can lead to expansion and contraction due to freezing and thawing. This constant cycle exacerbates the crack, while also compromising the stability of the underlying soil.
Fortunately, the solutions to these issues are easily within reach.
Begin by watching an instructive video tutorial, courtesy of Quikrete’s concrete experts, that demonstrates the art of pouring a flawless slab. Then, delve into a comprehensive guide that outlines the correct procedures to follow before embarking on your next concrete venture, be it a petite planter or an expansive patio.
Armed with this knowledge, you’ll be well-equipped to achieve envy-inducing results, ensuring a stunning and enduring finish for your concrete projects.
Achieve Optimal Curing for Lasting Strength and Durability
While the complete curing process for concrete takes approximately 28 days, the actions you take during the initial few days after pouring are critical in ensuring a robust and crack-resistant surface.
The binding ingredient in concrete, cement, undergoes gradual curing and requires adequate moisture retention to reach its maximum strength. By allowing moisture to evaporate slowly, you significantly decrease the likelihood of cracks. To achieve this, it is recommended to spray the newly poured concrete with water multiple times a day during the first week. In regions with hot and dry weather conditions, more frequent spraying may be necessary.
To simplify the curing process, you can eliminate the need for manual watering by incorporating Quikrete Acrylic Cure & Seal into the mixing water before blending it with the concrete.
This product not only facilitates the curing process but also provides protection against dirt, grease, and other types of stains, ensuring a pristine appearance.
During the crucial seven-day period, it is vital to monitor the weather forecast for potential cold fronts.
If temperatures are expected to drop below 50 degrees Fahrenheit, it is advisable to cover the freshly poured concrete with a concrete insulating blanket or a polyethylene sheet that is at least four millimeters thick. This protective covering helps prevent the concrete from becoming too cold, which can weaken its internal structure and contribute to future cracking.
If you do cover the concrete for cold weather protection, avoid uncovering it solely for spraying. Instead, wait until temperatures rise above 50 degrees Fahrenheit before removing the cover and resuming the spraying process.
Once the concrete reaches the one-week mark, spraying and covering are no longer necessary.
At this stage, the concrete has cured sufficiently to withstand extreme temperatures without adverse effects. By following these proper curing techniques, you can ensure that your concrete project attains optimal strength, longevity, and resistance to cracking, providing you with a durable and visually appealing finished result.
Enhance Structural Integrity with Thoughtful Control Joint Placement

Even with careful curing methods mentioned earlier, it is important to acknowledge that large concrete slabs, like patios or sidewalks, may still experience cracking due to natural concrete shrinkage caused by temperature variations and the depletion of water during the hydration process.
Given the movement of the underlying soil, it is inevitable that concrete slabs will eventually develop cracks. This is where control joints come into play, serving as strategic weak points deliberately incorporated into the slab’s design to anticipate and guide any future cracks.
By incorporating control joints, the likelihood of cracks occurring in undesired areas is significantly reduced.
There are three main methods for creating control joints:.
Forming control joints in the pliable wet concrete using a concrete grooving tool.
Inserting Quikrete Expansion Joint Strips, composed of flexible wood fibers, during the pouring process.
Cutting control joints into the concrete slab using a circular saw equipped with a specialized concrete blade the day after pouring.
For optimal results, it is recommended to determine the maximum spacing between control joints by multiplying the planned concrete thickness (in inches) by 2.
5. For instance, if you are constructing a 4-inch-deep patio, multiplying 4 by 2.
5 yields a distance of 10 feet between joints. You may choose to place the joints closer together for additional crack protection, and for larger concrete slabs, consider incorporating perpendicular joints as well.
In the months and years following the completion of the project, it is crucial to regularly inspect the control joints for any signs of cracks.
If cracks have developed, promptly seal them with a high-quality concrete sealant, such as Quikrete’s Self-Leveling Sealant, to maintain the integrity and aesthetics of the structure.
By employing strategic control joint placement and vigilant crack monitoring, you can proactively address potential cracking issues and ensure the long-term durability and visual appeal of your concrete project.
.
.
.
Achieve the Perfect Water-to-Concrete Ratio for Optimal Mix Consistency
One of the most prevalent mistakes made by newcomers to concrete DIY projects is the tendency to add excessive water to the dry concrete mix in an attempt to facilitate mixing.
Unfortunately, this common error results in weakened concrete and significantly increases the risk of cracking. Surprisingly, even a mere extra quart of water can diminish concrete’s strength by up to 40 percent! To ensure a successful mix, it is crucial to strike the right balance where the concrete is thoroughly saturated without being overly watery. Ideally, the consistency should resemble that of oatmeal, with no dry patches or excessive liquidity.
Identifying the correct water-to-concrete ratio is essential.
A standard 80-pound bag of Quikrete Concrete Mix typically requires approximately three quarts of water to achieve the desired consistency. However, it’s important to note that this is an approximate guideline and adjustments may be necessary based on specific conditions.
If the mix appears slightly crumbly, you can add small amounts of water, gradually and sparingly, until all the dry components are incorporated. Conversely, if the mix is too wet and exhibits excessive liquidity, adding a little more dry concrete will help rectify the situation.
By adhering to the appropriate water-to-concrete ratio and making adjustments as needed, you can ensure a well-balanced and properly mixed concrete batch, reducing the risk of structural weaknesses and cracks.
Remember, achieving the right consistency is key to obtaining a durable and visually pleasing finished product.
Ensure a Stable Foundation: Proper Base Compaction for Long-Lasting Concrete Slabs

Before embarking on any concrete project, such as constructing a sidewalk or patio, it is essential to establish a solid and compacted base that will provide reliable support for the new slab.
Failing to properly compact the base can result in future settlement, leading to voids beneath the slab and eventual cracking. To achieve optimal results, it is recommended to use a gravel-based fill, such as Quikrete All-Purpose Gravel, as it is easy to compact by tamping it down to a depth of three to four inches, creating a flat and firm base.
The excavation process also plays a crucial role in minimizing the risk of future cracks.
A general guideline is to excavate only the amount of soil necessary to accommodate the desired depth of the concrete, along with a few inches of gravel. For instance, if you intend to create a four-inch-thick slab, dig down approximately seven inches, and then proceed to fill the forms with three inches of sand as a preparatory layer before pouring the concrete.
It is important to avoid excessive excavation followed by refilling with a few inches of soil, as the soil will eventually settle over time, causing the slab to develop cracks.
By adhering to proper base compaction techniques and strategic excavation methods, you can establish a stable foundation that minimizes the risk of settlement and cracking in your concrete slabs.
This attention to detail during the groundwork ensures the long-term durability and integrity of your concrete project.
*The information is for reference only.