Creative DIY Projects: 5 Ideas Using Existing Supplies. Achieving a well-maintained home doesn’t always require a trip to the home improvement store to stock up on supplies. In fact, many DIY maintenance tasks, home repairs, and projects can be accomplished using items you already have at home.
By tapping into your resourcefulness and thinking creatively, not only can you utilize those extra supplies that have been occupying storage space, but you can also enjoy the process and enhance the condition of your house in the process. Embrace this opportunity to repurpose and reimagine household items, have some fun, and witness the transformation of your home into an even better place.
Revitalizing Your Perennial Plants: The Art of Separation and Transplanting

In the world of gardening, rejuvenation is key to ensuring the continued health and beauty of your flowering perennials.
Every three to four years, it becomes necessary to separate certain types of perennials, such as tulips, irises, and peonies, to prevent overcrowding of their bulbs or roots. By undertaking this process, you not only promote healthier growth but also create an opportunity to expand your garden with a fresh array of flowers.
To embark on this horticultural adventure, prepare yourself with kneepads and a trusty hand trowel.
Equipped with these tools, you’ll be ready to dive into the soil and begin the process of separation. Gently dig around the base of the plant, taking care not to damage the delicate bulbs or roots.
Once exposed, you can carefully detach the smaller new roots and bulbs from the main rootstock.
Now comes the exciting part.
Find a new location where these smaller bulbs can be replanted. Take into consideration factors such as sunlight, soil conditions, and spacing requirements specific to each type of perennial.
With a little planning and creativity, you can design a garden layout that showcases the vibrancy of your transplanted roots and bulbs.
As the seasons change, you will witness the fruits of your labor.
The original plants, now relieved of overcrowding, will burst forth with more profuse blooms, capturing your attention with their renewed vitality. And don’t forget about the transplanted roots and bulbs—they are the promise of a whole new crop of flowers that will grace your garden in the coming summer.
Prepare to be amazed by the variety and splendor that awaits you.
So, venture into your garden with enthusiasm and a sense of purpose.
Embrace the art of separating and transplanting perennial plants, knowing that you are not only caring for their immediate needs but also ensuring their long-term well-being. As you witness the beauty that emerges from these simple acts, you’ll find joy in the transformative power of gardening and the bountiful rewards it brings.
Rejuvenating Your Perennial Garden: Separating and Transplanting for Blooming Success
Maintaining the health and vitality of your flowering perennials requires periodic attention and care.
Every three to four years, it becomes necessary to separate certain types of perennials, including tulips, irises, and peonies, to prevent their bulbs or roots from becoming overcrowded. By undertaking this process, you not only ensure the continued flourishing of your plants but also have the opportunity to expand your garden’s beauty with a fresh burst of flowers.
To embark on this gardening endeavor, prepare yourself with kneepads and a trusty hand trowel.
Armed with these essential tools, it’s time to dig into the soil and begin the process of separating your perennial plants. Gently loosen the earth around the base of each plant, being careful not to damage the precious bulbs or roots.
As you dig deeper, you’ll gradually expose the main rootstock.
With the main rootstock revealed, it’s time to carefully separate the smaller new roots and bulbs from it.
Take your time and handle them with care, ensuring that each division retains its vitality and integrity. These smaller bulbs hold the promise of future blooms and deserve their own space to thrive.
Find a suitable new location in your garden where the smaller bulbs can be planted.
Consider factors such as sunlight, soil conditions, and proper spacing for each type of perennial. By selecting the ideal spots, you’ll create an environment that promotes healthy growth and ensures the best possible display of vibrant flowers.
As the seasons progress, you’ll witness the rewards of your efforts.
The original plants, freed from overcrowding, will reward you with more profuse blooms, showcasing their renewed vigor. Meanwhile, the transplanted roots and bulbs will settle into their new surroundings, preparing to surprise you with a whole new crop of flowers in the coming summer.
Get ready to embrace the delightful array of colors and fragrances that await you.
So, don your gardening gear with enthusiasm and determination.
Engage in the art of separating and transplanting perennial plants, knowing that you are providing them with the opportunity to thrive and flourish. As you witness the bountiful blooms and the overall rejuvenation of your garden, you’ll find immense satisfaction in your green-thumb endeavors.
Embrace the Power of Composting: Turning Waste into Garden Gold

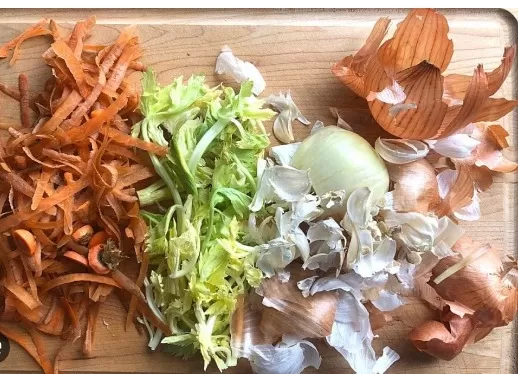
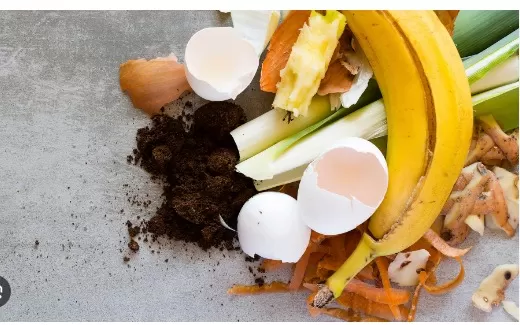
If you’re looking for an eco-friendly way to recycle plant and kitchen waste, composting is the answer—and you don’t need A Fancy compost bin to get started.
All you need is a patch of ground and a little effort. By creating a compost pile using dry leaves, hay, leftover fruits and vegetables, and other household composting ingredients, you can transform organic matter into a nutrient-rich soil amendment that will work wonders for your plants.
Begin by selecting a suitable location for your compost pile.
Find a spot on the ground where you can gather your composting materials. Dry leaves, a common ingredient, provide carbon, while leftover fruits and vegetables contribute nitrogen.
Aim for a good balance between these two elements to ensure successful decomposition.
As you build your compost pile, make sure to wet it down daily.
This moisture aids in the breakdown process, encouraging the growth of beneficial microorganisms that facilitate decomposition. Think of it as providing a nurturing environment for the composting magic to happen.
Over time, the pile will begin to decompose.
To accelerate the process and ensure even decomposition, turn the pile over using a shovel. This helps to mix the materials, allowing for better airflow and speeding up the breakdown of organic matter.
While turning the pile, dampen it a little more to maintain the desired moisture level.
With patience and regular care, in just a few months, you’ll be rewarded with a rich, dark pile of compost—your very own “garden gold.
” This compost is a natural and nutrient-rich fertilizer that surpasses any store-bought alternative. Its benefits extend beyond simply nourishing your plants; it also improves soil structure, aids in moisture retention, and enhances overall plant health.
Now, armed with this black gold, you can spread it around your vegetable garden or use it to nourish your flowering plants.
Watch as they flourish and thrive, thanks to the goodness provided by your homemade compost. Not only are you reducing waste and embracing sustainability, but you’re also investing in the long-term health of your garden.
So, take a step towards a greener lifestyle by starting your composting journey today.
Embrace the simplicity and effectiveness of this natural recycling process. As you witness the transformation of waste into a valuable resource, you’ll find joy in the knowledge that you’re making a positive impact on the environment and cultivating a flourishing garden.
Resolving the Sticking Door Dilemma: A Step-by-Step Fix
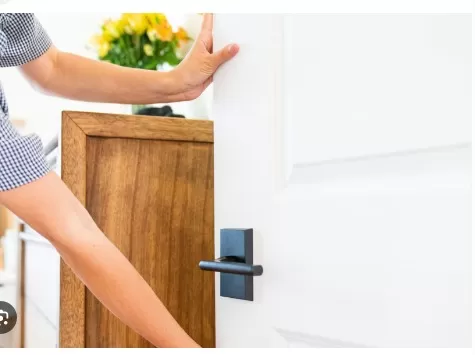
Dealing with a sticking door that refuses to close smoothly doesn’t have to be a daunting task.
By following a few simple steps, you can rectify the issue and restore your door’s functionality. Let’s get started:.
Identify the sticking point: Observe the door closely to determine where it’s sticking.
Is it the top, bottom, or side? Once you’ve identified the problem area, mark it with chalk. This will help you keep track of the exact spot that needs adjustment.
Remove the door: To work on the door effectively, you’ll need to remove it from its hinges.
Use a screwdriver to take out the hinge pins, which will allow you to lift the door away from the frame. Enlist the help of a friend if the door is heavy or awkward to handle.
Sand or plane the marked area: With the door in a more accessible position, you can now address the sticking point.
Depending on the severity of the issue, you can use either sandpaper or a hand plane. Begin by lightly sanding or planing the chalked area.
Be cautious and take off only a small amount at a time to avoid removing too much material.
Test the fit: Once you’ve made your adjustments, carefully put the door back on its hinges.
Slowly close the door to check if it now moves smoothly without sticking. If it still sticks, repeat the sanding or planing process on the specific area until you achieve the desired result.
Fine-tune as needed: If the door is closing smoothly but still has a slight sticking issue, you can make additional minor adjustments.
Use the sandpaper or plane to remove a tiny amount of material from the problem area until you achieve a perfect fit.
Reinstall the door: Once you’re satisfied with the door’s movement, secure it back onto the hinges by inserting the hinge pins and tightening them with a screwdriver.
Ensure the door is properly aligned within the frame and that it swings freely without any obstructions.
By following these steps, you’ll be able to resolve the sticking issue and enjoy a properly functioning door once again.
Remember to proceed with caution, making gradual adjustments and testing the fit regularly to achieve the desired outcome.
Say goodbye to the frustration of a sticking door and revel in the satisfaction of a smoothly operating entrance.
Banishing the Eyesore: A Guide to Stripping Wallpaper without Special Supplies

Say goodbye to that unsightly orange flocked wallpaper that has haunted your walls since you moved in.
You don’t need any special tools or supplies to tackle this task. Get ready to roll up your sleeves and follow these simple steps to reclaim your walls:.
Prepare your workspace: Clear the area around the wallpapered wall and protect the floor with a drop cloth or plastic sheeting to catch any falling debris or water.
Spray with warm water: Fill a pump sprayer with warm water or use a spray bottle. Generously spray the wallpaper, ensuring the entire surface is thoroughly wetted.
Warm water is effective in softening the old wallpaper paste and making it easier to remove.
Let it soak: Allow the water to soak into the wallpaper for 10 to 20 minutes. This will give the water enough time to penetrate the layers of paper and adhesive, loosening their grip on the wall.
Scrape off the wallpaper: Armed with a large putty knife or taping knife, gently scrape the softened wallpaper off the wall. Begin at a corner or an edge and work your way across, applying gentle pressure to lift the paper away.
Take care not to damage the underlying wall surface as you scrape.
Repeat if necessary: Some stubborn wallpaper may require an additional round of spraying and soaking. If there are stubborn patches that refuse to budge, apply warm water once again and allow it to soak for a few more minutes before attempting to scrape off the remaining wallpaper.
Clean up: As you remove the wallpaper, collect the discarded pieces and dispose of them in a trash bag. Wipe down the walls with a damp cloth to remove any residual adhesive or paper remnants.
With these simple steps, you can bid farewell to that orange flocked wallpaper that has overstayed its welcome.
By using warm water to soften the adhesive and a putty knife to gently scrape it away, you can restore your walls to their former glory.
So, roll up your sleeves, gather your determination, and take on this wallpaper-stripping project.
In no time, you’ll be rewarded with a fresh canvas ready for a new chapter of wall décor. Embrace the transformation and revel in the satisfaction of reclaiming your space from the clutches of outdated wallpaper.
*The information is for reference only.