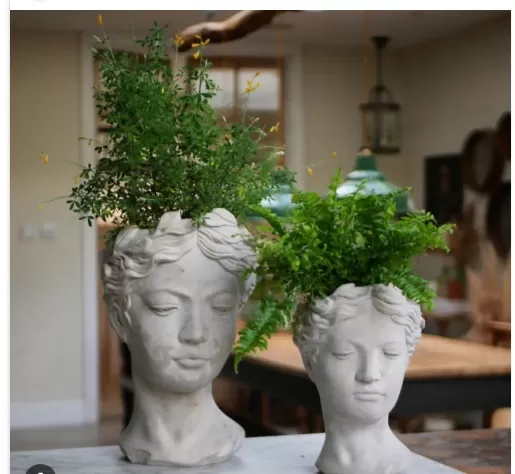
DIY Concrete Planters: 5 Stylish and Creative Ideas, Displaying your plants in concrete containers can be a fantastic way to showcase their beauty and add a touch of modern style to your home. These DIY concrete containers can be made over a weekend, allowing you to create unique and personalized planters that perfectly suit your aesthetic preferences.
Working with materials like Quikrete, you can craft durable and visually appealing containers that will beautifully complement your plants. Whether you prefer sleek and minimalistic designs or more intricate and artistic patterns, the versatility of concrete allows you to unleash your creativity and make stunning planters that will be the envy of your friends and neighbors. This content is paid advertising created in partnership with Quikrete.
DIY Concrete Planters: Showcase Your Greenery in Style

Concrete is a versatile and budget-friendly material that goes beyond major home renovations.
With its durability and malleability, it offers endless possibilities for creating unique and eye-catching decor. When it comes to displaying your plant collection, concrete proves to be an excellent choice for crafting custom planters.
Not only is it easy to mold into various shapes, but it also withstands both indoor and outdoor environments effortlessly. Furthermore, you can elevate the aesthetic appeal of your planter by adding decorative finishes such as paint or stain, making it truly one-of-a-kind.
If you’re in search of new planters for your beloved houseplants or container garden, you don’t need to look any further.
We’ve gathered seven cool concrete planter ideas that you can easily DIY over the weekend. These projects only require Quikrete concrete and basic tools and supplies that you likely already have at home.
Get ready to unleash your creativity and give your plants a stylish home with these stunning concrete planters.
Create a Stunning Sugar Mold Planter with Quikrete Concrete Mix
Drawing inspiration from traditional wooden sugar molds, this DIY project combines woodworking skills with Quikrete 5000 Concrete Mix to create an attractive and reusable concrete planter.
While constructing the mold requires a few woodworking techniques, once it’s built, you can easily craft beautiful planters time and time again.
To form the planter shape, mini paper cups are inserted into the poured concrete, secured in place by a piece of scrap wood nailed on top.
Before letting the concrete cure overnight, use a sander without sandpaper to eliminate any bubbles. After the planter is fully cast and cured, give it a light sanding for a smooth finish, and then plant some succulents or other low-growing plants to complete the look.
This unique sugar mold planter is now ready to take center stage on your dining or console table, adding a touch of natural beauty to your space.
Create a Stylish Mod Vase with Quikrete Fast-Setting Concrete Mix

If you’re looking to add a touch of modern elegance to your floral arrangements, this DIY project is perfect for you.
Using a clear plastic ornament bulb and Quikrete Fast-Setting Concrete Mix, you can craft a unique and stylish mod vase that complements any space. Whether you prefer an air plant, a single stem, or a small arrangement, this vase will showcase your blooms beautifully.
To begin, construct a square or rectangular mold using melamine or wood scraps.
Apply oil to the sides of the mold to facilitate easy concrete release. The dimensions of the mold are flexible, but it’s recommended to keep them under a foot for optimal results.
Place the mold on a flat surface and position the ornament bulb inside, with the head of the bulb against the center top of the mold.
Prepare one bag of Fast-Setting Concrete Mix and pour it into the mold, filling it approximately halfway up the sides of the bulb. Smooth the surface of the concrete for a polished look.
Allow the concrete to cure, then carefully remove the mold. Voila! You now have a chic and modern planter to showcase your favorite floral arrangements.
Craft a Durable Mid-Century Modern Planter with Quikrete 5000 Concrete Mix
Content: Achieving the stylish mid-century modern aesthetic doesn’t have to break the bank.
By utilizing Quikrete 5000 Concrete Mix, you can create a custom planter that exudes mid-century modern vibes at a fraction of the cost. With a little bit of woodworking skill or by following an alternative approach, DIY enthusiasts can dive right into this project using 2x4s, 2- and 5-gallon buckets, and a few additional supplies.
Begin by pouring the concrete mix into the 5-gallon bucket and placing the 2-gallon bucket inside.
To ensure the smaller bucket stays in place and doesn’t float, add weighted objects. Allow the concrete planter to cure for two to three days.
While the concrete is hardening, construct the wood base. Once both components are completed, securely attach them together using a strong adhesive.
The versatility of this planter allows it to seamlessly complement various types of decor, from modern to traditional. Furthermore, its durability ensures that it will continue to look great for years to come, whether displayed on your porch or patio.
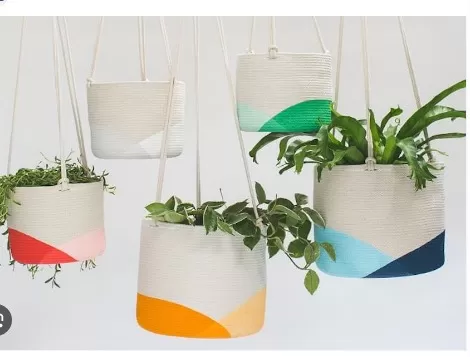
DIY Hanging Planter: Combine Industrial and Natural Elements with Quikrete\’s Sand/Topping Mix

Elevate your indoor or outdoor space with a stylish hanging planter crafted using Quikrete’s Sand/Topping Mix and Concrete Acrylic Fortifier.
This DIY project strikes the perfect balance between industrial and natural decor, resulting in a modern and boho-inspired look.
To begin, create a mold using cardboard to shape the planter.
Pour the Sand/Topping Mix combined with Concrete Acrylic Fortifier into the mold and allow it to cure. Once the mixture has dried and hardened, carefully remove the cardboard to reveal the planter’s unique shape.
Next, take two 5-foot pieces of rope and fold them in half.
Thread the folded ends of the rope through the corner holes of the planter and tie a secure base knot beneath the concrete. Finally, insert a potted plant into the center of the planter and hang it up to showcase your greenery.
This DIY hanging planter adds a touch of natural beauty to any space, whether it’s indoors or outdoors.
Its combination of industrial materials and organic design creates a visually striking piece that is sure to be a focal point in your decor.
*The information is for reference only.