DIY hardwood floor Cleaner: Step-by-Step Guide. By utilizing this all-natural cleaning recipe and following the expert technique, you can effectively banish dirt and grime from your fine flooring while maintaining an eco-friendly approach. Regular cleaning and maintenance will help preserve the beauty and longevity of your floors for years to come.
Materials and Equipment for Household Cleaning: Conveniently Found on Amazon

If you’re looking to stock up on supplies for your household cleaning routine, you can find everything you need on Amazon.
Here’s a list of items and tools that will come in handy:.
Pure Castile Soap (such as Dr.
Bronner’s): You’ll need about 1 teaspoon of this gentle and versatile soap.
Water: Get 4 cups of water for your cleaning solution, and make sure to have extra for rinsing.
Essential Oil (optional): To add a pleasant scent to your cleaning solution, consider using 5 to 10 drops of your preferred essential oil.
Spray Bottle: Find a spray bottle that suits your needs to store and apply the cleaning solution effectively.
Mop with Microfiber Pad: A mop with a microfiber pad is recommended for efficient and effective cleaning.
By having these materials and tools readily available, you’ll be equipped to tackle various cleaning tasks around your home.
Step 1: Creating a Custom Cleaning Solution
To prepare a custom cleaning solution with a pleasant scent, follow these steps:.
Take a spray bottle and ensure it is clean and ready for use.
Add 1 teaspoon of pure castile soap (such as Dr.
Bronner’s) to the spray bottle. This soap is gentle yet effective for cleaning purposes.
Pour 4 cups of water into the same spray bottle.
This amount will provide you with an adequate quantity of the cleaning solution.
If you desire a light scent, consider incorporating 5 to 10 drops of essential oil of your choice.
Popular options include peppermint, orange, or lavender. The essential oil will not only provide fragrance but can also offer additional cleaning benefits.
Securely screw the top of the spray bottle to ensure it is tightly sealed.
Shake the bottle vigorously to thoroughly mix the ingredients.
This will help blend the soap, water, and essential oil, creating a well-combined cleaning solution.
Now, your customized cleaning solution is ready to be used for various cleaning tasks in your home.
Step 2: Performing a Spot Test for Floor Compatibility

Before applying the newly prepared cleaning solution to your entire floor, it is crucial to conduct a spot test to ensure compatibility and avoid any potential damage.
Follow these steps:.
Choose an inconspicuous spot on your floor, preferably under a piece of furniture or in a less noticeable area.
Apply a small amount of the cleaning solution from the spray bottle to the test spot.
Use the same concentration as you would for the rest of the floor.
Follow the application directions for the cleaning solution, making sure to distribute the solution evenly over the test spot.
Allow the solution to sit on the test spot for a few minutes, as specified by the cleaning solution’s instructions.
After the designated time has passed, rinse the test spot with water thoroughly.
You can use a clean cloth or mop to remove any residue.
Carefully inspect the test spot for any signs of damage, discoloration, or adverse reactions.
Look for changes in the flooring material, such as warping, fading, or staining.
If there is no visible damage or negative effects on the test spot, it is safe to proceed with using the cleaning solution on the rest of the floor.
However, if you notice any damage or undesirable changes, do not continue using the solution on the entire floor.
By performing a spot test, you can identify any potential issues and prevent any unintended damage to your floor.
It’s always better to be cautious and ensure the cleaning solution is safe for your specific flooring material before proceeding with a full application.
Step 3: Applying the Cleaning Solution to the Floor
When using the homemade cleaning solution on your floor, it’s important to work in small areas and apply the solution with care to avoid excessive moisture that could potentially damage the wood.
Follow these steps:.
Divide the floor into manageable sections, roughly about three square feet in size.
This will allow you to focus on one area at a time and ensure even application of the cleaning solution.
Hold the spray bottle containing the cleaning mixture at a reasonable distance from the floor.
Spritz the solution onto the designated area, making sure to distribute it evenly.
Be mindful not to spray an excessive amount of the homemade floor cleaner at once.
Too much moisture on the surface can lead to water sitting for extended periods, which can cause severe damage to the wooden boards. Excess moisture can result in swelling, cupping, warping, and even separation of the boards.
Use a mop with a microfiber pad or a soft cloth to spread and gently agitate the cleaning solution across the area you sprayed.
This will help ensure thorough cleaning without leaving excessive moisture behind.
Continue working in small sections, spritzing and cleaning the floor until you have covered the entire surface.
By working in small areas and being cautious about the amount of cleaning solution you spray, you minimize the risk of excessive moisture damage to the wood.
This approach helps maintain the integrity and appearance of your hardwood floor while effectively cleaning it.
Step 4: Working the Cleaning Solution into the Floor with a Microfiber Mop

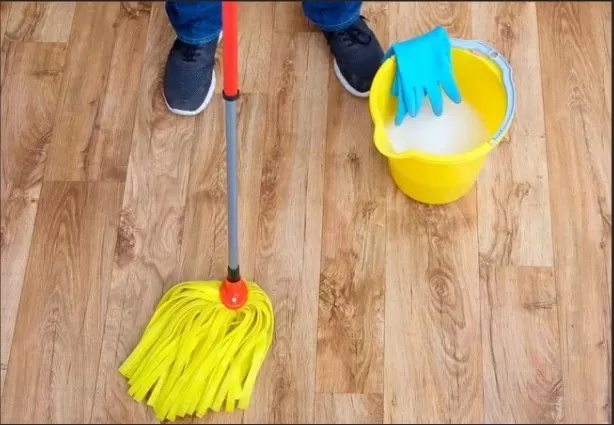
After applying the cleaning solution to the floor, it’s time to work it into the wood using a microfiber mop.
Follow these steps for effective cleaning:.
Take a dry microfiber mop with a soft pad or cloth attachment.
Ensure that the mop is clean and free from any debris or dirt.
Begin working with the mop in a back and forth motion, following the grain of the wood.
This motion helps to distribute the cleaning solution evenly and aids in loosening any dirt or grime on the surface.
As you work, be mindful to avoid using pre-dampened mop pads.
The cleaning solution you sprayed provides ample moisture for the cleaning process. Using a dry mop pad prevents excessive moisture from sitting on the floor, which can lead to damage.
Focus on small patches at a time, gradually moving across the floor.
This approach allows you to effectively clean the floor without letting the cleaning solution dry out.
If the microfiber mop becomes soiled or wet during the process, rinse it with Clean Water and squeeze out any excess water.
This ensures that you’re not spreading dirt or excess moisture across the floor.
Repeat the process of working in small patches, rinsing the mop, and squeezing out excess water until you have cleaned the entire floor.
By using a dry microfiber mop and working along the grain of the wood, you can effectively clean the floor while minimizing the risk of excessive moisture or damage.
Regularly rinsing and squeezing out excess water from the mop helps maintain its cleaning efficiency throughout the process.
*The information is for reference only.