Driveway Sealing 101: Step-by-Step Guide. If you’re looking to give your home’s exterior a quick and effective upgrade, why not start with your driveway? This weekend, take the opportunity to protect and enhance the curb appeal of your property by applying a high-quality sealer to your driveway.
Over time, driveways can be subjected to harsh weather conditions, regular vehicle traffic, and the natural wear and tear of daily use. This can lead to fading, cracking, and the accumulation of dirt and stains, detracting from the overall appearance of your home. However, by applying a driveway sealer, you can revitalize its look while providing essential protection against future damage.
How to Properly Seal and Maintain Your Driveway to Enhance Durability and Appearance

Having a well-sealed driveway not only enhances the overall appearance of your property but also ensures its longevity by protecting it from the damaging effects of gas, oil spills, cracks, and general wear and tear.
In this comprehensive guide, we will outline Step-by-Step Instructions on how to effectively seal your driveway, while also providing additional tips on maintaining its pristine condition. By following these guidelines, you can ensure a successful sealing process and enjoy a durable, attractive driveway for years to come.
Step 1: Preparing the Surface Before you begin sealing your driveway, it’s crucial to prepare the surface properly.
Start by identifying any gas and oil spills and clean them using a mild detergent. Neglecting this step may result in the stains bleeding through the sealer, compromising its effectiveness.
Additionally, remove any grass growing in cracks and trim the grass along the driveway edges with an edge trimmer.
Step 2: Repairing Cracks and Fissures Inspect your driveway for any cracks or fissures and address them before sealing.
Utilize a crack sealer or patch compound to repair these imperfections. By doing so, you create a smooth and even surface that will enable the sealer to adhere properly and provide optimal protection.
Step 3: Cleaning the Driveway To ensure a clean surface for sealing, thoroughly sweep the driveway with a broom to remove dirt and debris.
Follow this by hosing down the entire area with water. Allow the driveway to dry completely for a minimum of 24 hours before moving on to the next step.
Step 4: Applying the Sealer Open the container of asphalt sealer and stir it well, making sure to read and follow the manufacturer’s directions and precautions.
It is essential to apply the sealer in manageable sections to guarantee an even coat. Begin by pouring enough sealer onto the driveway to cover an area of approximately 4 x 4 feet.
Step 5: Choosing an Application Method You have the option to apply the sealer using either a squeegee or a broom, depending on your preference.
Whichever method you choose, work the sealer back and forth until you achieve a smooth, uniform coat. Pay special attention to feathering the edges to prevent ridges or evidence of a patchwork application process.
Step 6: Clean-Up and Drying Period After completing the sealing process, clean your tools and yourself with soap and warm water.
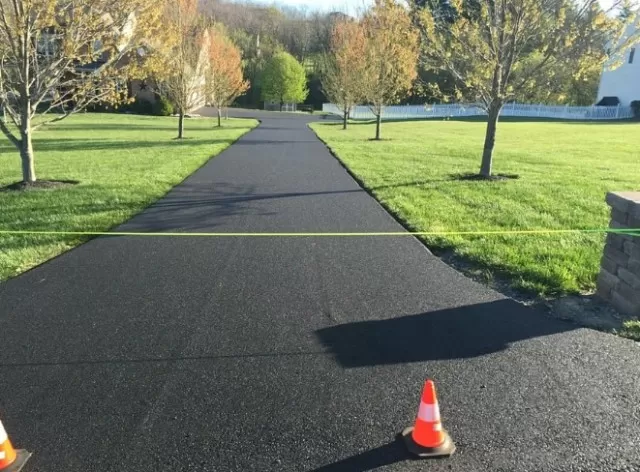
It is crucial to refrain from walking on or using the driveway for at least 24 hours to allow the sealer to fully cure. As a precaution, block the entrance to the drive by placing turned-over sealer containers, ensuring no one inadvertently steps onto the freshly sealed surface.
Additional Tips for Driveway Maintenance

Regularly inspect your driveway for any signs of damage or wear.
Address minor cracks or imperfections promptly to prevent them from worsening.
Keep the driveway clean by sweeping away debris regularly and promptly removing any oil or gas spills.
Consider resealing your driveway every few years to maintain its protective coating and extend its lifespan.
Avoid using harsh chemicals or deicers on the sealed surface, as they can degrade the sealer and damage the driveway.
When shoveling snow or using heavy equipment on the driveway, exercise caution to prevent scraping or damaging the sealed surface.
By following these guidelines and regularly maintaining your driveway, you can ensure its longevity, enhance its appearance, and protect your investment.
Remember, a well-sealed driveway not only adds value to your property but also provides a smooth and inviting entrance for years to come.
Essential Steps for a Professional Driveway Sealcoating Job

Achieving a professional-looking sealcoat on your driveway requires careful preparation and execution.
In this guide, we will outline the essential steps to ensure a successful sealcoating job that enhances the durability and aesthetic appeal of your driveway. By following these guidelines, you can confidently tackle the project and achieve a long-lasting, pristine driveway surface.
Step 1: Clearing and Cleaning Before applying the sealcoat, thoroughly clean the driveway surface.
Remove any debris, dirt, or loose materials using a broom or leaf blower. Additionally, clear away any vegetation or grass along the edges and within cracks, ensuring a clean and smooth surface for the sealcoating.
Step 2: Filling Cracks and Repairing Damage Inspect the driveway for cracks, potholes, or other damage.
Utilize a crack filler or patching compound to repair these imperfections, ensuring a level surface. Properly addressing these issues will prevent further deterioration and ensure a seamless sealcoat application.
Step 3: Power Washing To remove embedded dirt, grime, and stains, consider power washing the driveway.
This high-pressure cleaning method effectively cleans the surface and prepares it for optimal adhesion of the sealcoat. Allow the driveway to dry completely before proceeding to the next step.
Step 4: Applying a Primer (Optional) For added adhesion and longevity, consider applying a primer before the sealcoat.
This step is especially recommended for older driveways or those with extensive cracking. Follow the manufacturer’s instructions to apply the primer evenly and allow it to cure according to the recommended drying time.
Step 5: Choosing the Right Sealcoat Select a high-quality sealcoat product suitable for your specific driveway material, such as asphalt or concrete.
Consult with a local supplier or professional for expert advice on the best sealcoat product for your needs. Ensure that the sealcoat is mixed thoroughly before application.
Step 6: Applying the Sealcoat Using a sealcoating brush, squeegee, or sprayer, apply the sealcoat evenly across the entire driveway surface.
Begin from one end and work your way to the other, ensuring a consistent and uniform coverage. Take care to avoid overlapping or excessive application, as this may lead to an uneven finish.
Step 7: Allowing for Proper Curing After applying the sealcoat, allow ample time for proper curing and drying.
Follow the manufacturer’s instructions regarding the recommended curing period before allowing foot or vehicle traffic on the sealed driveway. This ensures the sealcoat can fully bond and provide the desired protection.
Step 8: Regular Maintenance To prolong the life of your sealcoating and maintain its appearance, implement a regular maintenance routine.
Periodically inspect the driveway for any signs of damage or wear and promptly address any issues that arise. Regularly clean the surface and avoid using harsh chemicals or abrasive tools that may damage the sealcoat.
*The information is for reference only.