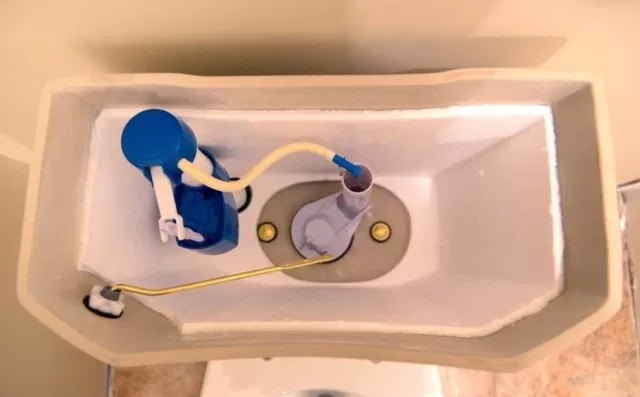
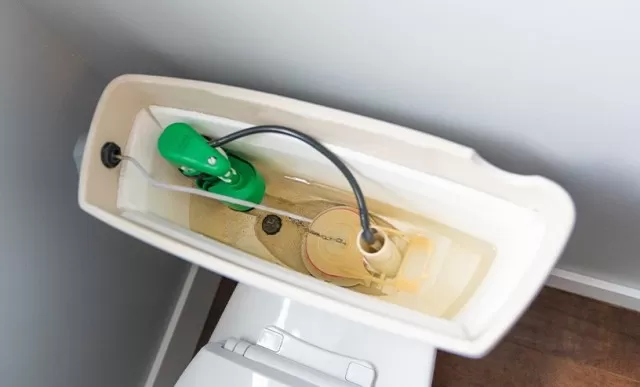
The toilet tank might not immediately come to mind when you think of cleaning, yet it plays a crucial role in maintaining a hygienic environment.
Maintaining Bathroom Hygiene: Beyond the Basics

Within your home, the bathroom stands as a space requiring consistent attention when it comes to cleaning.
While you’re likely familiar with the routine tasks of regular cleaning, such as disinfecting the toilet, wiping down surfaces, and scrubbing the floor, there’s an essential step that often goes unnoticed—the cleaning of your toilet tank. This often-overlooked component deserves its rightful place in your cleaning routine, and here’s why it matters, along with a comprehensive guide on how to tackle this task effectively.
Understanding the Importance of Toilet Tank Cleaning.
The toilet tank might not immediately come to mind when you think of cleaning, yet it plays a crucial role in maintaining a hygienic environment.
Left unchecked, the toilet tank can serve as a breeding ground for bacteria and fungi. The presence of toilet water can encourage the growth of mold and mildew, especially if the toilet isn’t flushed regularly.
Pay attention to the waterline as well; a reddish ring can indicate the presence of Serratia marcescens, a bacteria associated with potential health issues.
Why and How Often to Clean Your Toilet Tank

Fortunately, cleaning your toilet tank doesn’t need to be a frequent task.
In fact, you’ll likely only need to address this task twice a year. This means it won’t add to the list of weekly or even monthly cleaning duties.
However, there are certain exceptions to this general guideline. If your toilet relies on water from a region with “hard water,” characterized by higher levels of dissolved calcium and magnesium, it’s advisable to clean the tank every quarter.
Additionally, if your bathroom tends to be warm and humid, increasing the frequency to once a month is a prudent approach to thwart mold growth.
Taking Action: Cleaning Your Toilet Tank When you’re ready to tackle the task of cleaning your toilet tank, follow these steps for effective results:.
Start by turning off the water supply to the toilet.
Flush the toilet to empty the tank of water. Use a cleaning solution, such as a mixture of vinegar and water, to scrub the interior of the tank.
Pay attention to corners and crevices. For stubborn stains or buildup, you can use a toilet tank cleaner or a soft brush.
Rinse the tank thoroughly and wipe it down to remove any residue. Once the tank is clean, turn the water supply back on and allow the tank to fill.
Finish by performing a regular cleaning of the exterior surfaces of the toilet, sink, and other bathroom elements. By incorporating toilet tank cleaning into your routine, you contribute to a cleaner and healthier bathroom environment.
This often-overlooked step ensures that your cleaning efforts are comprehensive and that your bathroom remains a place of comfort and well-being for you and your household.
How to Clean a Toilet Tank

Maintaining a pristine and hygienic bathroom involves more than just the visible surfaces; it also extends to areas that might not receive regular attention, such as the toilet tank.
Fortunately, this task doesn’t require an arsenal of specialized products. In fact, you likely have the necessary items in your household already.
Here’s a comprehensive guide on how to clean your toilet tank, along with tips to ensure lasting cleanliness.
Gather Your Supplies: Before you begin, gather the few supplies you’ll need for this task.
Vinegar, a versatile household item, takes center stage in this cleaning process. Additionally, have a sponge or scrub brush and disinfectant on hand.
Assess the Tank: Start by removing the lid of the toilet tank and examining its interior.
Look for mineral buildup or any accumulated debris that might have formed over time.
Vinegar Soak: To address any mineral deposits or residue, pour about four cups of vinegar directly into the tank.
Allow the vinegar to soak for up to an hour, effectively loosening the buildup.
Stop Water Flow: Locate the water valve, usually situated on the wall Behind the Toilet, and turn it off to halt the flow of water into the tank.
Drain the Tank: Flush the toilet repeatedly until the tank is completely drained of water.
This step provides easy access to the interior of the tank for Thorough Cleaning.
Scrub Away: Armed with a sponge or scrub brush and a disinfectant, scrub away the muck and residue that have been loosened by the vinegar soak.
Pay attention to corners and hard-to-reach areas.
Optional Monthly Maintenance: To prolong the cleanliness of your toilet tank, consider a monthly maintenance routine.
Add a cup or two of vinegar to the tank, allowing it to soak overnight. The next morning, flush the toilet to rinse away the vinegar and any accumulated debris.
Restore Water Flow: With the tank now clean and residue-free, turn the water valve back on to restore the flow of water.
Replace the Lid: Finally, place the lid back onto the tank, leaving your toilet looking fresh and well-maintained.
Taking the time to properly clean your toilet tank is an additional step in your bathroom cleaning regimen, but its impact on overall cleanliness is significant.
By incorporating this practice into your routine, you ensure that your bathroom remains a space of comfort and hygiene for both you and your household. This simple yet effective process contributes to a well-rounded approach to home maintenance.
*The information is for reference only.