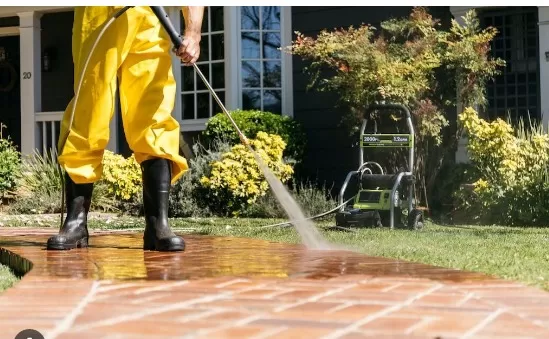
House Pressure Washing: Step-by-Step Guide. Achieving a pristine and immaculate home exterior may require some preparation and knowledge, but the rewards are undoubtedly worth the investment. By dedicating time and effort to proper cleaning techniques and understanding the specific needs of your home’s exterior surfaces, you can transform its appearance and enhance its curb appeal.
Whether it’s washing windows, power washing siding, or revitalizing outdoor surfaces, taking the necessary steps to maintain a spotless home exterior will leave you with a sense of pride and create a welcoming environment for both residents and visitors alike.
Revitalizing Your Home’s Exterior: A Comprehensive Guide to Pressure Washing

Introduction: Pressure washing is a highly effective method for restoring the cleanliness and beauty of your home’s exterior.
By following the steps outlined below, you’ll be able to protect your surroundings, prepare the necessary solutions, operate the pressure washer correctly, and thoroughly clean your entire house. Get ready to witness the transformative power of pressure washing.
Step 1: Shield and Secure: Protecting Surrounding Greenery and Entrances
In addition to protecting your greenery, it is important to ensure that your windows and doors are tightly sealed to prevent any water infiltration during the pressure washing process. By taking these precautions, you can minimize the risk of damage to your plants and potential Water Damage inside your home.
Begin by covering your shrubbery, plants, gardens, and lawn with drop cloths or plastic sheeting. This will create a barrier between the high-pressure water and your delicate vegetation, shielding them from the forceful spray. Secure the coverings firmly with rocks, stakes, or any heavy objects to prevent them from being displaced by wind or water pressure.
Next, focus on sealing your windows and doors. Close them tightly to create a snug fit, reducing the likelihood of water seeping inside. If you have doors or windows that are prone to leaking, take additional measures to reinforce their protection. Use duct tape to seal any gaps or cracks, or cover them with plastic sheeting for an extra layer of defense against water intrusion.
Ensuring a watertight seal around your windows and doors is crucial to prevent any water from entering your home. By taking the time to secure these potential entry points, you can maintain the integrity of your interior spaces and minimize the need for extensive cleanup or repairs.
Remember to prioritize safety throughout the process. If you’re unsure about properly sealing your windows and doors or protecting your greenery, consult with a professional or seek advice from experts in the field. Taking these precautions will provide peace of mind and allow you to focus on the task at hand—achieving a clean and rejuvenated exterior for your home.
Step 2: Prepare the Cleaning Solution: Mixing the Solution and Fitting the Pressure Washer

In a 5-gallon bucket, follow the manufacturer’s instructions to mix the mildewcide with water.
Add bleach at a ratio of one part bleach to nine parts of the mildewcide-detergent solution.
Pour the prepared solution into the garden sprayer. Set up the pressure washer, attaching the garden hose to the hose mount on the back of the machine.
Choose the appropriate nozzle based on the surface and desired pressure, using a 15-degree nozzle for harder surfaces and a 25- or 30-degree nozzle for softer surfaces. If necessary, attach the extension wand to reach higher areas, ensuring proper Safety Precautions when using scaffolding.
Step 3: Conduct a Pressure Wash Test and Begin Cleaning
Put on safety goggles and test the pressure washer’s cleaning power on a small, scrubbed area.
Maintain a distance of 3 feet between the nozzle and the wall, adjusting as needed for optimal cleaning power without causing damage.
Start at the top of the scrubbed section and work your way down, power washing overhangs and gutters first. Angle the sprayer down at a 45-degree angle to prevent water from getting under the siding.
Step 4: Repeat and Complete: Power Washing the Entire House

Move on to the next section of siding and repeat Steps 4 through 6 until you have power washed the entire home.
Continuously adjust the distance from the siding to ensure effective cleaning without causing damage.
Work from top to bottom, systematically cleaning each section. .
*The information is for reference only.