Keurig Coffee Maker Descaling: Step-by-Step Guide. If you’ve noticed an off taste in your morning cup of coffee, it could be due to mineral deposits that have accumulated inside your Keurig machine. Cleaning out these deposits can not only enhance the flavor of your coffee but also extend the lifespan of your beloved machine.
There are various methods to remove mineral buildup, such as descaling with a vinegar solution or using specialized descaling products. Regular maintenance and cleaning of your Keurig will help ensure that each cup of coffee tastes as delicious as possible, providing you with a satisfying and enjoyable brewing experience.
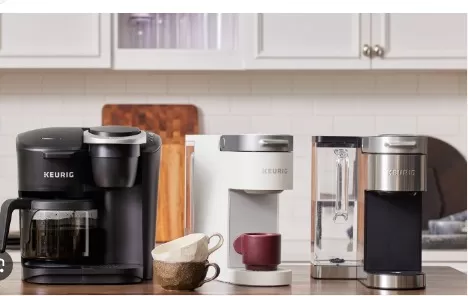
A Comparison of Keurig and Drip Coffee Makers: Features and Cleaning Process

Keurig and drip coffee makers have distinct differences in their brewing methods, making them stand out from each other.
The primary disparity lies in the utilization of coffee pods in Keurig machines, as opposed to the traditional coffee filter and ground coffee used in drip coffee makers. Nevertheless, when it comes to maintenance, both types require regular cleaning and descaling to preserve the quality of the coffee they produce.
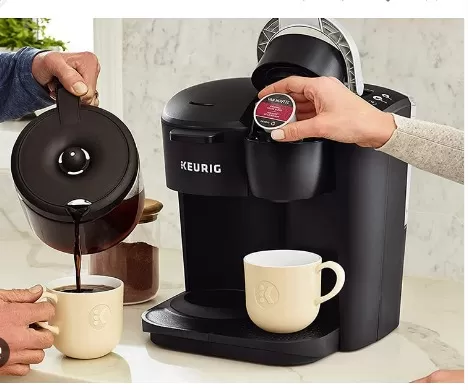
Keurig machines, with their unique pod-based operation, offer convenience and speed.
Instead of manually measuring and pouring ground coffee, users simply insert a coffee pod into the machine. This single-serving pod contains pre-measured ground coffee, providing a hassle-free brewing experience.
In contrast, drip coffee makers necessitate the use of a standard coffee filter, where users manually add their desired amount of ground coffee.
Despite the different brewing processes, the cleaning requirements for both Keurig and drip coffee makers are relatively similar.
Over time, mineral deposits and coffee residue can accumulate, affecting the taste of the coffee. To counter this, both types of machines incorporate cleaning cycles, ensuring ease of use and convenience for the users.
Regular cleaning of Keurig machines involves removing and cleaning various components, such as the water reservoir, drip tray, and K-cup holder.
Descaling, which involves removing mineral buildup, is also necessary to maintain optimal performance. Similarly, drip coffee makers require routine cleaning, including washing the carafe, removing and cleaning the filter basket, and descaling if necessary.
In conclusion, the divergence between Keurig and drip coffee makers lies in their brewing methods, with Keurig machines utilizing coffee pods for a quick and effortless experience.
However, when it comes to maintaining these machines, both types require regular cleaning and descaling. By following the recommended cleaning cycles, users can ensure that their Keurig or drip coffee maker consistently produces delicious coffee.
Descaling Your Keurig Machine: Step-by-Step Guide for Effective Cleaning

Before You Begin: Knowing when your Keurig machine needs descaling is important.
While some newer models have indicator lights for limescale buildup, older models may not. Look out for signs such as slower coffee dispensing, chalky white residue in the machine’s interior, or dripping after coffee is dispensed.
Once you notice these signs, it’s time to descale your Keurig. Here’s a step-by-step guide to help you through the process.
Tools & Materials:.
Soft cleaning cloth
Keurig descaling solution or distilled white vinegar
Mug
Pitcher
STEP 1: Cut the power to the Keurig and clean detachable parts.
Start by disabling the auto-off capability if your Keurig model has it enabled. Then, power off and unplug the machine.
Once it’s cool, remove detachable parts like the water reservoir, lid, water filter, drip tray, and brewing pod holder. Empty any remaining water from the reservoir and discard used coffee grounds and pods.
Use a damp, non-abrasive cloth to wipe down the interior and exterior of the water reservoir and other parts. Make sure to dry them before reinstalling, except for the water filter.
Remember to avoid submerging any electrical components in water.
STEP 2: Fill the reservoir with a descaling solution.
Choose between a commercial descaling solution or a vinegar-based solution to remove limescale. If using a Keurig-branded descaling solution, mix equal parts of the solution and water to fill the reservoir.
The amount will depend on your brewer’s size. Alternatively, for a DIY solution, fill the reservoir with equal parts water and distilled white vinegar.
STEP 3: Run a brewing cycle with the cleaning solution.
Plug in the machine and place a large mug on the drip tray. Lift and lower the brewer handle without inserting a beverage pod.
If the reservoir is non-detachable, wait for a few seconds for the descaling solution to drain into the appliance. Select the largest brew size and press the Brew button to start the cleaning cycle.
Discard the hot water in the sink. Repeat this step until the appliance prompts you to refill the reservoir or until no visible scale remains.
Power off the brewer and wait for 30 minutes before emptying both the mug and water reservoir.
STEP 4: Flush the reservoir with fresh water.
Reinstall the water reservoir and fill it with fresh, filtered water from a clean pitcher or glass, ensuring not to exceed the maximum fill line. Power on the brewer and place the mug on the drip tray.
Select the largest brew size and start another cycle to rinse away any residual buildup or vinegar odor. Repeat the fresh water rinse cycle at least three more times, or more if heavily scaled.
Refill the reservoir with fresh water as needed for each cycle. Thorough rinsing is essential to remove any lingering flavors of vinegar or descaling solution.
STEP 5: Rinse and dry the reservoir.
Once you’ve completed the rinsing process, power off the brewer and discard the residual water from the water reservoir. Rinse the reservoir with filtered water and allow it to air-dry before reinstalling it in the brewer.
Following these steps will help you effectively descale your Keurig machine, ensuring it continues to deliver great-tasting coffee.
Maintaining a Clean Keurig Coffee Maker: Tips to Reduce Descaling Frequency

Content: Keeping your Keurig coffee maker clean is essential for optimal performance and less frequent descaling.
Here are some helpful tips to maintain a clean machine and reduce the need for descaling:.
Use filtered water: If you live in an area with hard water, consider using filtered water to fill your Keurig machine.
This helps reduce limescale buildup and prolongs the time between descaling sessions.
Only use clean cold water: It’s crucial to only use clean, cold water in the water reservoir.
Avoid adding any other liquids, such as milk or flavored syrups, as they can leave residue and clog the machine.
Regularly clean the water reservoir: Take the time to wash the inside of the water reservoir regularly.
Use mild Dish Soap and a soft cloth or sponge to remove any residue or buildup. Rinse it thoroughly to ensure there are no soap remnants.
Avoid stagnant water: Try not to leave water inside the reservoir for extended periods.
It’s best to refresh the water every 3 or 4 days to prevent any bacterial growth or potential off-flavors in your brewed coffee.
By following these simple tips, you can keep your Keurig coffee maker cleaner for longer periods, reducing the frequency of descaling and ensuring that you enjoy consistently delicious cups of coffee.
Final Thoughts
Maintaining a clean Keurig machine is essential for optimal coffee flavor and overall performance.
Regular cleaning, including descaling every 3 to 6 months, is crucial to prevent limescale buildup and ensure a high-quality taste in your favorite hot beverages. If you reside in an area with hard water, using bottled or filtered water can further enhance the taste of your brewed coffee. By prioritizing cleanliness and proper maintenance, you can continue to enjoy delightful cups of coffee from your Keurig machine.
*The information is for reference only.