Take control of the clutter in your kitchen and restore order with our comprehensive five-step guide to organizing your kitchen pantry.
Wave farewell to chaotic arrangements of cereal boxes and towering piles of canned goods.
With a little planning and effort, you can transform your pantry into a well-organized space that will make meal preparation a breeze and bring a sense of calm to your kitchen.
How many types of kitchen pantry?

Several types of kitchen pantries can be found in homes.
Here are a few common ones:
Walk-in Kitchen Pantry: This is a larger pantry space that allows you to walk into it.
It typically has ample storage shelves and cabinets, providing plenty of space for storing a variety of food items, kitchen appliances, and other pantry essentials.
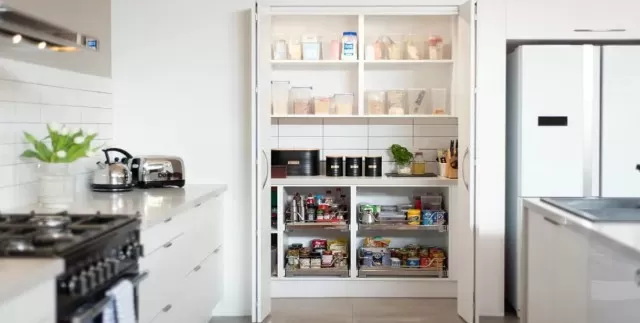
Reach-in Kitchen Pantry: A reach-in pantry is a smaller pantry that is usually integrated into the kitchen cabinets.
It consists of shelves or pull-out drawers that allow you to easily access stored items. This type of pantry is commonly found in smaller kitchens or apartments where space is limited.
Butler’s Kitchen Pantry: A butler’s pantry is a separate room located between the kitchen and dining area.
It serves as a transitional space for preparing and serving meals. Butler’s pantries often have countertops, cabinets, and additional storage for tableware, serving dishes, and other dining essentials.
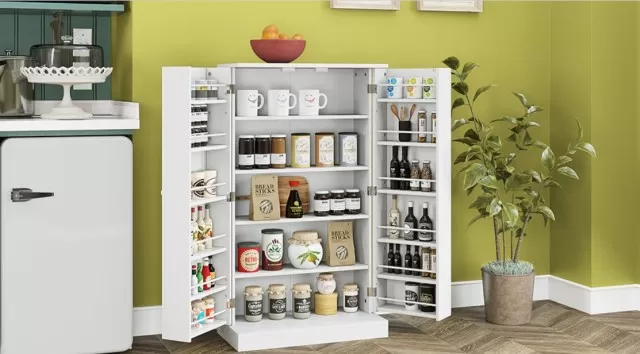
Freestanding Kitchen Pantry Cabinet: This type of pantry is a standalone cabinet or cupboard designed specifically for pantry storage.
It can be placed in any convenient location in the kitchen or dining area and provides storage space for food items, kitchen supplies, and more.
Built-in Kitchen Pantry: A built-in pantry is a custom-designed pantry that is integrated into the kitchen layout.
It can be built into existing cabinetry or walls, offering a seamless and organized storage solution. Built-in pantries are tailored to the specific needs and preferences of the homeowner.
10-Step Kitchen Pantry Organization

By following these steps and utilizing helpful organizing tools, you can create a well-organized and functional pantry that makes it easy to find and access your items.
Empty and Clean the Kitchen Pantry.
To start fresh, remove everything from your pantry, including the shelves and brackets if possible.
Enlist the help of your kids to move everything onto a nearby countertop or table. Take this opportunity to give the shelves, walls, and floor a thorough cleaning to remove dust, cobwebs, and any food debris.
Consider applying a fresh coat of paint and adding liner paper to the shelves for a refreshed look. Also, take a walk through your home to identify other areas where you store food and consider bringing some items into the pantry.
Sort and Organize.
Begin by getting rid of expired, stale, or unappetizing items.
Dispose of packaging that is open or unsealed, as these items tend to lose freshness quickly. Group the remaining items into categories that make sense for your family’s needs.
You can sort snacks into “sweet” and “salty” piles or keep sandwich-making supplies together, for example. Writing down the categories on index cards or sticky notes will help you stay organized.
Prioritize items with use-by dates by arranging them in order, and placing the oldest ones at the front or on top.
Plan and Arrange.
Take a few minutes to measure your pantry and sketch a layout on paper.
Reserve the top shelf for lightweight and infrequently used items like party supplies and serving pieces. Space the shelves based on what they will hold, keeping a distance of 12-18 inches between each.
Place garbage and recycling bins on the floor, transfer pet food to a lidded canister and use a foldable crate to store bottles of soda or water. Create specialty zones, such as a baking section, at eye level.
Maximize the pantry door by adding a whiteboard, bottle opener, or corkboard for coupons. Designate midrange shelves for meal-making supplies and lower areas for easily accessible items like snacks and breakfast items.
Utilize Storage Containers.
Investing in store-bought organizing solutions can greatly enhance the functionality of your pantry.
Use translucent boxes to group party supplies or paper goods, making it easy to see and retrieve what you need. Risers are great for elevating cans and keeping them organized in rows by type.
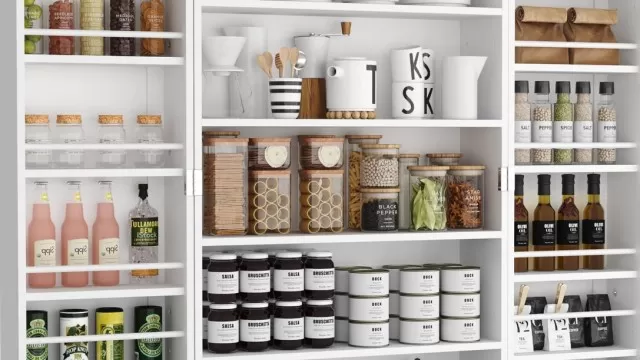
Opt for airtight canisters to store dry goods like flour, sugar, pasta, rice, beans, and nuts. Look for containers with wide mouths and flat lids for easy pouring, scooping, and stacking.
Lazy Susans are useful for storing bottles and jars, allowing you to access items at the back with a simple spin.
Labeling.
Implementing clear labels will help maintain the organization of your pantry.
Use marker and adhesive labels to identify the contents of clear containers, including the date. Consider attaching a clear pocket to the containers to hold cooking instructions.
For solid bins or baskets, use tags that can be easily removed or repositioned as the contents change. Hang the tags at eye level for easy visibility, especially for boxes placed on higher shelves.

Assess and Empty.
Begin by assessing the current state of your pantry.
Take stock of the items you have and evaluate what needs to be discarded or donated. Clear out your pantry completely, removing all items from the shelves.
This blank canvas will allow you to start fresh and create an efficient and functional layout.
Categorize and Sort.
Divide your pantry items into logical categories that align with your cooking habits and preferences.
Create groupings for different types of food, such as grains, snacks, canned goods, spices, and baking supplies. As you sort through your items, discard any expired or unused products.
This step will not only make it easier to find what you need but also ensure that you only keep items that are still fresh and relevant to your culinary endeavors.
Optimize Storage Space.
Make the most of your pantry’s storage space by utilizing various organizing tools and techniques.
Invest in sturdy and adjustable shelving units, stackable containers, and clear bins that will help maximize vertical and horizontal space. Consider using wire racks or risers to create additional levels for canned goods or jars.
Utilize hooks or door-mounted organizers for hanging utensils or storing smaller items. By optimizing your storage space, you can create a system that keeps everything accessible and visually appealing.
Implement a Labeling System.
Maintain order and ensure easy identification of items by implementing a labeling system.
Label each container, bin, or shelf with its designated category or contents. You can use adhesive labels, chalkboard stickers, or a labeling machine for a polished and uniform look.
Clear and consistent labeling will help you quickly locate items and maintain the organization of your kitchen pantry over time.
Maintain and Refresh.
Organizing your kitchen pantry is not a one-time task but an ongoing process.
Make it a habit to regularly review and refresh the contents of your pantry. Check expiration dates, discard any expired products, and adjust the organization as needed.
Regularly cleaning the pantry shelves and wiping down containers will help maintain a clean and inviting space. By staying proactive in your pantry maintenance, you can ensure that your efforts to organize will continue to pay off in the long run.
By following this guide, you can transform your pantry into a well-organized and efficient space that brings a sense of calm and functionality to your kitchen.
Enjoy the benefits of easy access to your ingredients, reduced food waste, and a visually appealing pantry that will make cooking and meal planning a more enjoyable experience.
*The information is for reference only.