Plunger Mastery: Proper Techniques for Effective Use. Ensure efficient and accurate clog removal by adhering to the following guidelines for selecting and utilizing a plunger.
Plunger Types: Understanding the Different Styles

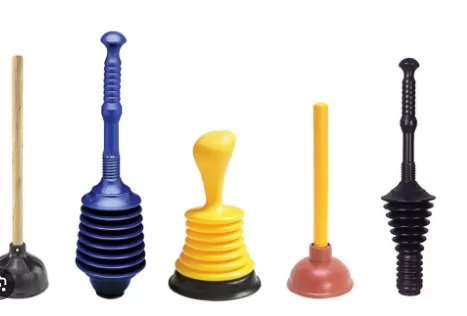
When it comes to plungers, there are a variety of options available at your local big-box or home improvement store.
However, the two most common styles that you should have on hand are the cup plunger and the flange plunger. Familiarizing yourself with each type will help you be prepared for any plumbing emergency that may arise.
Cup plunger: The cup plunger is the one that often comes to mind when we think of this tool.
It features a simple wooden handle attached to a rubber cup, which gives it its name. This design is particularly effective for flat-surface drains such as those found in sinks and bathtubs.
It works well for unclogging sinks, showers, and bathtubs. However, it may not create an airtight seal in the curved drain of a toilet, making it less suitable for that specific task.
Flange plunger: When dealing with a toilet clog, a flange plunger is the ideal choice.
This type of plunger has an additional ring of rubber, known as the flange, encircling the cup. The flange is designed to be inserted into the toilet drain, effectively sealing in the air and increasing suction power.
In a pinch, you can fold the rubber ring of the flange plunger back into the bell of the plunger and use it to unclog a tub or Sink Drain. However, it’s important to note that a dedicated cup plunger will generally be more effective for those scenarios.
By having both a cup plunger and a flange plunger at home, you can be prepared for various plumbing issues that may arise.
Understanding the strengths and limitations of each type will allow you to tackle clogs with confidence, knowing you have the right tool for the job.
How to Plunge a Sink, Shower, or Tub: Clearing Clogs with a Plunger

To effectively clear clogs in sinks, showers, or tubs, follow these steps using a plunger.
It’s important to take necessary precautions and avoid using drain-clearing chemicals simultaneously to prevent any hazards.
Prepare the area: Before you begin, seal off any nearby drains in sinks or tubs to ensure better results.
Additionally, for improved suction power, apply a small amount of petroleum jelly to the rim of the plunger cup to create a tighter seal.
Cover the overflow drain: If your sink or tub has an overflow drain, cover it with a wet towel.
This prevents air from escaping and helps maintain the suction power during plunging.
Position the plunger: Place the rubber bell of the plunger securely over the drain of the sink or shower, ensuring a tight seal.
Submerge the bell completely in the standing water. If there is excessive water, remove some of it with a nearby bucket to minimize any potential mess.
Begin plunging: Start by pushing down on the plunger handle gently, forcing the air out of the cup.
Then, with quick and deliberate thrusts, continue plunging, directing the pressure down the drain. It’s essential to maintain the seal and avoid lifting the plunger enough to break it.
Repeat this action for approximately 20 seconds.
Check for clearance: When you pull the plunger away, the clog should be cleared.
Test the drain by running water to ensure the blockage has been successfully removed.
Important note: If you choose to use drain-clearing chemicals, avoid using a plunger simultaneously.
Combining these methods can lead to splashing of harsh and toxic substances, which can cause burns or, if they come into contact with your eyes, pose a risk of blindness.
By following these steps and using a plunger correctly, you can effectively clear common clogs in sinks, showers, or tubs, restoring proper drainage without the need for chemicals or professional assistance.
Plunging a Toilet: Effective Steps to Clear a Clog

If you find yourself dealing with a clogged toilet that is on the verge of overflowing, avoid repeatedly flushing and instead follow these steps to effectively clear the blockage:.
Give it time: Allow approximately 10 minutes for the water level in the toilet bowl to naturally drop.
During this time, locate the water supply hose on the wall Behind the Toilet and turn the handle clockwise to close the valve. This will prevent any potential overflow.
Adjust the water level: Assess the water level in the toilet bowl.
Ideally, it should be about halfway up the bowl. If the bowl is too full, carefully transfer some of the excess water into a bucket.
On the other hand, if the bowl is almost empty, add enough water to fill it halfway. Maintaining an appropriate water level will enhance the suction and increase the chances of a successful plunge.
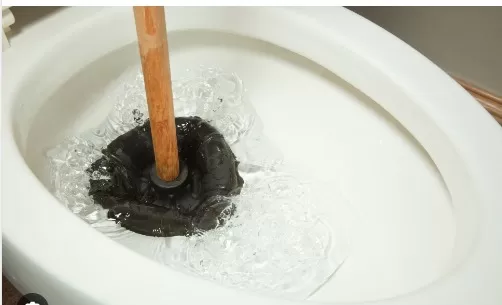
Use a flange-style plunger: Opt for a flange-style plunger for optimal suction.
Ensure that the flange (the additional rubber ring) is extended. Submerge the plunger in the water, making sure that the top of the bell is covered.
Insert the rubber ring directly into the drain opening to create a tight seal. With the plunger in place, push and pull on the handle with quick and forceful thrusts for about 20 seconds.
Maintain the seal and avoid lifting the plunger out of the drain, as this could break the seal. In most cases, this plunging action is sufficient to clear the clog.
Additional measures: If the toilet remains clogged despite your attempts with the plunger, it may be necessary to move on to other methods.
Consider using a drain snake (also known as a toilet auger) to manually break up the clog. Alternatively, if the issue persists or if you suspect a more significant underlying problem, it might be best to contact a plumber for professional assistance and diagnosis.
By following these steps and using a flange-style plunger correctly, you can effectively clear most toilet clogs.
However, if the problem persists or seems more serious, it’s advisable to seek professional help to ensure a thorough resolution.
What to Do When a Plunger Doesn\’t Work: Alternative Methods for Clearing Clogs
If you’ve attempted to clear a clog using a plunger but the toilet won’t flush or the shower still won’t drain, don’t worry.
There are other effective methods you can try to tackle the stubborn clog:.
Hot water and Dish Soap: Heat a gallon of water on the stove until it’s just below boiling point (around 200 degrees Fahrenheit).
While the water heats, add some dish soap to the toilet bowl. Carefully pour the hot water into the toilet bowl and let the mixture sit for about 15 minutes.
The heat and soap will work together to break up the clog. Repeat this process as needed.
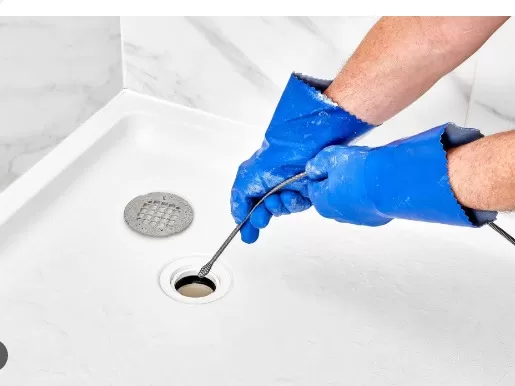
Drain snake: For sinks and shower drains, soap scum and hair clogs can often be removed using a drain snake.
Put on gloves and insert the snake into the drain as far as possible, rotating and shifting it as you go. Pull up the snake, along with any accumulated material, clean it off, and repeat the process until the clog clears.
If you have a slow-draining toilet, use a toilet auger instead. Place an empty bucket next to the toilet, put on gloves, and insert the auger cable into the toilet drain.
Rotate the auger’s crank to extend the cable until it reaches the obstruction. Then, work the crank in the opposite direction to pull out the blockage.
Dispose of the removed material in the bucket and repeat the process until the toilet flushes freely again.
baking soda and vinegar: Create a mixture of 1 cup of baking soda and 2 cups of vinegar.
Pour this mixture into the toilet bowl and let it react in the water for 20 to 30 minutes. Afterward, flush the toilet to see if the clog has dissolved.
Be cautious to prevent overflow.
Call a plumber: If you’ve followed the above steps and none of the alternative techniques have resolved the clog, it’s time to seek professional help.
Sometimes, the clog may be located too far down the plumbing system or may be particularly severe, requiring the expertise of a plumber. It’s better to call a professional rather than risk causing damage to your pipes or fixtures.
By utilizing these alternative methods and, if necessary, contacting a plumber, you can address persistent clogs that are resistant to plunging.
Remember to exercise caution and prioritize your safety while attempting any DIY solutions.
*The information is for reference only.