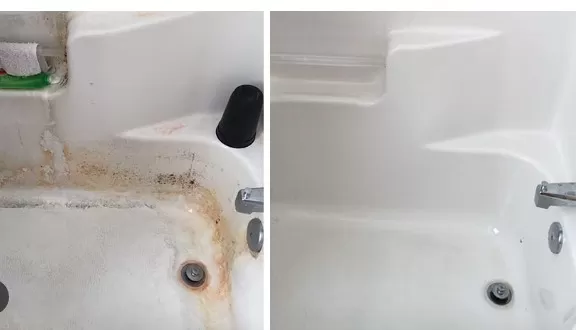
0Proper Shower Cleaning Techniques: Step-by-Step Guide. While you step out of the shower feeling refreshed and clean, the same may not always be true for the shower itself. Soap scum, mold, and mildew can accumulate over time, making your shower look dull and unappealing.
To restore its sparkle, follow these tips and effectively eliminate these common issues. Start by using a mixture of vinegar and water or a mild cleaning solution to remove soap scum. Scrub the surfaces with a non-abrasive sponge or brush, paying attention to corners and grout lines. For mold and mildew, apply a bleach-based cleaner or a solution of hydrogen peroxide and water. Let it sit for a while and then scrub away the mold with a brush or sponge. It’s also essential to keep the shower well-ventilated and dry after each use to prevent the growth of mold and mildew in the future. By implementing these cleaning techniques and practicing regular maintenance, you can restore your shower’s cleanliness and keep it glistening for a long time.
Important Precautions for Shower Cleaning
Before you embark on cleaning your shower, it’s essential to keep a few important points in mind.
These precautions will help ensure your safety and the effectiveness of the cleaning process:.
Work in a well-ventilated area: When cleaning a shower, it’s important to have proper ventilation.
Open windows or turn on an exhaust fan to promote air circulation and minimize exposure to chemical cleaning products.
Turn on the bathroom fan: Utilizing the bathroom fan during the cleaning process helps remove any fumes or odors, maintaining better Air Quality in the space.
Read product labels: Before using any cleaning products, carefully read and follow the instructions and warnings on their labels.
This will help ensure that the products are safe to use on your specific type of tile or grout, preventing any potential damage.
Test new products: Prior to applying a new cleaning product to the entire shower, perform a patch test in an inconspicuous area.
This allows you to verify its compatibility and effectiveness without risking damage to the entire surface.
Start with mild solutions: Begin the cleaning process with mild cleaning solutions or homemade remedies.
This is particularly important if you’re uncertain about the sensitivity of your tile or grout. If mild solutions prove insufficient, you can gradually escalate to stronger cleaning products if necessary.
Avoid mixing cleaning products: Never mix different cleaning products, as this can lead to the release of toxic fumes or create other dangerous chemical reactions.
Follow the instructions provided by each individual cleaning product and use them separately.
By adhering to these precautions, you can ensure a safe and effective cleaning experience for your shower while maintaining a healthy environment in your bathroom.
Cleaning a Tile Shower: Step-by-Step Guide

Maintaining a clean and sparkling tile shower requires regular attention.
Follow these steps to effectively clean your tile shower and keep it looking bright:.
Supplies needed:.
Plastic mesh non-scratch scrubber
White vinegar
Spray bottle
Rubber gloves
Tile cleaner
Grout brush
Oxygenated bleach or chlorine bleach
Towel
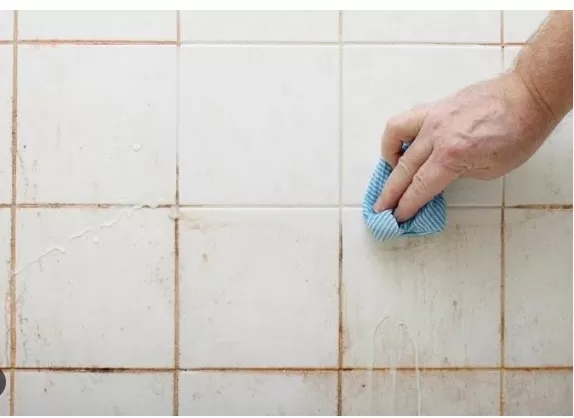
Step 1: Pre-scrub soap scum and stains:.
Start by running the shower as hot as possible for about 5 minutes.
This helps soften soap scum and debris, making it easier to clean. Turn off the water and use a dry, non-scratch plastic scrubber to give your shower a preliminary scrub.
This prepares the surface for better penetration of the cleaning product. Step 2: Spray and soak tile and grout:.
Put on rubber gloves and pretreat the tile and grout using a tile cleaner or a natural cleaning solution.
If there is minimal soap scum, a mixture of equal parts white vinegar and warm water in a spray bottle can be effective. However, ensure that your tile can withstand acidic cleaners before using vinegar.
Generously coat all shower surfaces with the cleaning solution and let it sit for about 5 minutes. This allows the cleaner to penetrate and loosen grime and soap scum.
Use a plastic scouring pad to scrub the tile surface and a grout brush to clean and brighten the grout lines. Step 3: For stubborn stains, rinse and apply stronger cleaning agent:.
If the initial cleaning solution doesn’t remove all the grime, thoroughly rinse the entire shower to remove any residue before proceeding.
For tough stains and heavy grime, create a paste using oxygenated bleach following the manufacturer’s instructions. Apply the paste and let it sit for 5 to 10 minutes before rinsing with Clean Water.
In the case of extremely dirty grout, carefully and sparingly apply chlorine bleach following the manufacturer’s instructions. Rinse thoroughly after 5 minutes.
Step 4: Rinse and dry:.
Rinse all shower surfaces with hot water to remove any remaining grime, soap, or cleaning agent.
Use a microfiber towel to dry off the shower door and tiles. This helps remove excess moisture and slows the growth of mold and mildew.
Run the bathroom fan for a few minutes to eliminate any remaining humidity. By following these steps, you can effectively clean your tile shower, leaving it fresh, sanitized, and looking its best.
Remember to perform regular maintenance to keep your shower in optimal condition.
Cleaning a Fiberglass Shower: Step-by-Step Guide

Fiberglass showers require regular cleaning and proper maintenance to keep them in good condition.
Follow these steps to effectively clean your fiberglass shower:.
Supplies needed:.
White vinegar
Spray bottle
Non-abrasive sponge
Dishwashing liquid
baking soda
Microfiber towel
Step 1: Prepping the shower:.
Start by running the shower at its hottest temperature for 2 to 5 minutes.
The heat and steam help soften dirt and make it easier to clean. Use a fan or ensure proper ventilation to reduce humidity during the cleaning process.
Afterward, turn off the water. Step 2: Applying the vinegar solution:.
In a spray bottle, mix equal parts white vinegar and warm water.
Spray the solution generously on the steamy shower walls. The acidity of vinegar helps dissolve mineral deposits, dirt, grease, and grime while killing bacteria naturally.
Allow the vinegar solution to sit for 10 to 30 minutes, depending on the level of dirtiness. Step 3: Scrubbing and removing grime:.
Use a non-abrasive sponge in a circular motion to scrub the shower walls, rinsing the sponge frequently.
For stubborn spots, add a few drops of mild dishwashing liquid to the vinegar and water mixture and repeat the spraying and scrubbing process. In extremely stubborn areas, make a paste using a teaspoon of baking soda and a few drops of dishwashing liquid.
Rub this paste on tough grime to gently lift and remove it. Step 4: Rinsing and drying:.
Run warm water through the shower to rinse off the cleaning solution and any remaining grime.
Follow the warm rinse with a final rinse of cold water to remove any soap residue. Dry the shower walls using a soft microfiber towel to prevent watermarks and streaks from forming.
Ensure proper ventilation by running the fan or opening a window to expel any remaining humidity. By following these steps, you can effectively clean and maintain your fiberglass shower, keeping it free from dirt, mildew, and soap scum.
Regular cleaning will help preserve the appearance and longevity of your fiberglass shower.
Cleaning a Natural Stone Shower: Step-by-Step Guide

Caring for natural stone surfaces requires special attention to avoid damage and maintain their beauty.
Follow these steps to effectively clean your natural stone shower:.
Supplies needed:.
Rubber gloves
pH-neutral cleaning product or bleach
Spray bottle
Non-abrasive sponge
Soft toothbrush
Microfiber towel
Microfiber cloth
Baking soda
Medium-sized bucket or bowl
Step 1: Prepping the shower:.
Start by rinsing the shower with hot water for 2 to 5 minutes to loosen any hardened soap scum.
Put on rubber gloves and prepare a cleaning solution by diluting a pH-neutral cleaning product specifically designed for stone surfaces, following the manufacturer’s instructions. Alternatively, mix equal parts bleach and warm water in a spray bottle for sterilization and mildew removal.
Note that bleach should not be used on colored stones or certain types of natural stone. Generously spray the cleaning solution onto all stone surfaces and let it sit for 5 minutes.
Step 2: Gentle scrubbing:.
Use a non-abrasive sponge or soft bristle brush to scrub the stone surfaces in a circular motion.
Apply moderate pressure and work on one area at a time. This helps remove dirt, soap scum, and grime without causing damage.
For tougher stains or grout cleaning, use a soft toothbrush instead of a grout brush, as the latter may scratch the stone. In areas with stubborn buildup, spray more of the cleaning solution and allow it to sit for a few more minutes before scrubbing again.
Step 3: Rinsing and drying:.
Rinse the shower thoroughly with clean, warm water to remove all traces of the cleaning solution.
Start from the top and work your way down to ensure thorough rinsing. Use a microfiber towel to dry the stone surfaces completely.
Drying helps prevent water spots and maintains the natural beauty of the stone. Step 4: Polishing and buffing:.
Create a paste by mixing 1/2 cup of baking soda with 1 quart of warm water in a medium-sized bucket or bowl.
Apply the baking soda paste to the stone surfaces using a microfiber cloth. Let the paste dry for approximately 5 hours, allowing it to absorb any remaining moisture and impurities.
Once dry, rinse the surface with warm water to remove the baking soda residue. Dry buff the stone with a clean microfiber cloth in a gentle, circular motion.
Buffing helps bring out the shine of the stone and diminishes small imperfections. By following these steps, you can effectively clean and maintain your natural stone shower, keeping it looking beautiful and preserving its longevity.
Regular cleaning will help prevent stains, soap scum buildup, and the growth of mildew.
Comprehensive Shower Cleaning: Additional Areas to Clean
Cleaning a shower goes beyond just the walls and surfaces.
Don’t forget to pay attention to these often overlooked areas to ensure a thorough and complete clean:.
Shower Floor: The shower floor can harbor bacteria and soap scum buildup.
For most floors, a mixture of baking soda and vinegar can be an effective and gentle cleaner. However, non-acidic alternatives like diluted ammonia may be needed for certain floor surfaces.
Apply the cleaning solution, scrub with a non-abrasive brush, and rinse thoroughly.
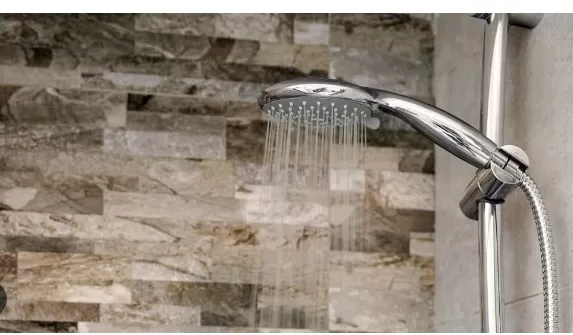
Shower Head: The shower head can accumulate mineral deposits and affect water flow.
Soaking the shower head in a cleaning solution helps remove clogs and restore optimal performance. Fill a plastic bag with a mixture of water and a descaling cleaner or white vinegar.
Secure the bag around the shower head using a rubber band and let it soak for a few hours. Afterward, remove the bag, scrub the nozzles gently with a brush, and run water through the shower head to flush out any residue.
Glass Shower Doors: Glass shower doors can develop soap scum and mineral deposits.
Soaking the doors with white vinegar for a few minutes helps loosen grime. Then, scrub the doors using a sponge dipped in a paste of baking soda and water.
Rinse thoroughly and wipe dry for a streak-free finish.
Shower Curtain: Many shower curtains can be cleaned in a washing machine.
Check the care label, and if suitable, wash the curtain with warm water and add vinegar, baking soda, or a gentle laundry detergent. Hang the curtain to dry afterward.
Shower Drain: Keep the shower drain flowing freely by periodically unclogging it.
Hair, soap residue, and other debris can accumulate and cause blockages. Remove the drain cover and use a drain snake or a bent wire hanger to pull out any visible debris.
Then, pour a mixture of baking soda and vinegar down the drain, followed by hot water, to help clear any remaining buildup.
By addressing these often forgotten areas, you can achieve a comprehensive and thorough cleaning of your shower, ensuring a fresh and hygienic bathing experience.
*The information is for reference only.