Quick and Easy: 5 Paint DIYs You Can Finish in 60 Minutes. Painting is a versatile DIY project that allows homeowners to transform their living spaces with relative ease. While many people tend to focus on painting interior or exterior walls, floors, and ceilings, there are other smaller-scale painting projects that can yield equally satisfying results.
These mini updates involve painting textiles, ceramics, and various home and garden accessories. By considering these often overlooked areas, you can quickly and creatively revitalize your home without the time and effort required for larger paint jobs. So grab your brush, roller, or sprayer and explore the possibilities of painting beyond the walls!
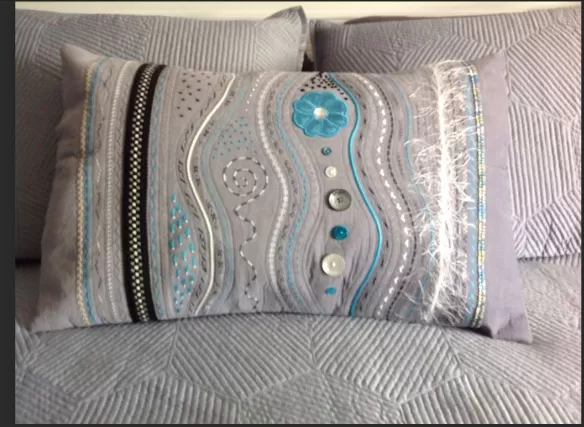
Crafty Cushions: Creating Faux Flat-Woven Texture with Geometric Stencils

Recreate the intricate patterns found in Turkish kilim rugs on your prewashed pillow cases with a clever DIY technique.
Using geometric stencils as inspiration, you can achieve the look of a flat-woven texture by painting directly onto the fabric. If fabric paint is not readily available or you can’t find your desired color in stores, don’t worry! You can easily transform regular acrylic paint into a fabric-friendly coating by mixing it with a textile medium.
Get creative and transform your plain pillow cases into stylish pieces that emulate the beauty of Turkish tapestries.
A Striking Transformation: Achieving the Dip-Dyed Illusion on Glass Kitchen Canisters
Embark on a jarring experience of giving your plain glass kitchen canisters a stunning dip-dyed effect.
With a simple technique, you can elevate their appearance to new heights. Begin by masking the jars with painter’s tape, covering the midsection and upwards. This will ensure a clean and defined line when you apply the paint. Once masked, grab your spray paint and generously coat the exposed portion of the jars. To add an extra touch of creativity, consider affixing foam letter stickers to spell out labels before painting. For a flawless alignment, start with the last letter of the word and work backwards. Watch as your glass canisters undergo a striking transformation, becoming eye-catching pieces that bring a unique aesthetic to your kitchen decor.
Revamped Garden Tools: Infusing Style and Utility

Transform your garden tools into fashionable and functional accessories to complement your raised Garden Bed.
Give the wooden handles a vibrant makeover by dipping them into a can of your favorite paint color. This simple yet effective technique will breathe new life into your tools, adding a touch of personal style to your gardening experience.
Once the paint has dried completely, ensure the longevity of the vibrant hues by applying a protective layer of polyurethane or acrylic spray to the handles. This extra step will safeguard the colors throughout the lifespan of your garden, ensuring that your retooled tools remain both aesthetically pleasing and practical.
Let your garden tools reflect your creativity as you tend to your plants with a set of stylish and durable accoutrements.
Unleashing Creative Potential: Reinventing the Cork Memo Board
Step back in time to the era before digital pin boards and rediscover the charm of the original cork memo board.
Elevate this kitchen and Home Office staple to a whole new level by transforming it into a captivating visual delight. Begin by covering the corkboard with a meticulously arranged striped lattice of painter’s tape, allowing your imagination to guide the pattern. Once the tape is in place, apply a coat of matte white spray paint to the exposed areas, creating a stunning contrast against the cork background. Watch as the ordinary corkboard becomes a canvas for mesmerizing optics, adding a touch of modern elegance to your space. Let this unpinned inspiration spark your creativity and serve as a unique focal point that blends functionality with artistic flair.
Gilded Elegance: Upgrading Alphabet Refrigerator Magnets

While alphabet refrigerator magnets may bring a sense of nostalgia, they might not match the sophistication exuded by the rest of your kitchen.
Fear not, as this simple DIY project will elevate them to a whole new level. To bring them up to speed, all you need is a can of spray paint and a touch of creativity.
Start by giving the magnets two coats of primer, ensuring a smooth and even surface. Once the primer is dry, follow up with two coats of gold paint, creating a lustrous sheen that is undeniably magnetic.
Watch as these once-humble magnets transform into elegant accents that effortlessly blend with your kitchen decor. The gilded allure of these upgraded magnets will add a touch of luxury and style to your refrigerator, giving it a refined and cohesive look.
*The information is for reference only.