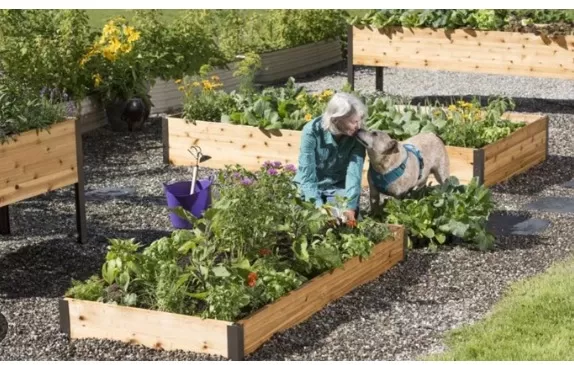
Raised Garden Bed Planning Tips: A Step-by-Step Guide. When planning a raised garden bed, there are several key considerations to ensure success. First, choose the right location that receives adequate sunlight for your plants to thrive. Next, determine the appropriate size and shape of the bed based on the available space and the amount of plants you wish to grow.
Additionally, consider the type of soil and drainage requirements for your desired plants. Lastly, plan for easy access and maintenance by leaving enough space between beds and incorporating pathways. By carefully considering these factors, you can create a well-planned and productive raised garden bed.
Maximizing Harvest with Above-Ground Garden Beds

Nothing compares to the satisfaction of plucking ripe tomatoes straight from the vine, but tending to a conventional vegetable garden can be labor-intensive, and not everyone has sufficient space in their yard.
If you’re seeking a convenient solution to cultivate your own produce this summer, consider utilizing raised garden beds. These expansive container-like gardens are filled with lightweight, nutrient-rich soil and have the potential to yield double the produce in half the area.
Since they are elevated above ground level within a confined space, they require less effort to maintain—no more bending over or stooping to eradicate weeds. The following guidelines will assist you in designing, planting, and sustaining a raised garden bed to achieve an abundant harvest.
Once you experience the benefits, you may never revert to traditional gardening methods again.
Choosing the Perfect Location
When it comes to selecting a spot for your raised garden bed, the options are virtually limitless.
Whether it’s alongside a driveway or in any other area of your yard, as long as you adhere to some fundamental guidelines, you’ll be good to go. To ensure optimal growth, garden plants require ample sunlight. Thus, it’s crucial to choose a location that receives direct sun exposure for the majority of the day. Additionally, consider finding an area that offers some degree of protection from strong winds. This can be achieved through the presence of nearby trees, a tall fence, or a building, as gusty winds can wreak havoc on delicate plants.
While easy access to water is essential, it’s equally important to avoid placing your raised bed in an area prone to collecting and retaining rainwater.
Vegetables thrive in well-draining soil, so soggy conditions can be detrimental to their growth. By carefully considering these factors, you’ll be able to select the ideal spot for your above-ground garden bed and provide the optimal conditions for your plants to flourish.
Determining Suitable Dimensions

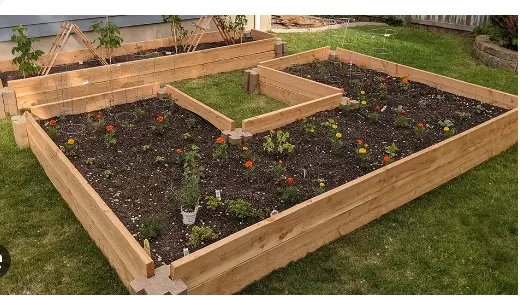
When it comes to the dimensions of your raised garden bed, it’s important to consider your specific needs and preferences.
The elevated height of the bed offers two key advantages. Firstly, it eliminates the need for painful stooping, making it easier to tend to your plants.
Secondly, the bed is filled with lightweight and nutrient-rich soil, which promotes faster growth and healthier plants.
While there are no fixed rules regarding the height of a raised garden bed, most beds range between 12 and 20 inches off the ground.
For individuals with mobility issues, such as those in wheelchairs, opting for higher sides can further enhance accessibility. To ensure comfortable access and maintenance, the bed’s width should not exceed three feet.
This width allows you to conveniently reach the plants in the center by extending your arm, approximately 1. 5 feet from either side.
The length of the bed is flexible and can be determined based on your preferences.
However, many gardeners find that beds with lengths of four to five feet are the most manageable. If you have a large amount of produce to cultivate, you can consider installing multiple raised beds.
By considering your specific needs and adhering to these general guidelines, you can determine the dimensions that best suit your requirements and create an efficient and accessible raised garden bed.
Choosing the Right Materials
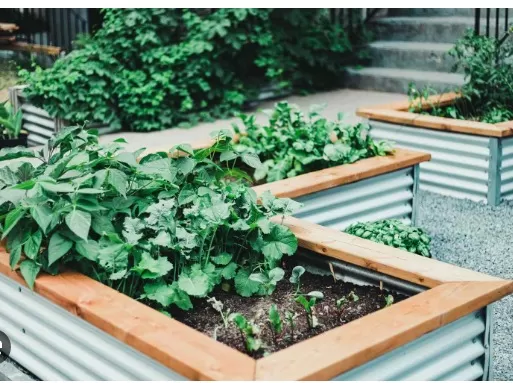
When constructing raised garden beds, it’s crucial to opt for materials that are resistant to water and rot.
Fortunately, you have various options to choose from. You can easily find raised garden bed kits at your local home improvement center or order them online, such as the Mr. Stacky Raised Garden Bed available on Amazon. These kits provide convenience and often come with all the necessary components for assembly.
If you prefer a more DIY approach, you can build your raised beds from scratch using different materials.
Some common choices include concrete blocks, landscaping blocks, retaining wall blocks, landscaping timbers, and rot-resistant woods like cedar, redwood, or black locust. These materials offer durability and resistance to water and decay, ensuring the longevity of your raised garden beds.
Consider your budget, availability of materials, and personal preferences when deciding which option suits you best.
Whether you opt for a pre-made kit or decide to construct your raised beds, selecting materials that withstand moisture and decay will help ensure the longevity and functionality of your garden beds.
Double Digging for Lower-Sided Beds

When constructing a raised garden bed with sides lower than 12 inches, it’s important to provide ample root space for your plants.
While shallow-rooted crops like lettuce and chives require a soil depth of up to six inches, other vegetables like green beans and cucumbers may need root depths exceeding 12 inches. To accommodate the latter, a technique known as “double digging” can be employed.
Here’s how to double dig your garden bed:.
Start by removing any existing vegetation or grass from the designated area.
Dig the soil to a depth of eight inches, loosening it thoroughly while removing any rocks, weeds, or debris.
As you dig, incorporate organic matter such as compost or well-rotted manure into the soil.
This will enrich the soil’s nutrient content and improve its structure.
Once you have finished double digging, you can proceed to construct the sides of your raised bed.
By double digging the soil before constructing the bed, you ensure that all plants within the raised bed have sufficient space for healthy root growth.
This technique creates an optimal environment for your vegetables to thrive, regardless of their root depth requirements.
*The information is for reference only.