10 Compelling Reasons Why DIYers Need a Pry Bar (Part 2).Dragging around a hefty toolbox can quickly become a tiresome chore, especially when a seemingly straightforward do-it-yourself repair requires a multitude of tools. But fear not; there’s a practical solution! You can significantly reduce the number of tools you need to carry, as well as your overall tool expenses, by opting for Versatile Tools that can tackle multiple tasks.
Let’s take a moment to appreciate the unassuming yet incredibly adaptable pry bar. With its L-shaped ends, a pry bar can be your go-to for applying leverage, lifting, scraping, and even spackling. Surprised by the versatility of a pry bar? You’re not alone, as many people have yet to discover the remarkable HYDE 9-1/2″ Bent Pry Bar.
Crafted from electro-coated, high-carbon steel, this compact multi-purpose tool, available at HydeStore.com, is lightweight while boasting remarkable strength. Below, we’ll delve into the numerous ways you can put this budget-friendly tool, priced at under $10, to work in and around your home.
Carpet Removal Made Easy: Protecting Your Hands

During the process of installing or removing carpet, the tiny, sharp barbs on tack strips can be a real menace, often leaving your hands scratched and sore.
To spare your hands from unnecessary pain, we recommend a quick and painless method. Simply employ the HYDE 9-1/2″ Bent Pry Bar, a versatile tool that makes this task a breeze.
Start by inserting the flat end of the HYDE 9-1/2″ Bent Pry Bar beneath the lower edge of the strip and gently tap it with a mallet to slip it underneath.
Then, with ease, pry upwards using the opposite end of the bar to loosen and extract the strip. Once the strip is removed, you can conveniently utilize the nail-pulling hole on the bar to extract any remaining nails from the subfloor.
This efficient technique not only safeguards your hands but also ensures a smooth carpet removal process.
Revitalizing Your Furniture: The Budget-Friendly Upholstery Makeover
If you’re looking to give your budget-friendly furniture a new lease on life by replacing worn or stained fabric, reupholstering can be a fantastic solution.
It grants your furnishings the appearance of brand-new pieces, all while keeping costs to a minimum—primarily limited to the expense of the fabric. However, as any avid DIYer can attest, these projects do require a trade-off between money and effort.
One of the primary challenges in this endeavor is the time-consuming task of removing the multitude of staples that secure the old fabric in place.
But fear not, as there’s a solution to expedite this process and save you precious time and energy. Enter the HYDE 9-1/2″ Bent Pry Bar, a handy tool that can make quick work of staple removal.
Here’s how it works: position the flat end of the bar beneath the center of a staple, then gently tap the opposite end with a mallet to drive the bar beneath the stubborn staple.
With minimal effort, use the bar to pry up the staple. When the staple is raised about 1/8 inch, reach for a pair of pliers to grab and effortlessly extract it.
Repeat this process for each staple, and you’ll find yourself completing the task in record time. With the HYDE 9-1/2″ Bent Pry Bar as your ally, your furniture reupholstering project will be a breeze, balancing cost-effectiveness with efficiency.
Simplify Hanging Heavy Doors: A Smart Solution

Installing a solid door on your own can be quite the task, especially when it comes to lifting the heavy door to the precise height while ensuring the door’s hinges align perfectly with those on the jamb.
Fortunately, there’s a clever workaround that can make this challenging job much more manageable, and it involves the use of the HYDE 9-1/2″ Bent Pry Bar and a small block of wood.
Here’s how you can tackle this task effectively:.
Begin by placing the door on the floor and sliding the flat end of the pry bar underneath it.
As you hold the door steady, gently lift the end of the pry bar that is closest to you while using your foot to push the block of wood beneath the bar.
Now, with the pry bar extending on either side of the block of wood, you’ll create a lever-like mechanism akin to a teeter-totter.
Step on one end of the pry bar, and like magic, the other end will raise the door to the exact height you need.
This ingenious method takes the burden off your shoulders.
With the door now at the correct height, you can easily align the hinges using your free hands.
Start by securing the top hinge pin first, followed by the middle one, and finally, the bottom hinge.
By following this efficient approach and enlisting the help of the HYDE 9-1/2″ Bent Pry Bar and a block of wood, hanging a heavy door becomes a far less daunting task, allowing you to achieve precise alignment without the struggle.
.
.
Achieving Flawless Paint Results: The \”Knifing In\” Technique
When it comes to painting walls adjacent to built-in cabinetry and trim work, even the steadiest hand can benefit from some assistance.
Painter’s tape is a common choice for masking off these areas, but it’s not always foolproof in ensuring clean lines. If the tape’s edge isn’t securely fastened, paint can seep underneath, marring the pristine finish you desire.
Professional painters have a secret technique to combat this issue, known as “knifing in.
” While it’s often done with a putty knife, you can achieve the same excellent results using the HYDE 9-1/2″ Bent Pry Bar. Here’s how:.
Begin by applying painter’s tape along the edge of the area you want to protect.
Take the flat end of the HYDE 9-1/2″ Bent Pry Bar and place it on one side of the tape, ensuring the tape’s edge is beneath the bar.
Gently pull the bar along the length of the tape while maintaining pressure.
This action secures the tape’s edge firmly in place.
Once you’ve “knifed in” along the entire length of the tape, you can confidently proceed with painting.
When it’s time to remove the tape, you’ll reveal clean and precise paint lines, free from any accidental smudges or seepage.
By employing this clever “knifing in” technique with the HYDE 9-1/2″ Bent Pry Bar, you’ll elevate your painting game and ensure that your paint job looks as professional as it gets, with impeccably crisp lines and no unwanted surprises.
.
.
.
.
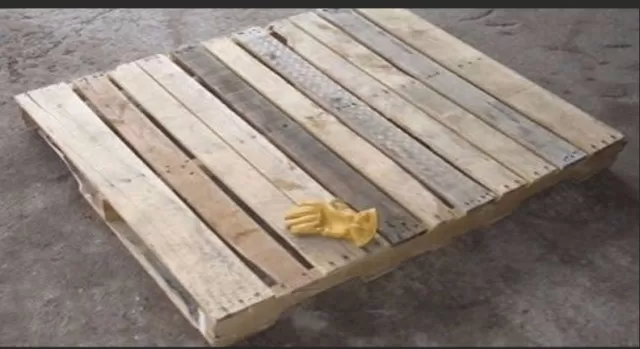
Unlocking the Potential of Wooden Pallets in Your DIY Projects

Wooden pallets are a DIY enthusiast’s treasure trove, offering boundless possibilities for crafting Pinterest-worthy creations, whether it’s a charming farmhouse table or a rustic clockface.
However, to harness the potential of the wood, you must first master the art of pallet disassembly.
The HYDE 9-1/2″ Bent Pry Bar comes to the rescue, providing the leverage needed to simplify the tear-down process.
Here’s a step-by-step guide to help you get started:.
Begin with the pallet lying flat on the ground, ensuring it’s stable and secure.
Insert the flat end of the pry bar between the end of any wood slat on top and the board beneath it.
Make sure it’s snug but not too tight.
Use a mallet to gently tap the pry bar, driving it deeper into the gap between the slat and the board.
Apply downward pressure on the pry bar to lift the slat along with the nail that’s holding it in place.
The nail should gradually pop out.
Repeat this process with other slats, working your way around the pallet.
Be patient and take your time, ensuring the wood doesn’t splinter.
Once you’ve fairly well pulled the pallet apart, you’re ready to begin your DIY project.
But before you dive in, remember to remove the nails. They should be slightly raised from the disassembly process, making it easy to slip the pry bar’s nail-pulling hole over the head of each nail and pry them out one by one.
With the help of the HYDE 9-1/2″ Bent Pry Bar, disassembling pallets for your DIY endeavors becomes a breeze, allowing you to unlock the full potential of this versatile source of reclaimed wood and turn your creative ideas into reality.
*The information is for reference only.