Replacing Subfloor Under Wall
Replacing a subfloor under a wall can be a challenging task, but it is necessary to maintain the structural integrity of a room. Subfloors may become damaged due to moisture or age, and it is essential to replace them promptly to prevent further damage. The subfloor serves as a foundation for both the floor and walls, contributing to the overall stability of the room.
While replacing a subfloor under a wall may seem daunting, there are instances where only parts of the subfloor need to be removed, and the wall can remain intact. However, in more severe cases, removing the wall may be necessary. It’s important to consult with a professional contractor to determine the best course of action
Replacing Subfloor – Basics of Walls and Floors

The walls and floors of a building form a tightly connected system that provides structural support.
Starting from the bottom, the basic elements of a home system include the floor joists that hold up the flooring, the subfloor that is attached to the top of the joists, and the optional thin underlayment that smooths the surface for the floor covering. The floor covering could be any material, such as laminate, vinyl tile, or luxury vinyl plank.
The bottom wall plate, made of a 2×4 piece, is the bottom-most part of the wall that is nailed downward into the subfloor and the joist. The wall studs are nailed vertically to the bottom wall plate, and all other wall elements are connected to it.
How to Remove Subfloor Under Walls

Replacing subfloor while the wall is still in place can be a challenging task since the subfloor is trapped under the wall.
It’s like trying to slide out a book that’s nailed to the ground while someone is standing on it. However, if you wish to keep the wall intact, you can remove only part of the subfloor, usually a safe width of 14 inches, which represents the space between two joists or studs.
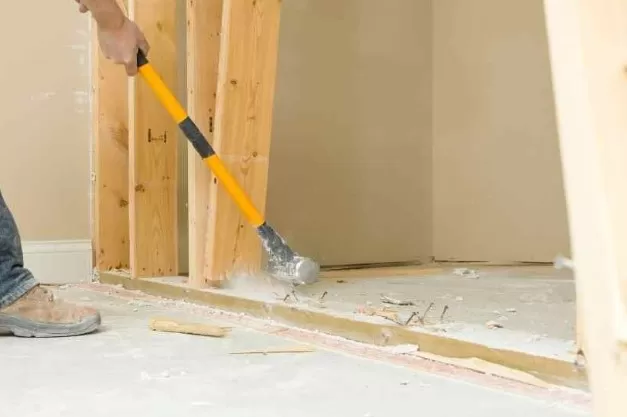
But to replace the subfloor across the entire wall, you will have to remove the wall. It’s worth noting that it’s not advisable to replace the subfloor from underneath, even if your home has access from the basement.
Instead, it’s recommended to replace the subfloor from the top by removing the floor covering and underlayment, cutting out the old subfloor, and installing new material.
How to Replace a Subfloor Under a Wall: Tips and Tricks

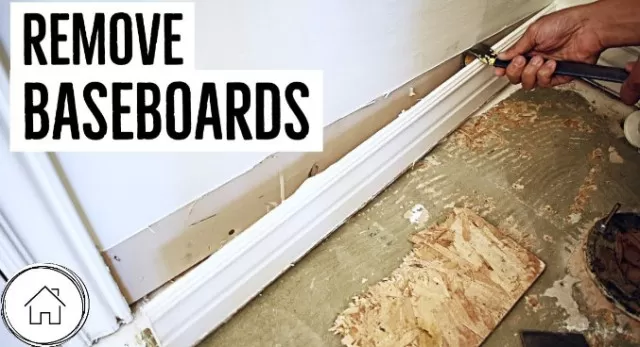
Remove the baseboard and quarter-round trim using a flat pry bar.
Remove sections of drywall that may extend over the floor covering and cut away a section to the required width and about 1-foot high. Dispose of the trash in a heavy-duty trash bag.
Remove the floor covering directly above the subfloor that you want to remove. Lift off easily if it’s a laminate or luxury vinyl plank flooring.
Self-adhesive vinyl tiles will peel off and sheet vinyl can be pulled back. Ceramic and porcelain tile need to be broken, plus the thinset mortar that holds it down should be chipped away.
Solid hardwood and engineered wood flooring installed parallel to the wall can be pried off. Remove any underlayment between the subfloor and the floor covering.
Cut away a section with the utility knife if it’s a laminate flooring with a foam or felt underlayment. For 1/4-inch luan underlayment board, use a circular saw to cut only into the luan but not any of the materials beneath it.
Cut away all nails that run downward from the bottom wall plate using a metal-cutting blade attached to the oscillating multi-tool. A nail puller tool can be used to remove the nail completely.
Set the circular saw to the proper depth to cut only the subfloor but none of the materials below the subfloor. Make two more cuts with the hand saw along the side of the cut-out square until you reach the wall’s bottom plate.
If the subfloor is heavily rotted, pull back on the remaining section of the subfloor and remove it by hand. If not, attach a 3/4-inch auger bit to the drill and drill to a depth of 3 1/2 inches underneath the wall bottom plate on both sides of the rotted area.
The section of the subfloor should pull out if the edge of the subfloor rests on the joist. If not, proceed to the next step.
If the subfloor is a continuous sheet that extends beyond the wall, repeat all the previous steps on the other side of the wall to free up the subfloor so that you can remove it. .
FAQ
Replacing a subfloor can be a time-consuming and labor-intensive task, but it is not difficult to learn.
However, before starting the project, DIYers should make sure they are comfortable with removing and reinstalling flooring, drywall, and trim.
The cost of replacing a subfloor depends on the amount of subfloor that needs to be replaced and the type of material used.
For a standard plywood subfloor, the cost is typically around $1. 50 per square foot, which includes labor and amounts to about $594 for an average-sized room.
It is important to note that walls are built on top of a home’s subfloor, meaning that replacing the subfloor can sometimes require the walls to be removed.
*The information is for reference only.