Revamp Your Bed: DIY Headboard Ideas. As the focal point of the room, your bed commands attention beyond its mere functional presence. Anchoring this stylish haven is the often underestimated, yet integral, design element—the headboard. It serves as the connecting thread that harmonizes your bed frame with the overall bedding display, adding an extra layer of visual allure to the sleeping space.
The beauty of a headboard lies not just in its simplicity but also in its potential for personalization. Far from being a distant purchase, crafting your headboard is an engaging DIY endeavor. Experimenting with different colors, textures, and bespoke designs allows you to create a piece that not only complements your bedroom aesthetic but also becomes a unique expression of your style.
Through this creative process, a headboard emerges as more than just a backdrop for pillows and sheets; it becomes an artful statement that subtly transforms the room. As you drift into slumber, the thoughtfully designed headboard wraps you in a cocoon of comfort and style—a testament to the power of a DIY touch in elevating the ambiance of your sleeping sanctuary.
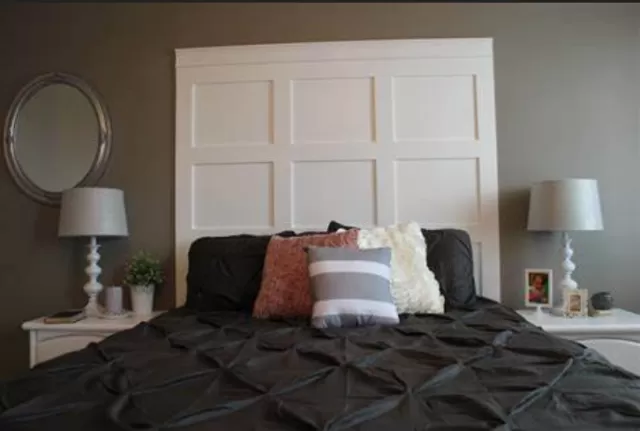
DIY Elegance: Craft a Stylish Molding Headboard for Your Bed

Transform your bedroom with a visually stunning faux-headboard that’s not only easy to create but also budget-friendly.
The secret weapon? Window or door casing molding readily available at your local home center or hardware store.
Tailor the length of each molding strip to perfectly complement the width and size of your bed.
In our example, we crafted a 48 x 70 inch frame for a queen-size bed, utilizing three 5-inch-wide strips (ensuring that the vertical strips reach down to the baseboards). Precision is key, so cut the strips to size with the help of a miter box and saw.
Secure them in place every 6 inches using trim nails, and then effortlessly conceal any visible holes with a touch of spackle.
To add a touch of finesse, paint the molding strips in the same shade as your wall but opt for a different finish to create a subtle yet stylish contrast.
Embrace creativity in design by experimenting with different heights—a shorter version for a modern, chic look or go tall to evoke a more traditional, timeless ambiance. Elevate your bedroom aesthetic with this simple yet impactful DIY molding headboard project.
Boho Bliss: Create a Woven Headboard for a Natural, Earthy Retreat
Elevate your bedroom with the boho-chic allure of a woven headboard—a perfect complement to a space adorned with earth-tone bedding and lush greenery.
The key to this effortless and stylish addition? Begin with a simple wooden headboard frame, ready to be transformed into a cozy focal point.
Embrace the natural aesthetic by filling the headboard frame with sturdy cotton straps, skillfully woven together in a basic yet distinctive tabby weave.
Let your creativity shine as you experiment with patterns and textures, infusing your space with the warmth and character that woven elements bring.
This DIY project not only adds a touch of artisanal charm but also seamlessly integrates with the organic, bohemian vibe of your room.
Immerse yourself in a tranquil retreat where the artful combination of woven textures, earthy tones, and vibrant plant life converges to create a harmonious haven of relaxation and style.
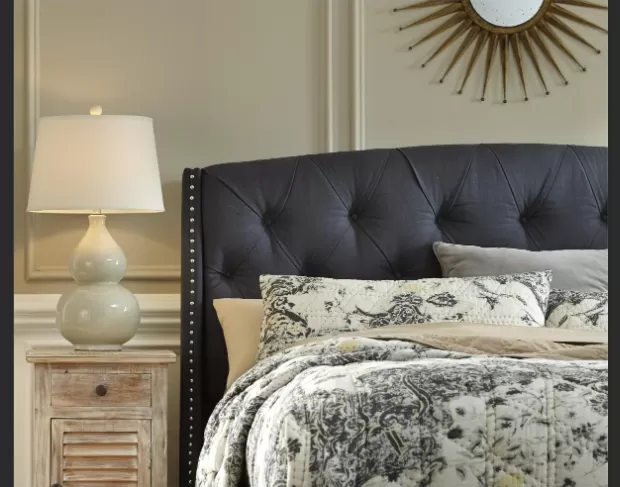
Revitalize Your Bedroom: Craft a Modern Upholstered Headboard Makeover

Transform your sleeping space with a touch of modern elegance by giving your padded headboard a stylish revamp.
This DIY project is both simple and chic, breathing new life into your bedroom Without Breaking the Bank.
Begin by removing the existing fabric from your padded headboard, creating a blank canvas for your creative vision.
Next, introduce a fresh perspective by affixing newly purchased pewter fabric to the headboard using a staple gun. Ensure a smooth and polished finish by carefully smoothing the fabric with an iron, if necessary, guaranteeing a sleek appearance when the headboard takes its place behind your bed.
This budget-friendly update not only adds a contemporary flair to your bedroom but also allows for personalization and creativity in choosing fabrics that suit your style.
Embrace the transformative power of upholstery to reinvent your sleeping sanctuary, creating a modern haven that seamlessly blends comfort and design.
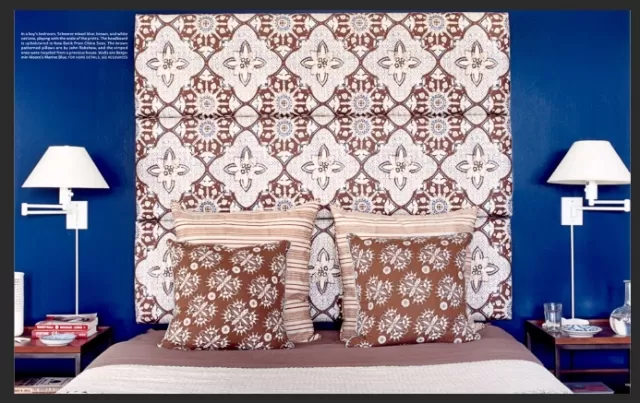
Beyond Boundaries: Elevate Your Bedroom with a Wallpaper Headboard
Unleash the full potential of wallpaper by stepping outside the conventional floor-to-ceiling application and into the realm of creativity.
This simple yet impactful shortcut involves using the lines and patterns of graphic wallpaper as your guide to craft a virtual headboard that adds depth and dimension to your space.
Embark on this creative endeavor by cutting out a silhouette from the wallpaper, strategically chosen to serve as a unique and eye-catching headboard.
Opt for dimensions that extend approximately 4 inches wider than your mattress to accommodate the additional width that bedding will introduce.
This innovative approach not only offers a cost-effective and time-efficient solution but also allows for boundless creativity in selecting wallpaper designs that resonate with your style.
Embrace the transformative power of a wallpaper headboard, where patterns and lines converge to create a visually striking focal point, elevating your bedroom into a haven of individuality and design flair.
Dream in Style: Craft Your Own Batik Headboard for a Personalized Retreat

Infuse your bedroom with individuality and artistic flair by creating a personalized batik headboard that speaks to your unique style.
This DIY project promises a stunning result that may have guests believing you commissioned a custom-made masterpiece.
Begin by embracing the intricacy of your chosen batik design stencil.
For larger projects, such as a headboard, consider making paper copies of the stencil and arranging them in a pattern. Tape the copies to the surface, ensuring a layout that resonates with your aesthetic preferences.
Now, dive into the creative process.
Paint the headboard with two coats of Ink paint, utilizing a flat sash brush for a smooth application. Allow each coat to dry completely before proceeding.
As you embark on the stenciling journey, work on one section of the batik pattern at a time. Remove and replace the paper copies with the batik stencil, creating a seamless and visually captivating design.
The result? A one-of-a-kind batik headboard that not only enhances your sleeping space but also reflects your personal style and artistic sensibility.
Immerse yourself in the satisfaction of a DIY project that transforms your bedroom into a haven of creativity and self-expression.
*The information is for reference only.