Discover how to restore your blunt blade’s sharpness and ensure kitchen safety with these essential knife maintenance tips. Say goodbye to squashed tomatoes and hello to effortless slicing.
Reviving Dull Knives: 3 Fixes for Precise Cuts

No matter how you slice it, a dull knife just won’t cut it in the kitchen. Working with a blunt blade both slows down your food prep and increases the risk of injury as you try to overcompensate with each slice—a practice that’s both frustrating and dangerous. But, before you can sharpen a kitchen knife, you first need to determine why it’s dull. Typically, the blade either has a bent edge or is blunt from use, and each issue calls for a different solution. Fortunately, for every cutlery conundrum, there’s a “cutting-edge” solution. We’ve rounded up three smart fixes that will keep your blades sharp and your edges straight.
Carve It In Stone

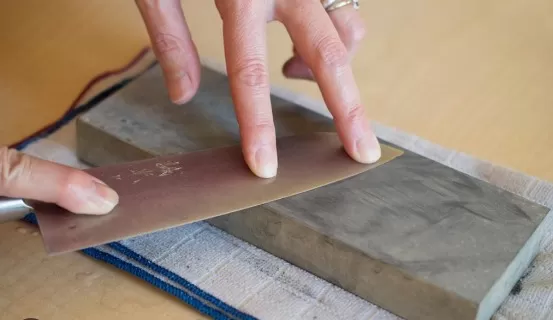
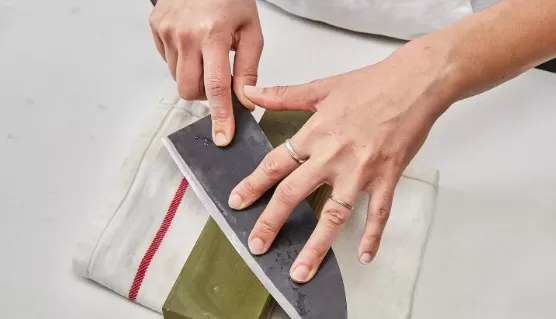
When dealing with a blade worn down from months of meal prep, turn to the preferred tool of professional chefs: the whetstone. Also called a sharpening stone, this long, rectangular block is made from composite stone with a coarse grit on one side and a fine grit on the other. As the knife rubs against the stone, bits of the metal blade are ground off to produce a new, sharper edge.
Straighten Up for Clean Cuts

Unlike a whetstone, a honing steel should be used regularly to straighten, rather than sharpen, your knives.
Bent edges translate to dull blades, which will cause problems on the cutting board. The ridges along the length of a honing steel work to straighten the edge of a knife by gently pushing it back into place.
Reviving Dull Knives: Sandpaper Method
When you find yourself without a sharpening stone, sandpaper can come to the rescue as a temporary solution.
By securely taping a sheet of fine-grit sandpaper to a cutting board, you can create a cost-effective alternative. Here’s how to use sandpaper to sharpen your blades:
Prepare the Setup
Tape a sheet of fine-grit sandpaper along the edges of a sturdy cutting board. Ensure that it is securely attached and won’t move during the sharpening process.
Angle and Grip
Hold the knife firmly by the handle, positioning it at a 20-degree angle to the cutting board. This angle will allow you to maintain consistent contact between the blade and sandpaper.
Light Pressure
Apply light pressure on the center of the blade with your free hand while keeping a firm grip on the handle. This pressure helps ensure proper sharpening without damaging the blade.
Slide and Shave
With controlled movements, slide the knife’s edge across the sandpaper as if you are shaving a thin layer off. Start from the base of the blade and work towards the tip. Repeat this motion for about 10 strokes on one side.
Flip and Repeat
Flip the knife over and repeat the sliding and shaving motion on the other side of the blade. This ensures even sharpening and balances the edge.
Finishing Touch
Replace the fine-grit sandpaper with a sheet of extra-fine sandpaper for a final touch. Repeat the sliding and shaving process on both sides of the blade to refine and polish the edge. Although using sandpaper is not the ideal method for sharpening knives, it can serve as a temporary solution in emergency situations. Remember to exercise caution and prioritize safety while sharpening your knives.
*The information is for reference only.