Simplified Cleanup Strategies for DIY Projects. For countless homeowners, the allure of a well-curated bucket list brimming with repairs, maintenance tasks, and DIY endeavors is irresistible.
Yet, the path to achieving these feats often comes riddled with a common dilemma: the looming aftermath of cleanup that can rival the task’s completion itself. Fear not, for within this challenge lies an opportunity to elevate your DIY game to new heights.Venture forth with newfound confidence, knowing that these clever strategies are at your disposal to curtail messiness and enhance productivity. With every repair, project, or DIY escapade, you’ll not only achieve your goals but also relish in the art of efficient, mess-free mastery. Embrace these insights and transform your DIY pursuits into a journey of creative fulfillment and streamlined excellence.
Controlling Drywall Dust While Drilling

Transforming your walls with new decorations is an enjoyable task, yet the process of drilling holes to secure your artwork often brings about the nuisance of fine, chalky drywall dust spreading across your floors and Beyond.
To alleviate this issue, a handy solution involves utilizing a common office item: the Post-it note. Elevating your DIY game, consider folding a Post-it note horizontally and positioning it strategically beneath the designated drilling spot.
An alternative approach entails creating a small notch in the Post-it and fashioning it into a makeshift cup. This clever technique provides a designated landing spot for the irritating drywall dust, accumulating it on the folded note.
Upon completing your home improvement endeavor, conveniently dispose of the dust-laden note, putting an end to the mess with ease. This innovative trick promises a cleaner drilling experience and more pristine results for your wall-mounted projects.
Preventing Paint Drips: A Clever Hack
Tackling a painting project is a fulfilling endeavor, yet the process of transferring paint from a can to a roller pan can often lead to an unsightly issue: paint pooling in the groove encircling the can’s rim, which subsequently spills over and creates an untidy spectacle down the sides.
However, fear not, for a straightforward solution exists to avert these paint drips. Here’s how to master this ingenious trick:.
As you prepare to pour paint into the roller pan, arm yourself with a nail and a lightweight hammer.
Gently tap the nail into the rim groove, allowing it to create a small hole in the rim. This hole will serve as a conduit for any excess paint to escape from the groove.
Importantly, ensure that the nail doesn’t penetrate all the way through; its purpose is to create an outlet, not to puncture the can.
Once the nail has been used to establish the hole, remove it from the rim, leaving behind a convenient drainage pathway.
This perforation will guide any surplus paint away from the rim groove and direct it back into the can, preventing the unfortunate paint spills that often mar painting projects.
By adopting this smart and uncomplicated technique, you’ll bid farewell to those troublesome paint drips and enjoy a tidier, more efficient painting process.
This DIY fix is a testament to the power of resourcefulness and innovation in overcoming common household challenges.
Mess-Free Painting: Harnessing the Power of Aluminum Foil

Engaging in a painting project is an opportunity for creativity, but the aftermath of cleaning up can often be a hassle.
Say goodbye to those post-painting cleanup woes with a simple yet ingenious solution: utilizing ordinary household aluminum foil as a protective liner for your paint trays. Here’s how to effortlessly enhance your painting experience:.
Before you commence your painting endeavor, reach for a roll of aluminum foil.
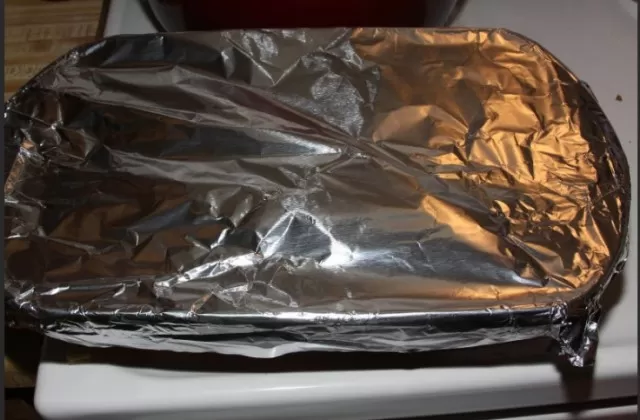
Begin by gently unrolling a sheet of foil and smoothly placing it within the confines of the paint tray. Ensure that the foil evenly lines the bottom of the tray, providing a barrier between the paint and the tray’s surface.
Next, expertly tuck the foil around the upper edges of the tray, securing it tightly.
This strategic maneuver prevents any stray paint from seeping beneath the foil, ensuring a mess-free painting process and simplifying cleanup once you’re finished.
Upon completing your artistic masterpiece, the beauty of this technique truly shines.
Gather the edges of the foil, crumpling it into a tidy bundle. With a satisfying gesture, bid farewell to the remnants of your painting adventure as you toss the foil into the trash.
This practical hack eliminates the need to wash the paint tray, streamlining the post-painting routine.
Embracing this innovative use of aluminum foil demonstrates how everyday items can be repurposed to revolutionize common household tasks.
Transform your painting sessions into more efficient, enjoyable experiences with this clever method that brings convenience and cleanliness to the forefront.
Achieving Pristine Caulk Lines with Tape: A Neat and Tidy Technique
Tackling a caulking project, particularly around seams like the juncture between a bathtub and tile surround, often comes with the challenge of managing potential messiness and smudges.
However, fear not, as a brilliantly simple solution awaits—one that will revolutionize your caulk application experience and deliver immaculate results. Here’s how to master the art of clean caulk lines using the power of painter’s tape:.
Before you embark on your caulk application journey, gather your materials: painter’s tape, caulk, and a container of water for a wet finger-smoothing technique.
Begin by positioning the painter’s tape along both sides of the seam you intend to caulk. This tape should be applied approximately 1/4″ away from the center of the seam, creating a buffer zone that will ensure clean, precise results.
As you meticulously align the tape, envision a clear boundary that will guide your caulk application and eliminate the potential for unsightly smears and excess.
With your prep work complete, you’re now ready to apply the caulk.
Squeeze a bead of caulk directly onto the seam, running it along the designated gap.
Utilize a steady hand to ensure consistent application, knowing that the tape’s presence will help maintain a defined caulk line. Once the caulk is in place, it’s time to employ the wet finger-smoothing technique.
Dip your finger in the container of water to keep it damp, and gently glide your finger along the caulk bead.
The water acts as a lubricant, allowing you to achieve a smooth and even caulk surface. This step not only enhances the aesthetic appeal of your project but also ensures a tight seal.
The grand finale of this process involves the satisfying removal of the painter’s tape.
With a deliberate motion, peel away the tape to unveil your handiwork. Behold the perfectly defined caulk line that stands as a testament to your precision and mastery of this technique.
Not only have you sidestepped the mess that often accompanies caulk projects, but you’ve also elevated the visual appeal of your space with clean, professional-looking results.
Embrace this innovative tape-based approach as a testament to the power of ingenuity in simplifying and enhancing household projects.
Your newfound ability to create flawlessly neat caulk lines will undoubtedly leave a lasting impression on your home improvement endeavors.
Enhancing Your Painting Venture: A Crafty Solution

Undertaking a chair or stool painting project can seem uncomplicated, until the moment arrives to coat the underside of the legs.
At that juncture, the menace of excessive paint accumulation around the legs can lead to drips and even adhesion to the drop cloth. Thankfully, a resourceful technique exists to circumvent these challenges, transforming your painting experience into a breeze.
Here’s how to elevate your painting game with a simple yet effective solution:.
As you gear up for your painting endeavor, envision a scenario in which you’re able to efficiently apply paint to the undersides of the legs without fear of mess or mishap.
The key to this transformation lies in the strategic placement of drywall screws.
Before dipping your brush into paint, secure a drywall screw into the bottom of each leg, ensuring that approximately 1 inch of the screw protrudes outward.
This action serves as the foundation of your paint-elevating solution, allowing for easy and controlled access to the underside of the legs.
With the screws firmly in place, carefully turn the chair or stool right-side up, positioning it onto your work surface or drop cloth.
This simple maneuver is where the magic happens: the screws act as sturdy pillars, lifting the legs above the drop cloth and preventing any contact between wet paint and the cloth.
Now, as you proceed with your painting task, you’ll notice the marked difference this elevation makes.
No longer do you need to contend with pooled paint or the risk of legs adhering to the drop cloth. The elevated legs grant you the freedom to apply paint evenly and confidently, achieving a professional finish without the usual challenges.
Upon completing your painting triumph, simply remove the drywall screws from the legs.
Your project’s outcome will speak for itself—smooth, even coats of paint on every leg without a hint of mess. This innovative approach exemplifies how a touch of ingenuity can streamline common household projects, making them more efficient and enjoyable.
Embrace this technique as a testament to your prowess in conquering the intricacies of DIY tasks.
With your newfound ability to effortlessly paint chair and stool legs, you’ll elevate not only your projects but also your confidence in tackling future painting endeavors.
*The information is for reference only.