Tile Countertops: Comprehensive Guide and Tips. Discover the boundless potential of tile as a versatile countertop material that allows for limitless creativity. Unlike natural stone, laminate, or solid surface options, tiles offer a wide range of design possibilities for your kitchen countertop, ranging from straightforward square patterns to intricate mosaics.
Tile Countertops provide an excellent opportunity for DIY projects, as they are relatively easy to install and can be a budget-friendly choice compared to other materials. However, like any countertop material, tile has its own set of drawbacks that are important to consider before making a decision for your kitchen remodel.
By delving into the following information, you will gain a comprehensive understanding of tile countertops, empowering you to make an informed decision that aligns with your remodeling goals. Explore the advantages and limitations of this versatile material to determine if it is the right fit for your kitchen.
The Evolution and Popularity of Tile Countertops

Tile countertops have a rich history that dates back to the late 1800s when the production of ceramic tiles started gaining momentum.
However, it wasn’t until after World War II that these countertops truly gained traction, coinciding with the evolution of kitchens in terms of size and functionality. .
During the 1970s and 1980s, tile countertops reached the pinnacle of their popularity.
They adorned countless kitchen spaces, becoming a trendy choice for homeowners. However, as time progressed, solid surface composite materials and the growing accessibility of natural stone slabs emerged as formidable competitors.
This shift in preferences led to a decline in the popularity of tile countertops. .
Solid surface composite materials offered durability and a seamless appearance, which appealed to many individuals seeking a sleek and modern aesthetic.
Moreover, the increased availability of natural stone slabs, such as granite and marble, provided an elegant and luxurious option for countertop surfaces. These alternatives gradually overshadowed the appeal of tile countertops, causing their popularity to wane.
Affordable Options: Tile Countertop Costs

When it comes to cost, tile countertops offer a range of options to fit different budgets.
Ceramic and porcelain tile countertops, known for their durability, are often the most budget-friendly, averaging between $2 and $3 per square foot. If you’re looking for a touch of elegance, stone tile countertops like granite, slate, or marble come at a slightly higher price range, ranging from $4 to $7 per square foot.
On the higher end, glass tile countertops can cost up to $30 per square foot due to their intricate manufacturing process, often involving skilled craftsmanship by glass artisans.
What makes tile countertops even more appealing in terms of affordability is the potential for DIY installation.
By taking on the installation yourself, you can significantly reduce costs. For ceramic tile countertops, professional installation typically increases the price to around $18 to $35 per square foot, while natural stone tile installation can range from $45 to $75 per square foot.
Glass tile installation, with its more complex process, can go up to $100 per square foot. Even with professional installation, these prices remain lower compared to the costs of professionally installed slab countertops.
For those considering slab countertops, it’s worth noting the price differences.
Soapstone slab countertops range between $100 and $185 per square foot, while granite slabs can cost between $75 and $200 per square foot. Engineered quartz slabs typically fall in the range of $80 to $155 per square foot, and concrete countertops range from $85 to $125 per square foot.
In summary, tile countertops offer a range of cost options, with ceramic and porcelain tiles being the most affordable and glass tiles being the highest-priced due to their intricate manufacturing process.
DIY installation can provide even greater savings, making tile countertops a cost-effective choice compared to professionally installed slab countertops.
Unleashing Creativity: Tile Design Options
One of the main attractions of tile countertops is the versatility they offer in creating both simple and intricate designs.
Modern trends often involve incorporating smaller tiles in rows between larger ones, seamlessly extending the tile design from the countertop to the backsplash for a visually cohesive look. With a wide range of tile types available, it’s possible to achieve custom and unique designs that reflect individual style preferences.
Ceramic and porcelain tiles are available in an extensive range of sizes, colors, and shapes, catering to diverse design preferences.
From one-inch octagons to 12-inch squares, and a plethora of sizes in between, these tiles offer flexibility in design choices. Additionally, rounded edge tiles are available, allowing for the creation of smooth and contoured countertop edges, adding an elegant touch to the overall aesthetic.
Glass tiles offer a captivating visual appeal with their translucent gem-like quality.
They come in a vast array of colors and styles, enabling homeowners to create stunning and vibrant designs. However, it’s important to note that glass tiles are more fragile and prone to chipping, which is why they are commonly used as backsplashes rather than for the entire countertop surface.
For those seeking a natural and earthy ambiance, stone tiles like travertine, slate, and granite provide an excellent option.
These tiles bring a touch of nature into the kitchen or bathroom space. Stone tiles are typically available in square or rectangular shapes, ranging from four to 12 inches in size, allowing for a variety of design possibilities.
In summary, the world of tile design is brimming with possibilities. Ceramic and porcelain tiles offer a wide range of sizes and colors, with options for rounded edge tiles. Glass tiles showcase stunning translucency, while stone tiles exude a natural appeal. By exploring these various tile types, homeowners can unleash their creativity and create personalized, eye-catching designs that elevate the aesthetic of their countertops and backsplashes.
Empowering DIY: Tile Countertop Installation Tips

Embarking on a DIY tile countertop installation can lead to significant cost savings.
However, if you’re new to working with tile, it’s advisable to observe the process in person or seek guidance from instructional videos available on platforms like YouTube. These resources can provide valuable insights and guidance for a successful installation.
Although each project may have unique considerations based on your counter configuration and tile choice, the following tips will help you start off on the right track:.
Plan and Prepare
Begin by thoroughly planning your project.
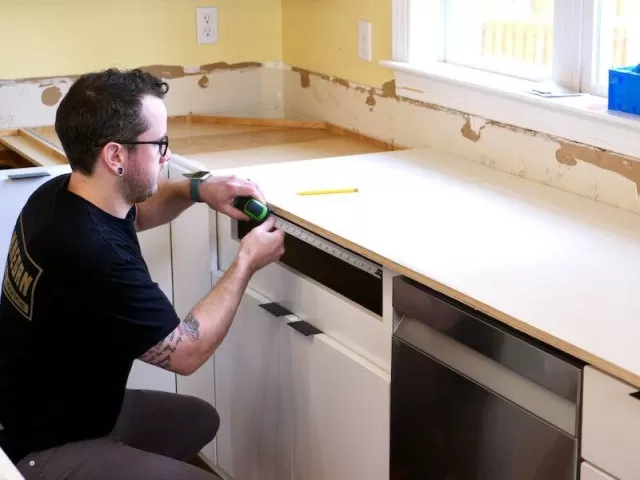
Measure your countertop space accurately and determine the amount of tile needed, including any additional materials like adhesive, grout, and tools. Ensure you have all the necessary supplies before starting the installation.
Surface Preparation
Properly preparing the surface is crucial for a successful tile installation.
Ensure that the countertop is clean, level, and free from any debris or grease. If needed, make any repairs or adjustments to create a suitable surface for tiling.
Tile Layout
Before applying adhesive, lay out your tiles on the countertop to visualize the design and ensure a proper fit.
Adjust the placement if needed and make any necessary cuts to tiles to accommodate edges, corners, or fixtures.
Adhesive Application
Follow the manufacturer’s instructions for the adhesive application. Use a notched trowel to create an even layer of adhesive on the countertop surface. Work in small sections at a time to prevent the adhesive from drying out before placing the tiles.
Tile Placement
Carefully place the tiles onto the adhesive, applying gentle pressure to ensure proper adhesion. Use tile spacers to maintain consistent grout lines and create a professional finish. Periodically check for levelness and make adjustments as necessary.
Grouting
Once the adhesive has dried and the tiles are securely in place, it’s time to apply grout. Use a grout float to spread the grout over the tiles, ensuring that all gaps are filled. Remove excess grout with a damp sponge, and allow the grout to cure according to the manufacturer’s instructions.
Finishing Touches
After the grout has fully cured, clean the tiles and remove any grout haze using a grout haze remover or vinegar solution. Apply a grout sealer to protect the grout from staining and maintain its appearance over time. Remember, every tile installation project is unique, so it’s essential to adapt these tips to suit your specific circumstances.
By carefully planning, preparing, and following best practices, you can achieve a successful DIY tile countertop installation, saving both money and enjoying the satisfaction of a job well done.
*The information is for reference only.