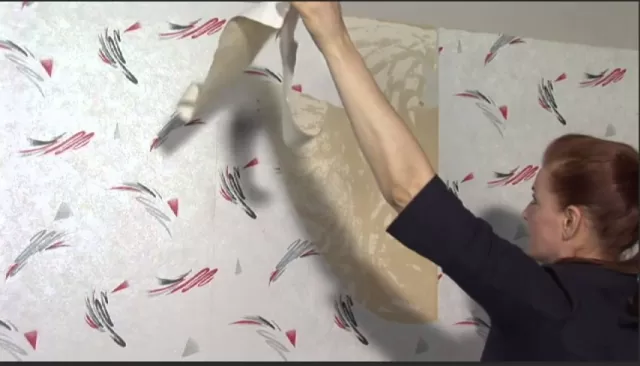
3 Methods to Remove It Without Harming Your Walls. Wallpaper has the transformative power to elevate your home’s design aesthetic, whether you’re opting for an accent wall, embellishing your ceiling, or covering an entire room. Yet, just as wallpaper contributes to a space, it can also detract from it. If you find yourself yearning for a change from your current pattern or embarking on a remodel in a newly purchased home, you might be contemplating the prospect of removing wallpaper yourself.
The task may seem daunting, but fear not—there are proven methods that can make the process much more manageable, allowing you to bid farewell to unsightly wallpaper without causing harm to your walls. While it can be a time-consuming endeavor, the satisfaction of revealing a fresh design canvas is well worth the effort.
Discover the tried-and-true techniques that simplify the art of wallpaper removal. Uncover the secrets that won’t compromise your walls, turning what may seem like a challenging task into a rewarding DIY project. Whether you’re tackling a single wall or an entire room, these methods ensure that your space undergoes a seamless transformation, ready to embrace a new design chapter. So, roll up your sleeves and embark on the journey of creating a home that reflects your evolving style, one wallpaper removal at a time.
Essential Tools for a Successful Wallpaper Removal Project

Embarking on a wallpaper removal project requires the right set of tools to make the process smooth and effective.
Depending on your chosen removal method, here’s a list of essential tools and materials you’ll need:.
Drop Cloths:.
Protect your floors and furniture with drop cloths to catch any debris, adhesive, or water during the removal process.
Scoring Tool:.
Use a scoring tool to create small perforations in the wallpaper, allowing your chosen removal solution to penetrate and loosen the adhesive.
Stripping Spray:.
Choose a quality stripping spray designed for wallpaper removal.
This solution helps to break down the adhesive, making it easier to remove the wallpaper.
Putty Knife:.
A putty knife is an indispensable tool for gently lifting and scraping off wallpaper.
It helps you remove the wallpaper without damaging the underlying surface.
Steamer:.
If you opt for a steam-based removal method, a wallpaper steamer is essential.
The steam helps to loosen the adhesive, making the wallpaper easier to peel off.
Dish Soap:.
Mix a solution of warm water and a small amount of dish soap.
This can be used to clean the walls after the wallpaper is removed, removing any remaining adhesive residue.
laundry detergent:.
Alternatively, a mixture of warm water and laundry detergent can also be effective in cleaning walls post-removal.
It helps to eliminate any adhesive residue and ensures a clean surface for further treatment or painting.
Ensure you have these tools on hand before starting your wallpaper removal project.
This preparation will make the process more efficient and help you achieve a clean and smooth surface for your next decorating step.
Strategic Preparation for a Mess-Free Wallpaper Removal Project

Embarking on a wallpaper removal project requires careful preparation to minimize mess and ensure a smooth process.
Here’s A Step-By-Step guide to getting your space ready:.
Clear the Walls:
Remove all wall décor, including paintings, mirrors, and shelves.
Take off outlet and switch plate covers as well. Safely store these items to prevent damage during the removal process.
Cover Furniture:
Clear the room of furniture and cover any remaining items with a protective tarp.
Gary McCoy, store manager at Lowe’s, recommends placing old towels or plastic drop cloths along the baseboards to prevent messy scraps from reaching the floors.
Score the Walls:
If dealing with washable or vinyl-coated wallpaper, use a scoring tool before applying liquid or heat.
This tool creates small holes in the paper, allowing water or steam to reach and deactivate the glue. McCoy notes that scoring may not be necessary for other types of wallpaper if the stripping solution is effectively absorbed.
By meticulously following these preparatory steps, you set the stage for a cleaner and more efficient wallpaper removal process.
Taking the time to clear the walls, protect furniture, and score when necessary ensures that your project proceeds smoothly, leaving you with a pristine surface ready for the next phase of your decorating journey.
Efficient Wallpaper Removal: A Comprehensive Guide

Removing wallpaper can be a straightforward process with the right methods.
Lisa Dreissig, senior interior designer at RHG Architecture + Design, shares three effective processes for wallpaper removal:.
Method 1: Stripping Spray
Materials:.
Wallpaper stripping spray.
Putty knife.
Dish soap.
Water.
Steps:.
Prepare the walls:.
After clearing the walls and covering furniture, saturate them with liquid stripper.
Application of stripping spray:.
Follow the instructions on the stripping spray bottle and let it sit for the recommended time.
Peel off wallpaper:.
Use a putty knife to gently peel off the wallpaper in sections.
Address wall liner:.
If the top layer comes off separately, score the wall liner underneath and apply stripping spray again.
Final touches:.
Scrape the walls until smooth, wipe down with a mixture of dish soap and water, and let them dry.
Method 2: Steaming
Materials:.
Wallpaper steamer.
Putty knife.
Dish soap.
Water.
Steps:.
Prepare the walls:.
Clear the walls, cover furniture, and steam a small section where you want to start.
Peel off wallpaper:.
Use a putty knife to peel off the steamed section.
Repeat the process:.
Steam and strip each section until all wallpaper is removed.
Address wall liner:.
If the top layer comes off separately, score the wall liner, steam again, and scrape the walls.
Final touches:
Wipe down with a mixture of dish soap and water and let dry.
Method 3: DIY Solution with Laundry Detergent
Materials:
Spray bottle.
Water.
Laundry detergent.
Putty knife.
Dish soap.
Steps:
Prepare the solution:.
Mix a solution of 50% water and 50% laundry detergent in a spray bottle.
Application of DIY solution:
Saturate the walls with the DIY solution.
Peel off wallpaper:
Use a putty knife to peel off the wallpaper in sections.
Address wall liner:
If the top layer comes off separately, score the wall liner, apply the solution again, and scrape the walls.
Final touches:
Wipe down with a mixture of dish soap and water and let dry.
By choosing the method that suits your preferences and Resources, you can efficiently and effectively remove wallpaper, preparing your walls for a fresh new look.
*The information is for reference only.