Toilet Woes Solved: Troubleshooting a Non-Flushing Toilet. When faced with a toilet that refuses to flush, there’s no need to immediately call a plumber and incur unnecessary expenses. Instead, follow these steps to troubleshoot the issue and potentially resolve it without spending extra money.
Verify the Water Shut-Off Valve and Prevent Blockages

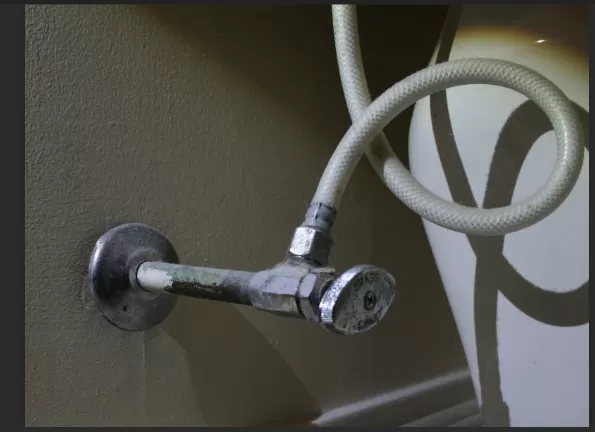
Ensure that the water shut-off valve is fully open to allow water flow to the toilet.
Occasionally, external objects or thorough cleaning can unintentionally turn off the valve, causing low water levels in the tank.
Check the flush valve, located a few inches from the floor Behind the Toilet base.
It should protrude slightly from the wall and be turned all the way to the left. If not, twist it counterclockwise and wait for a minute before flushing.
Restoring the flow should resolve the issue, ensuring a functional toilet.
Addressing Clogged Pipes
If the water shut-off valve is fully open but the toilet still doesn’t flush properly, a clogged pipe might be the problem.
Heavy paper products are common culprits for clogs.
Take necessary steps to clear the blockage.
Confirm that the water level in the bowl isn’t too high by using a plunger without causing overflow.
If necessary, remove excess liquid using a disposable plastic cup.
Plunge the toilet vigorously for about 20 seconds, focusing on creating a seal with the flange in the drain opening.
If the clog clears, remove the plunger and flush the toilet immediately.
To prevent future issues, consider using lower-ply toilet paper and avoid flushing paper towels or feminine products.
Inspect and Replace the Flapper

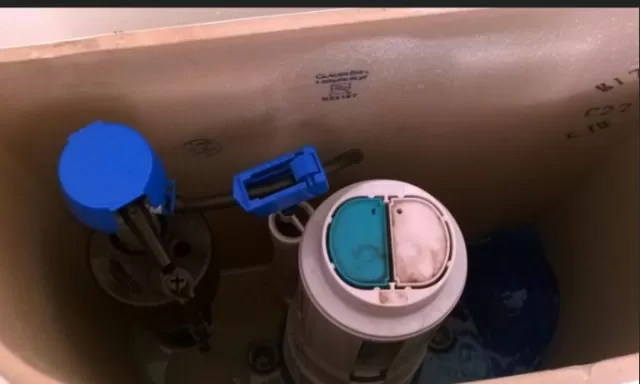
In case the toilet continues to have flushing problems, examine the flapper, which resembles an inflated balloon and is often red.
Carefully remove the toilet tank’s top cover and check for any signs of warping or damage on the flapper.
If necessary, replace it with a new one, readily available at local hardware stores for a low cost.
Ensure Proper Connection: Lift Chain and Flapper
If the flapper appears to be in good condition but the flush isn’t working, check the lift chain that connects the toilet handle to the flapper.
If the chain has excessive slack, it won’t effectively activate the flapper when you flush.
Adjust the chain’s length by attaching a different link to the lever end, leaving enough slack for the flapper to close completely.
With a properly adjusted lift chain, pushing the handle will result in the flapper opening, allowing water to flow into the toilet and down the drain.
Clean the Toilet\’s Inlet Holes

Underneath the toilet rim, you’ll find a series of angled holes that release water from the tank during the flushing process.
Over a period of time, the inlet holes in your toilet can get obstructed by mineral deposits or bacteria, impeding the water flow during flushing.
To examine the condition of these holes, you can utilize a cosmetics mirror to get a closer look.
If you observe orange and black deposits in the holes, it indicates the presence of bacteria. On the other hand, light-colored deposits typically signify mineral buildup.
To address this issue, you can follow these steps:
1. Prepare a mixture of bleach and water. The exact ratio may vary, but a common guideline is around 1 part bleach to 10 parts water. Ensure proper ventilation and handle bleach carefully.
2. Locate the toilet’s overflow tube, which is typically connected to the toilet tank. Pour the bleach and water solution into the overflow tube. Allow it to sit for several minutes to facilitate the cleaning process.
3. After the designated waiting time, flush the toilet. This action will help distribute the bleach solution through the system and clear any accumulated deposits.
4. To thoroughly clean each jet, use a piece of wire or a cut coat hanger. Gently insert the wire into each jet and move it back and forth to dislodge any remaining obstructions. Exercise caution to avoid damaging the toilet bowl.
5. Once the cleaning process is complete, flush the toilet again to remove any loosened debris and ensure proper water flow.
By following these steps, you can effectively address clogged inlet holes in your toilet caused by mineral deposits or bacteria. Regular maintenance and cleaning will help maintain the optimal performance of your toilet.
*The information is for reference only.