Dishwasher Not Draining? Here’s What to Do to Solve It!. Discovering a stinky, sudsy puddle inside your dishwasher can be frustrating, but fear not – we have some troubleshooting tips to help you tackle this issue and get your dishwasher draining properly again.By following these tips, you can bid farewell to the sudsy puddles and restore your dishwasher’s draining functionality. Enjoy a fresh and clean dishwasher, ready to take on your next load of dishes with ease!
Optimize Your Dishwasher Drainage: Utilize Your Garbage Disposal Effectively!

Your garbage disposal is a crucial companion to your dishwasher, as its drain hose plays a significant role in maintaining proper drainage.
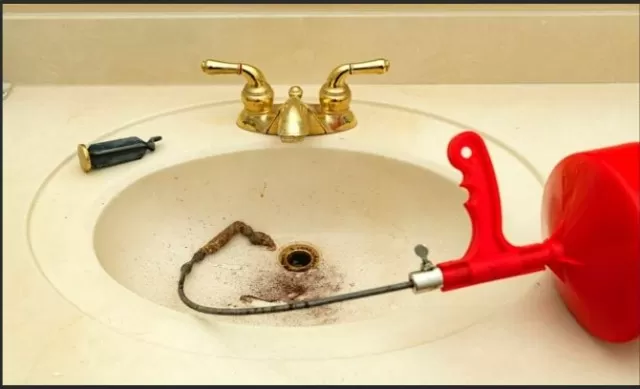
However, issues can arise if the disposal unit contains unground food particles or if food sludge accumulates in the drainpipe below it. When such blockages occur, even the most efficient dishwasher can face problems with draining.
To ensure smooth and trouble-free dishwasher drainage, consider running the garbage disposal regularly.
Simply activating the disposal can be enough to address minor clogs and allow your dishwasher to function correctly again. Additionally, developing a good practice of leaving the water running for an extra 15 seconds after disposing of food can prove highly beneficial.
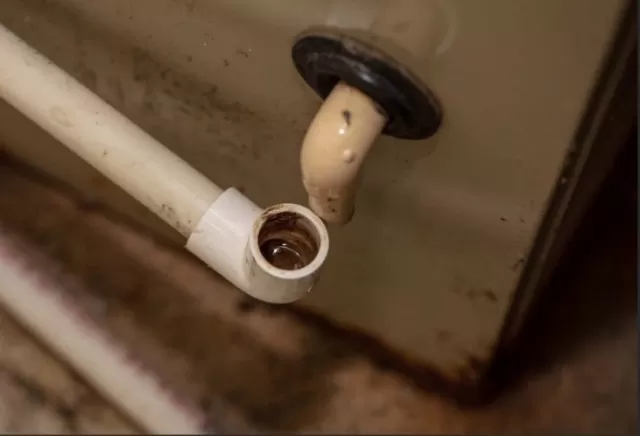
This simple step ensures that any remaining food residues are effectively flushed out from the P-trap drain situated beneath the disposal.
By taking these easy measures, you can maximize the efficiency of both your dishwasher and garbage disposal, guaranteeing a hassle-free kitchen cleanup experience.
Say goodbye to drainage issues and enjoy a smoothly functioning kitchen setup!.
Eliminate Standing Water in Your Dishwasher: Troubleshooting Steps
If running the garbage disposal fails to resolve the issue of standing water in your dishwasher, or if you don’t have one, it’s time to address the problem directly.
Follow these simple steps to drain the water and inspect the cause:.
Create a Barrier: To prevent water from spreading, place absorbent towels around the base of the dishwasher.
Remove the Bottom Dish Basket: Slide out the bottom dish basket to clear the area for accessing the water.
Scoop Out the Water: Utilize a plastic cup to scoop the dirty and unpleasant-smelling water into a bucket designated for disposal.
Make sure to collect as much water as possible to avoid further leakage.
Towel Up Remaining Water: If the water level becomes too low to scoop with the cup, use clean towels to absorb the last bit of water remaining at the bottom of the dishwasher.
By following these steps, you can effectively eliminate standing water and examine the dishwasher more closely to identify the root cause of the problem.
It’s essential to address this issue promptly to maintain the dishwasher’s proper functioning and ensure a clean and hygienic kitchen environment.
Maintain Optimal Dishwasher Performance: Cleaning the Dishwasher Air Gap

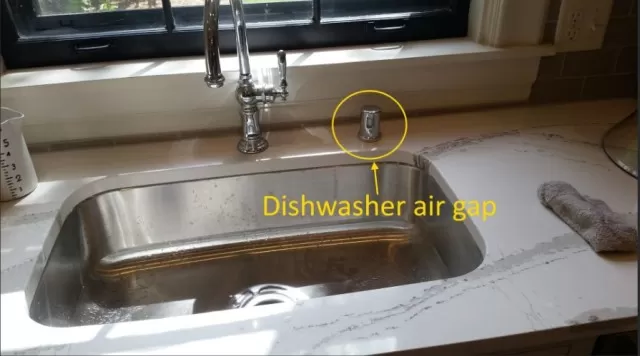
Having a dishwasher air gap is often a reliable drainage solution for your dishwasher, though its presence may vary based on local building codes.
While some communities mandate air gaps, others may only require a high loop in the hose under the sink cabinet. If your dishwasher is equipped with an air gap, you can usually find it positioned next to your kitchen faucet (as shown in the photo on the right, where the air gap is located to the left of the spray nozzle).
Occasionally, debris can accumulate within the air gap, leading to potential drainage issues and standing water inside the dishwasher.
To address this concern, follow these steps:.
Remove the Air Gap: Twist the air gap counterclockwise to detach it from its position.
Inspect for Debris: Check the inside of the air gap for any accumulated gunk or debris that might be causing the problem.
Thoroughly Clean the Air Gap: Use water and a stiff brush to clean the air gap, ensuring that all obstructions are removed effectively.
Reinstall the Air Gap: Place the clean air gap back into its original position securely.
Run the Dishwasher Cycle: Once the air gap is back in place, run a dishwasher cycle to test whether the drainage issue has been resolved.
By following these simple steps and keeping your dishwasher air gap clean, you can maintain the proper functioning of your dishwasher, ensuring an efficient and trouble-free dishwashing experience.
Remember to periodically inspect and clean the air gap to prevent clogs and maintain the appliance’s optimal performance.
Resolving Detergent Mishaps in Your Dishwasher
Accidents happen, and it’s not uncommon to encounter detergent mishaps in your dishwasher.
The appliance is specifically designed for use with automatic dishwasher detergents, which clean efficiently without producing excessive suds. However, in the rush of a busy day, it’s easy to mistakenly use regular dishwashing liquid, leading to an overflow of suds and hindering proper draining. Similarly, running out of automatic dishwasher detergent might tempt you to use laundry detergent as a quick substitute, which can cause the same problem.
If you find yourself guilty of such mishaps, here’s how to resolve the situation:.
Bail Out the Tub: First, remove any excessive suds and water from the dishwasher tub.
You can do this by following the steps mentioned earlier, like scooping out water or using absorbent towels.
Re-run the Cycle: Once the tub is cleared of suds and water, run the dishwasher cycle again.
However, this time, ensure you use the correct dishwasher detergent specifically designed for the appliance.
By using the appropriate detergent and clearing any suds from the dishwasher, you can restore the proper functioning of the machine.
Avoiding these detergent mix-ups will not only help your dishwasher operate effectively but also prevent potential damage caused by excessive suds. Stay mindful of the detergents you use, and enjoy a hassle-free and efficient dishwashing experience.
Eliminate Odor and Clogs: Cleaning the Dishwasher Drain Basket

A smelly and clogged dishwasher can often be traced back to the drain basket located at the base of the machine, typically positioned below the bottom rack.
Recognizable by its upside-down basket appearance, the drain basket cover can be removed easily, either snapping off or secured with one or two screws. If you’re unsure about its location, refer to your owner’s manual, downloadable from the manufacturer’s website.
To tackle the issue, follow these steps:.
Remove the Cover: Take off the drain basket cover to access the area below.
Check for Food Buildup: Inspect the basket for any accumulated food debris or gunk that might be causing the problem.
Clean the Basket: Using your hand or a spoon, carefully remove any debris present in the drain basket.
Replace the Cover: Once the drain basket is cleaned, securely put the cover back in place.
Run the Dishwashing Cycle: With the drain basket now free from clogs, run the dishwasher cycle again to ensure proper functioning.
Note: To prevent future clogs, consider pre-rinsing your dishes before placing them in the dishwasher.
Although many modern dishwashers have macerators to grind soft wet food particles, they may not have the power of a garbage disposal. Even if your dishwasher’s manual suggests skipping pre-rinsing, it’s advisable to do so to avoid frequent cleaning of the drain basket.
By regularly cleaning the drain basket and practicing pre-rinsing, you can maintain a fresh-smelling and efficiently functioning dishwasher, making kitchen cleanup a breeze.
*The information is for reference only.