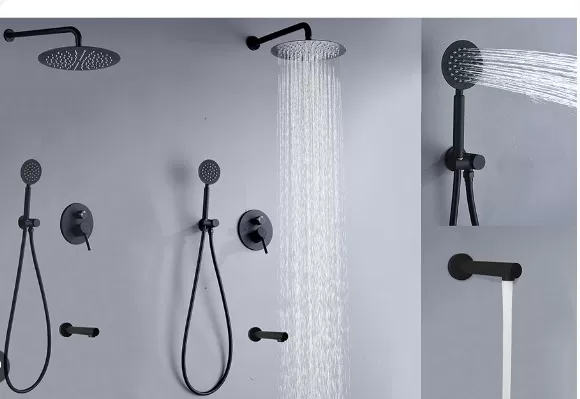
DIY Guide: Installing a shower head. Installing a new shower head is a small project that can have a significant impact on your shower experience. The best part is that it’s a quick and straightforward task that doesn’t require any specialized plumbing tools. With just a few simple steps, you can upgrade your shower head with ease.
Start by turning off the water supply to the shower. Next, unscrew the existing shower head from the pipe using an adjustable wrench or pliers. Clean the threaded pipe to ensure a smooth connection for the new shower head. Then, take your new shower head and apply plumber’s tape to the threaded end to create a tight seal. Screw the new shower head onto the pipe and tighten it securely by hand. Turn on the water supply and check for any leaks. If everything looks good, you’re ready to enjoy your new and improved shower experience. Installing a new shower head is a DIY project that anyone can accomplish, and it can make a noticeable difference in your daily routine.
How to Install a New Shower Head

Installing a new shower head can be a relatively simple task with the right tools and materials.
This guide will provide Step-by-Step Instructions on how to install a new shower head, whether you choose to keep the existing shower arm or replace it. Make sure to gather the necessary tools and materials before starting the installation process.
Tools & Materials:.
Pipe wrench
Thread seal tape
Plumber’s putty
Replacement shower head
Note: This guide may include affiliate links, and we may earn revenue from the products mentioned.
Step 1: Assess the Shower Arm.
Decide whether to keep the existing shower arm or replace it.
If it is corroded or doesn’t match the finish of your new shower head, it’s recommended to replace it. Use a pipe wrench to remove the old shower arm if needed.
Be careful not to damage the plumbing behind the wall.
Step 2: Installing a New Shower Arm (if applicable).
Wrap thread seal tape two or three times around the threads of the new shower arm.
Stretch the tape slightly as you apply it. Carefully thread the new shower arm into the wall fitting, ensuring a secure connection.
Seal the wall opening around the shower arm with plumber’s putty.
Place the shower flange over the arm and press it into the putty, removing any excess putty.
Step 3: Installing the Shower Head.
If your shower head attaches directly to the arm:.
Wrap thread seal tape around the threads at the base of the shower arm.
Carefully thread the shower head onto the arm, ensuring a snug fit. Avoid over-tightening.
Use pliers (protected with cloth or plastic tape) if necessary to tighten the shower head securely.
If you have a handheld shower head:.
Check the manufacturer’s instructions to determine if thread seal tape is necessary at the base of the shower arm.
Thread the handheld shower head onto the shower arm. Attach the flexible hose of the handheld shower head onto the bracket.
Additional Tips for Choosing and Installing a Shower Head
Consider a handheld shower head: Handheld shower heads offer flexibility and convenience, allowing you to easily direct the water flow.
They are particularly useful for rinsing off, cleaning the shower, or bathing children or pets.
Opt for a low-flow shower head: Low-flow shower heads are designed to conserve water without compromising the showering experience.
They can help reduce water consumption and Save Energy used by your Water Heater.
Choose metal shower heads: Metal shower heads, especially those with chrome finishes and brass construction, tend to offer better performance and durability compared to plastic ones.
They may come at a higher cost, but their longevity and ease of adjustment make them worth the investment.
Look for flexible metal hoses: If you opt for a handheld shower head, choose one with a metal hose instead of a plastic one.
Metal hoses are more flexible and easier to maneuver, providing added convenience during use.
Research and compare options online: Shopping online allows you to explore a wider range of shower head options, read reviews, and compare prices.
However, if possible, visit stores to physically see and feel the shower heads you’re considering before making a purchase.
Expect to pay for quality: Quality shower heads typically come with a higher price tag, starting at around $80.
Investing in a well-made shower head ensures better performance, durability, and a more enjoyable showering experience in the long run.
By considering these additional tips, you can choose a shower head that suits your needs and preferences while ensuring efficient water usage and long-term satisfaction.
Upgrade Your Shower Lighting

Enhance the ambiance of your shower by incorporating creative lighting solutions.
Consider the following ideas:.
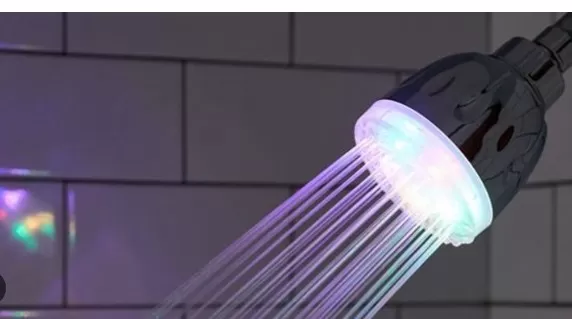
LED Shower Head Lights: Replace your regular shower head with an LED shower head that includes built-in lights.
These lights change color based on water temperature, creating a visually stunning and immersive shower experience. Enjoy the soothing glow of different colors while you shower.
Waterproof LED Strip Lights: Install waterproof LED strip lights around the perimeter of your shower enclosure.
These versatile lights can be easily mounted and provide a soft, ambient glow. Choose colors that create a relaxing or invigorating atmosphere, depending on your preference.
This lighting option adds a touch of luxury and transforms your shower into a personal oasis.
Add Aromatherapy to Your Shower Routine

Elevate your shower experience by incorporating aromatherapy.
Explore the following ideas to introduce soothing scents and relaxation:.
Essential Oil Shower Disks: Create shower disks infused with your favorite essential oils.
These disks can be placed on the shower floor or hung near the showerhead, releasing the scent as the water dissolves them. Choose essential oils known for their calming or invigorating properties, such as lavender, eucalyptus, or citrus.
Shower Aromatherapy Diffusers: Install a small aromatherapy diffuser in your shower space.
These devices emit a fine mist of essential oils into the air, creating a spa-like atmosphere. Select oils based on your desired mood or therapeutic benefits.
Breathe in the delightful scents as you enjoy a refreshing shower.
Note: When using essential oils, ensure they are safe for use in showers and dilute them properly according to the manufacturer’s instructions.
*The information is for reference only.