Fixing a Leaking Shower Head: Effective Solutions. By following these simple instructions, you can save yourself from the annoyance of a dripping shower head and the surprise of unexpectedly high utility bills. It’s crucial to address a leak in your shower head as soon as you notice it.
Ignoring it can lead to wasted water and increased water bills over time. To tackle the issue, start by turning off the water supply to the shower. Then, using a wrench or pliers, carefully unscrew the shower head from the pipe. Inspect the rubber washer or O-ring inside the shower head for any signs of damage or wear. If necessary, replace the washer or O-ring with a new one. Afterward, reassemble the shower head and ensure it is tightly secured to the pipe. Turn the water supply back on and test for any leaks. By dealing with a shower head leak promptly, you’ll prevent water wastage and maintain a more efficient and cost-effective plumbing system in your home.
How to Turn off the Water Supply to Your Shower
Turning off the water supply to your shower is an important step to ensure safety and prevent any water flow during maintenance or repair work.
Here’s a guide on how to turn off the water supply to your shower:
Locate the main water supply shut-off: In most homes, the main water supply shut-off valve is located on the lowest floor, often in the basement or utility room.
Look for a circular spigot or a lever handle ball valve on the wall where the water meter is located.
Turn off the water supply: If you have a circular spigot, turn it clockwise until it can’t be turned any further.
If you have a lever handle ball valve, turn the lever clockwise by 90 degrees to shut off the water supply. Ensure that the valve is fully closed to prevent any water flow.
Drain the water from the pipes: To remove any remaining water in the pipes, go to a sink on the lowest level of your home.
Turn on both the hot and cold water taps to allow the water to drain out. This step helps relieve pressure in the system and prevent any accidental water flow while working on the shower.
Verify that the water supply is shut off: To confirm that the water supply to the shower is indeed shut off, try turning on the shower faucet.
If no water comes out, it indicates that the water supply has been successfully turned off.
Remember, if your shower has its own accessible shut-off valve, you can use it instead of shutting off the main water supply.
Always follow the manufacturer’s instructions and local plumbing codes when performing any maintenance or repair work on your shower.
How to Remove a Shower Head

Removing a shower head is a necessary step for various plumbing tasks, such as cleaning, replacing, or repairing the shower head.
This guide will provide you with simple instructions on how to safely remove a shower head while ensuring the proper protection of your shower and its components.
Turn off the water supply
Before beginning any work on the shower head, make sure the water supply to the shower is turned off.
Refer to the previous section for instructions on how to turn off the water supply.
Prepare the shower
Cover the drain hole in the shower with a cloth or stopper to prevent small parts from falling into the drain during the removal process.
Loosen the shower head
Locate the nut that secures the shower head to the shower arm.
This nut is usually located at the base of the shower head, where it connects to the shower arm.
Use a wrench or pliers to grip the nut and turn it counterclockwise to loosen it.
If the shower head is difficult to remove, it may be stuck due to mineral deposits or age.
Troubleshooting a stuck shower head
Cover the shower head with a soft cloth to protect its finish.
Use pliers to grip the shower head firmly through the cloth.
Apply steady and gentle pressure while turning the pliers counterclockwise to release the shower head.
Be cautious not to exert excessive force that could damage the shower head or the shower arm.
How to Check for a Worn Seal and Replace an O-Ring in a Shower Head

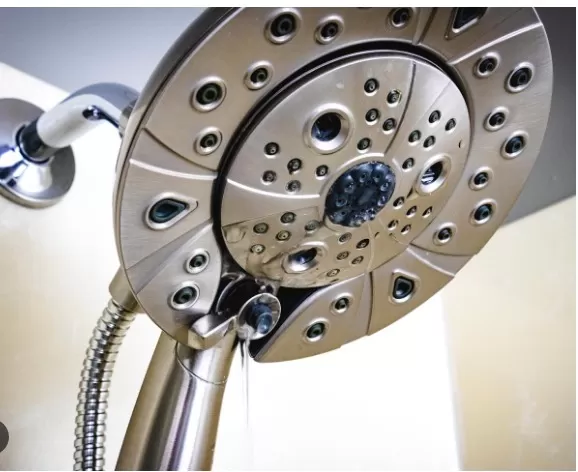
If you’re experiencing a leak from your shower head, the problem may be a worn seal between the shower arm and the shower head.
Over time, washers and O-rings can deteriorate, causing water to leak. This guide will help you identify a worn seal, disassemble the shower head, and replace the washer or O-ring to fix the leak.
Turn off the water supply
Before starting any work on the shower head, ensure that the water supply is turned off.
Refer to the earlier section for instructions on how to turn off the water supply.
Identify a worn seal
Check for any visible signs of leakage or water dripping from the connection between the shower arm and the shower head.
If the leak is present, it indicates a potential issue with the seal.
Disassemble the shower head
Remove the shower head by loosening the nut that secures it to the shower arm, following the earlier instructions.
Carefully separate the different parts of the shower head, including the faceplate and any swivel connections.
Inspect and replace the seal
Examine the existing washer or O-ring for signs of wear, cracking, or damage.
Take the worn seal to a hardware store to find an exact replacement.
Purchase a new washer or O-ring that matches the size and shape of the old one.
Install the new seal
Place the new washer or O-ring into its designated spot in the shower head.
Reassemble the shower head, ensuring that all components fit back together properly.
Reinstall the shower head
Position the shower head back onto the shower arm.
Tighten the nut to secure the shower head in place, ensuring a snug fit.
How to Replace a Faucet Washer in a Compression Shower Faucet

If your shower faucet is leaking, the culprit might be a worn washer assembly within the compression faucet.
Compression faucets typically have separate hot and cold handles, and a worn washer can lead to persistent leaks. This guide will walk you through the steps to identify the leaking handle, remove the faulty faucet handle, replace the washer, and reassemble the faucet.
Note that in some cases, severe corrosion or damage to the seat behind the washer may require professional assistance to replace the entire assembly.
Identify the leaking handle
Determine which handle, hot or cold, is causing the leak by feeling the temperature of the dripping water.
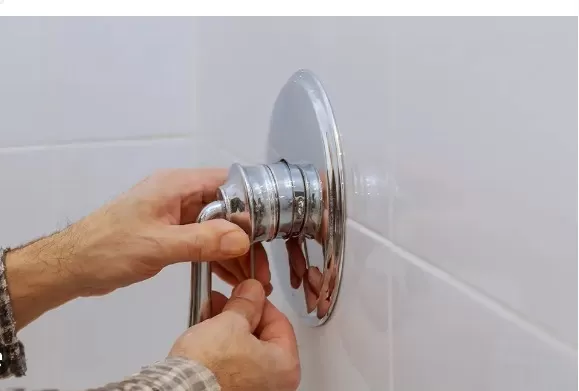
Remove the faulty faucet handle
Look for a screw located below the handle or concealed under a pry-off cap.
Unscrew or pry off the cap, and then remove the screw holding the handle in place.
Gently pull the handle away from the faucet assembly to detach it.
Access the faucet stem
Slip off the cover trim to expose the faucet stem.
Locate the hex nut securing the faucet stem in place.
Remove the hex nut and replace the washer:.
Use a deep socket wrench to loosen and remove the hex nut.
Once the hex nut is removed, you will find a rubber washer on the faucet stem.
Take note of the size and shape of the washer and purchase a suitable replacement.
Remove the old rubber washer and replace it with the new one.
Reassemble the faucet
Slide the faucet stem back into its position.
Use the deep socket wrench to secure the hex nut tightly.
Place the faucet handle back onto the stem, aligning it properly.
Insert and tighten the handle’s retaining screw.
If applicable, reattach the pry-off cap or cover trim.
Test for leaks
Turn on the water supply and test the faucet for any leaks.
If there are no signs of leakage, the washer replacement was successful.
Note: Severe corrosion or damage to the seat behind the washer may require professional assistance to replace the entire assembly.
*The information is for reference only.