Top Projects for June: 5 Must-Do DIY Ideas. With warm and sunny June days upon us, it’s an ideal time to focus on enhancing your outdoor space and tackling indoor maintenance tasks that are best accomplished in pleasant weather. Take advantage of the favorable conditions to spruce up your patio, deck, or garden, creating an inviting and functional outdoor oasis for relaxation and entertainment.
Additionally, use this time to address any indoor maintenance projects that require good weather, such as painting, window cleaning, or organizing your living spaces. By making the most of the beautiful June weather, you can maximize the enjoyment of both your indoor and outdoor environments.
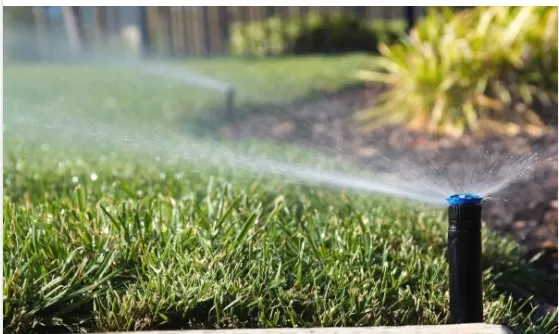
Upgrade Your Lawn with an Intelligent Sprinkler System

Achieving a vibrant and healthy lawn during the summer requires proper watering: watering at the right time, ensuring deep hydration, and maintaining a consistent schedule.
However, managing this landscaping task can be time-consuming and challenging. Luckily, there is a solution: installing a smart sprinkler system with advanced features.
These modern sprinkler systems can even adapt their watering schedule based on the forecasted rainfall. By embracing this technology, you’ll only use the necessary amount of water for your lawn, minimizing waste.
.
One excellent choice for a smart sprinkler controller is the Rachio 3: 8 Zone Smart Sprinkler Controller.
This device can be conveniently managed through a smartphone app, providing you with complete control and flexibility. With its compatibility with Alexa, you can even control your sprinkler system using voice commands.
This advanced controller allows you to optimize your watering schedule, adjust settings remotely, and monitor your lawn’s hydration levels with ease.
By investing in a smarter sprinkler system, you’ll not only save time and effort but also contribute to water conservation.
With the ability to adapt to weather conditions and efficiently distribute water, these intelligent sprinklers ensure that you only use the necessary resources to maintain a vibrant and healthy lawn throughout the summer. Upgrade your lawn care routine today with a smart sprinkler system and enjoy a greener, more sustainable landscape.
Cleaning Window Screens for Fresh and Dust-Free Breezes
With the arrival of the open window season, it’s essential to ensure that your window screens are free from grime and dust.
A simple task of washing your window screens can help maintain a clean and refreshing atmosphere inside your home. Follow these steps to effectively clean your window screens:.
Remove the screens: Start by taking the screens off the windows.
This will allow you to clean them more thoroughly.
Prepare an outdoor cleaning area: Find a suitable location, such as your driveway or patio, to lay the screens for cleaning.
This will prevent water and dirt from entering your home.
Rinse with a garden hose: Use a garden hose to gently rinse the screens.
The water pressure will help remove loose debris and dirt. Make sure to cover both sides of the screens for a thorough cleaning.
Treat stubborn dirt: For seriously dirty screens, create a solution of mild dish soap and water.
Gently scrub the screens using a soft brush or sponge. Be careful not to apply excessive force, as it may damage the screens.
Rinse and air dry: Rinse the screens again with the garden hose to remove any soap residue.
Allow the screens to air dry completely before reinstalling them. This will prevent water stains and ensure a clean, streak-free appearance.
By taking the time to wash your window screens, you’ll prevent dirt and dust from entering your home, allowing you to enjoy the fresh breeze without compromising cleanliness.
Maintain a hygienic and pleasant living environment by incorporating this simple task into your regular cleaning routine.
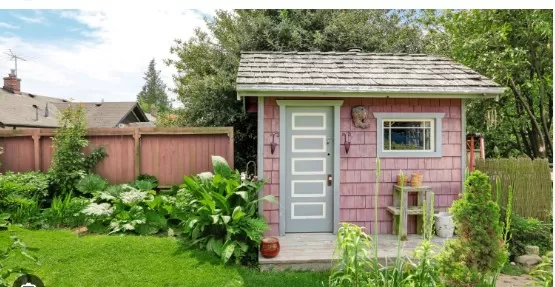
Create Additional Space and Convenience with a Backyard Shed

Are you in need of extra storage for your lawn and garden equipment? Or maybe you’re dreaming of a unique hangout spot or a dedicated home office? Look no further than a backyard shed.
Whether you prefer the simplicity of a prefab model or the satisfaction of building it yourself, a shed is the perfect solution for your needs.
Prefab Shed: If you’re looking for a hassle-free installation, a prefab shed is an excellent choice.
These pre-built structures can be easily assembled in just an afternoon. With a variety of sizes and designs available, you can find one that perfectly fits your requirements.
Enjoy the convenience of having a functional storage space or a cozy hideaway without the complexities of construction.
Build Your Own: For those seeking a hands-on approach and a sense of accomplishment, building your own shed using simple shed plans is a rewarding option.
With the right guidance and materials, you can create a customized shed tailored to your specific needs and style preferences. Embrace your creativity and bring your vision to life while enjoying the process of constructing your personal retreat.
A backyard shed provides you with a dedicated space to store tools, equipment, and other items, keeping your lawn and garden organized.
Additionally, it offers a versatile setting for various activities, such as crafting, working, or simply unwinding in a private sanctuary. Imagine the possibilities that a backyard shed can bring to your lifestyle and home.
Whether you opt for a convenient prefab shed or embark on a DIY adventure, a backyard shed will enhance your living experience by providing additional space and functionality.
Choose the option that suits you best and unlock the potential of your outdoor area.
Proper Disposal of Old Paint: An Environmentally Responsible Approach
Having leftover paint for touch-ups is practical, but holding onto old paint that no longer matches your walls or has become unusable due to dryness and lumps is unnecessary.
It’s important to dispose of old paint responsibly, as it contains toxic chemicals that can harm the environment if not handled correctly. Follow these steps to ensure proper disposal:.
Avoid regular trash disposal: Resist the temptation to dispose of old paint cans with your regular trash.
Improper disposal can lead to environmental contamination and health hazards.
Contact local sanitation department: Reach out to your local sanitation department to obtain information about proper paint disposal facilities in your area.
They can provide guidance on drop-off locations, recycling centers, or hazardous waste facilities that accept old paint.
Follow disposal guidelines: Adhere to the specific disposal guidelines provided by your sanitation department or local authorities.
They may have specific requirements for packaging or labeling the paint cans for transportation and disposal.
Recycling options: In some areas, recycling programs or paint stewardship initiatives may be available.
These programs aim to collect and recycle old paint for reuse or proper treatment. Check if such programs exist in your community and take advantage of these environmentally friendly options if available.
By disposing of old paint responsibly, you contribute to the preservation of the environment and safeguard the health of your community.
Remember, paint should never be poured down drains, sewers, or dumped into the soil, as it can contaminate water sources and harm ecosystems.
Prioritize the well-being of your surroundings by contacting your local sanitation department and following their guidelines for proper paint disposal.
Let’s collectively promote a cleaner and greener environment by taking responsible actions towards the disposal of hazardous materials like old paint.
Revitalize Your Sleeping Space: Cleaning and Refreshing Your Mattress

It’s time to be honest: Can you recall the last time you cleaned your mattress? If not, it’s high time to give it a thorough refresh to eliminate dust mites and create a pleasant sleeping environment.
Follow these steps to clean your mattress effectively:.
Remove the mattress cover: Start by removing the mattress cover or protector, if you have one.
This will allow you to clean the surface of the mattress more efficiently.
Vacuum the mattress: Use a vacuum cleaner with an upholstery attachment to remove crumbs, pet hair, dust, and other debris from the top and sides of the mattress.
Pay close attention to seams and crevices where dirt tends to accumulate.
Deodorize with baking soda: Sprinkle a generous amount of baking soda over the entire surface of the mattress.
Baking soda acts as a natural deodorizer, absorbing unpleasant odors. Allow the baking soda to sit for at least a couple of hours, but if possible, leave it overnight to maximize its effectiveness.
Vacuum again: After the baking soda has had time to work its magic, thoroughly vacuum the mattress to remove the powder along with any trapped odors.
Make sure to vacuum both sides of the mattress for a comprehensive cleaning.
Let in fresh air: While you’re cleaning the mattress, open the windows in the bedroom to allow fresh air to circulate.
This helps in airing out the space and removing any lingering odors.
By regularly cleaning and refreshing your mattress, you can create a cleaner and healthier sleeping environment.
It’s recommended to follow these steps every few months to keep your mattress free from allergens and maintain its freshness.
Enjoy a rejuvenating sleep by giving your mattress the attention it deserves.
Incorporate this mattress cleaning routine into your regular home maintenance, and you’ll reap the benefits of a cleaner, more comfortable bed.
*The information is for reference only.